itslearning Integration
This section guides you through integrating Mindomo with itslearning, enabling teachers and students to access and create mind maps seamlessly within their courses. Mindomo tools and assignments can be added directly to itslearning, allowing automatic account creation, easy collaboration, and streamlined grading without extra logins.
Working with Mindomo
Section titled “Working with Mindomo”Direct Access
When teachers and students access Mindomo from itslearning, their Mindomo accounts will be automatically created, and they will be able to start mind mapping without any additional login.
To start using Mindomo directly from itslearning, you need to add a new Mindomo LTI tool to your itslearning course.
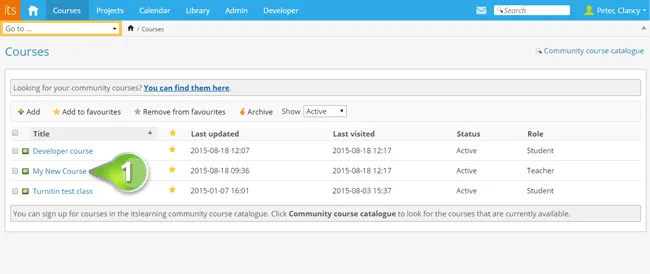
Step 1. Log into itslearning and select your course.
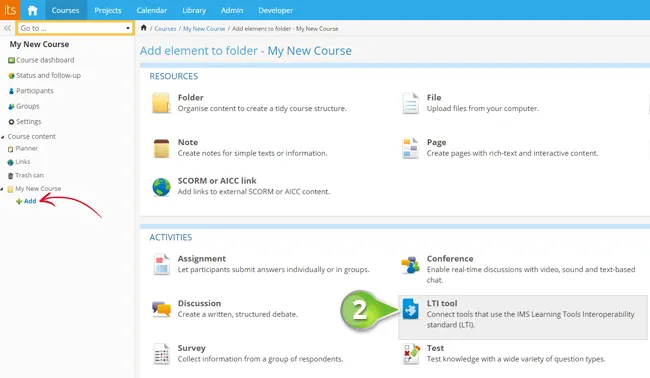
Step 2. Click on Add and then on LTI tool.
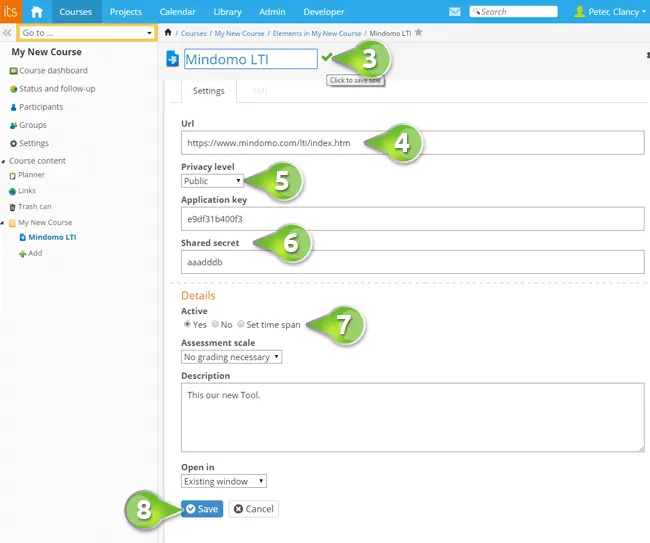
Step 3.
- Name the tool (example: Mindomo LTI) (3).
- Add the URL:
https://www.mindomo.com/lti/index(4). - Set the tool as Public (5).
- Add the Application key and Shared secret (6).
- Set any other details (description, whether the tool is active or not, whether it opens in the same tab or a new one, etc.) (7).
- Click on Save (8).
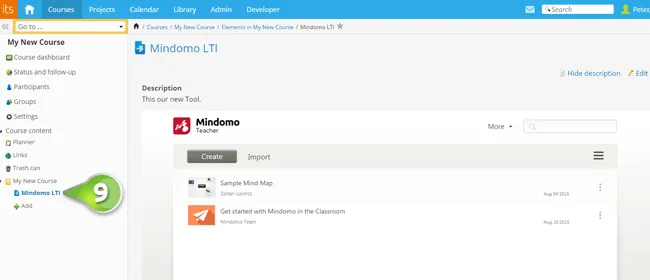
This is how the Mindomo tool you added will look (9):
Attach mind maps to a course
You can add mind maps to your itslearning courses. This way, students can view and edit the maps without having to create Mindomo accounts or log into Mindomo independently.
This method of attaching a mind map to your itslearning course is different from simply embedding it.
While embedding:
- You need to make your map public (therefore accessible to everyone who has the embed link).
- Your map can only be viewed, not edited.
While attaching a map through LTI:
- Your map remains private, and students or teachers who have access to your itslearning course will be able to view or edit it without you explicitly sharing the map.
- If your students or fellow teachers do not have Mindomo accounts, new accounts will be created for them automatically when they access the attached map.
Add a viewable mind map
Step 1. Log into itslearning and select your course.
Step 2. Click on Add and then on LTI tool.
Step 3.
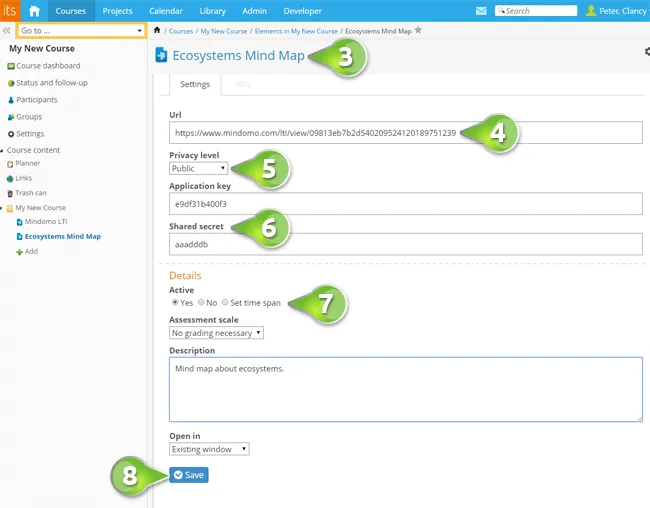
- Set a title for the map (3).
- Add the URL:
https://www.mindomo.com/lti/view/mapID(4). - Set the tool as Public (5).
- Add the Application key and Shared secret (6).
- Set any other details (description, whether the tool is active or not, whether it opens in the same tab or a new one, etc.) (7).
- Click on Save (8).
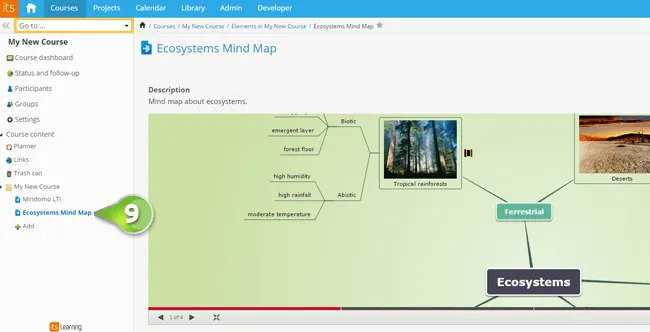
This is how the Mindomo mind map you added will look in itslearning (9):
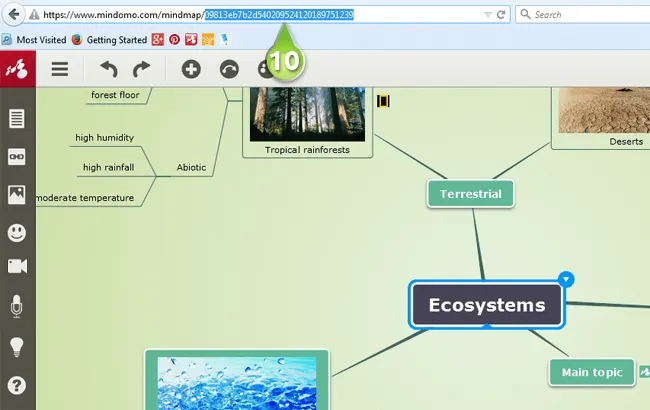
The map ID is the last sequence of letters and numbers in the mind map’s URL, after the last / (10).
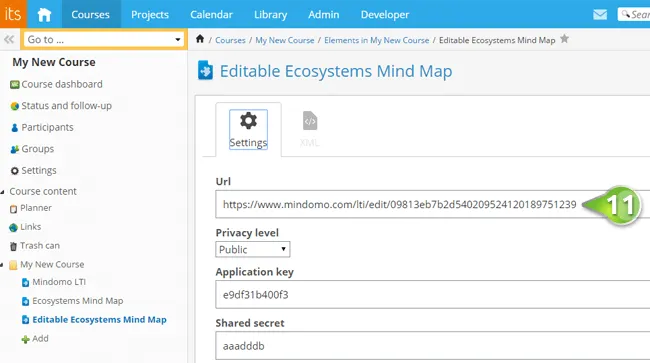
Add an editable mind map
Follow exactly the same steps as above, except for Step 3, where you need to:
- Add the URL:
https://www.mindomo.com/lti/edit/mapID(11).
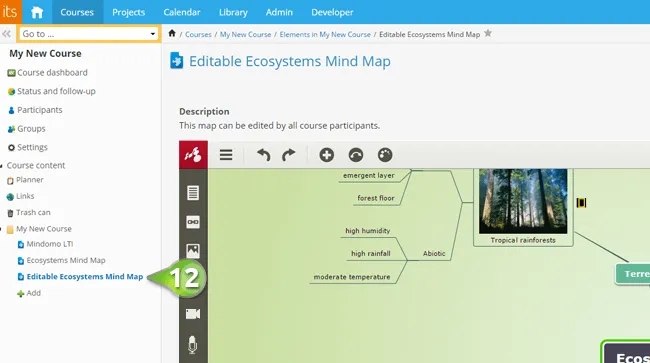
This is how the Mindomo mind map you added will look (12):
Mind map assignments
Students can work individually or in groups to create mind maps on various subjects covered in your itslearning courses. Students can work on these mind map assignments directly from itslearning, without having to create accounts or log into Mindomo. Furthermore, once students start their mind map assignments, teachers can access students’ maps directly from itslearning and grade them.
Step 1. Log into itslearning and select your course.
Step 2. Click on Add and then on LTI tool.
Step 3.
- Set a title for the map.
- Add the URL:
https://www.mindomo.com/lti/assignment(1). - Add the Application key and Shared secret.
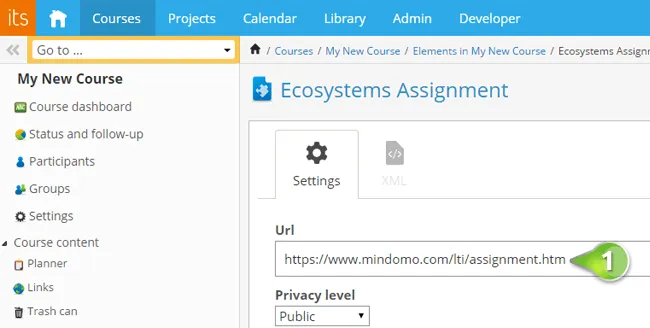
After you click on Save, this is how the assignment will appear in the itslearning platform (2):
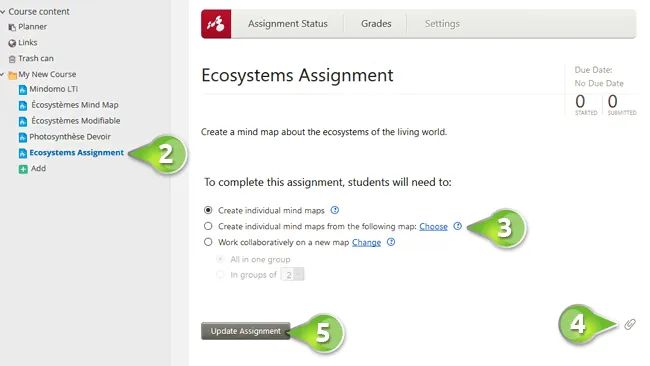
Next, you will be able to choose the assignment type (3) from the Settings section:
- Each student will create and submit an individual mind map.
- Students will create and submit individual maps using a mind map shared by you as a starting point. Click Choose to select your map.
- All students will work collaboratively to create a new mind map or edit a map shared by you.
- You can also attach resources to this assignment (4).
When you are done editing the assignment, click Update Assignment (5).
Once you click on Update Assignment, the assignment will be created in both itslearning and Mindomo.
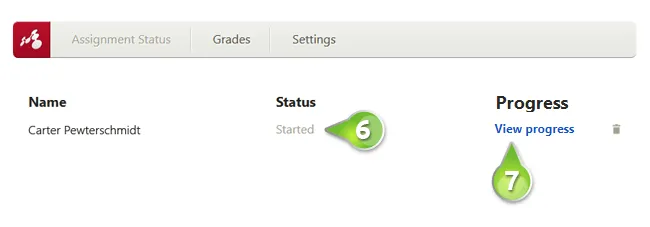
After the assignment is created, go to the Assignment Status section, where you can see how each student performed (6) and track their progress (7).
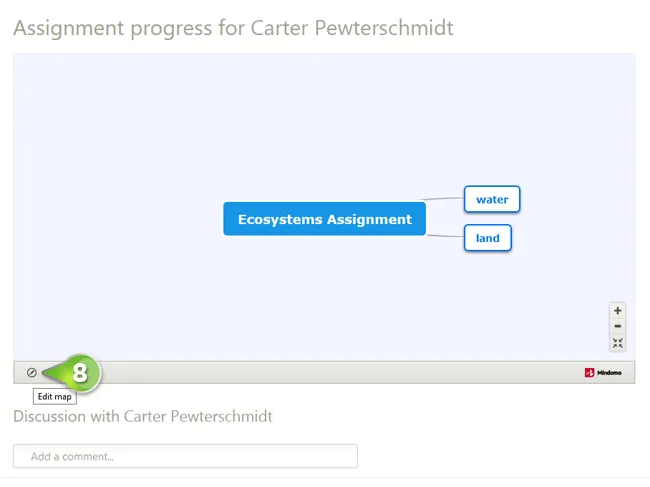
By clicking the Edit map icon (8), you will have direct access to the mind map.
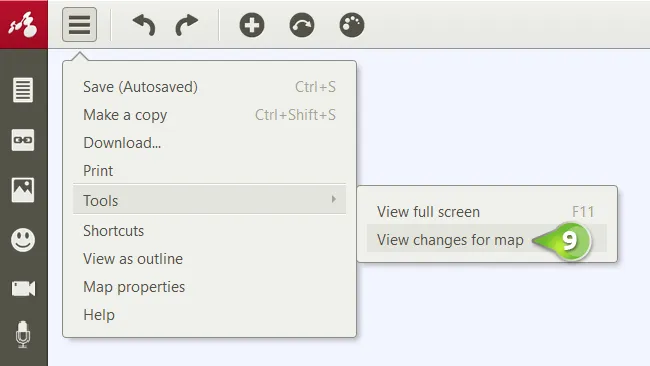
To see all changes made to the map, go to the Main Menu, then to Tools, and select View changes for map (9).
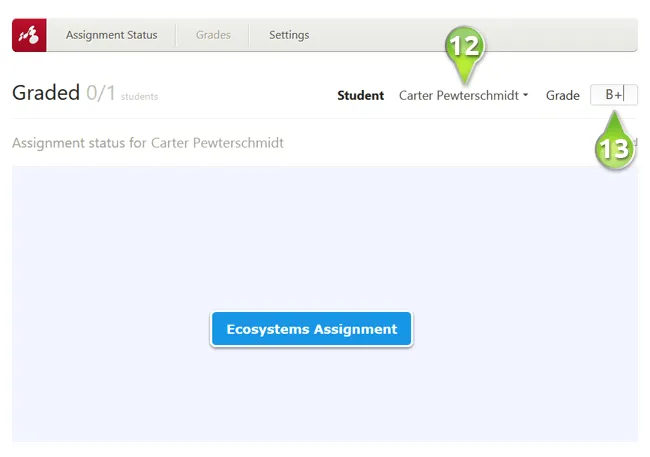
You can grade (10) each student’s performance and view all grades for the assignment (11).

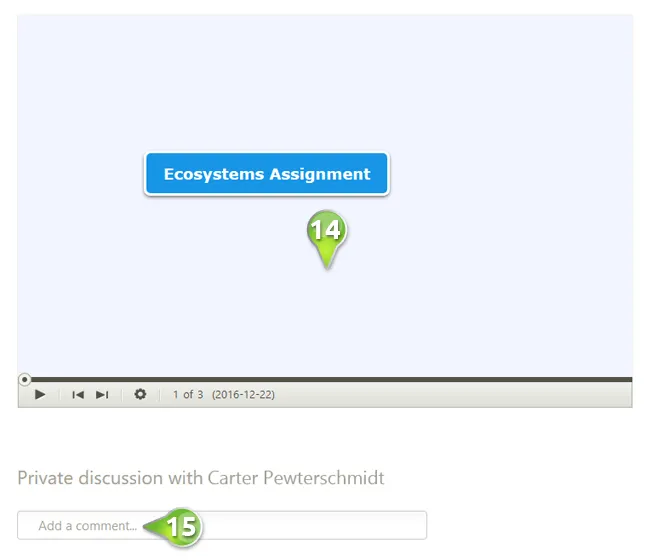
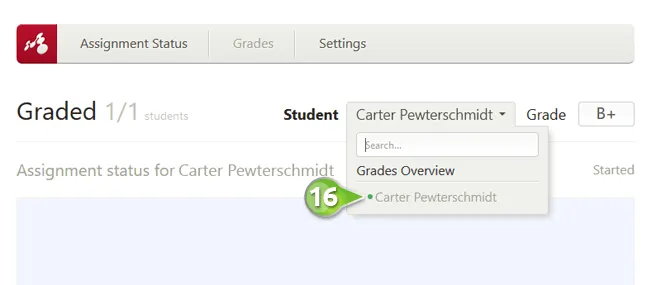
Each student is graded separately by selecting them from the list (12) and entering the grade (13).
As soon as you select a student, all details of their activity on the map appear below (14), and you can discuss privately with them (15).
Students who have already received a grade will appear highlighted in green (16).
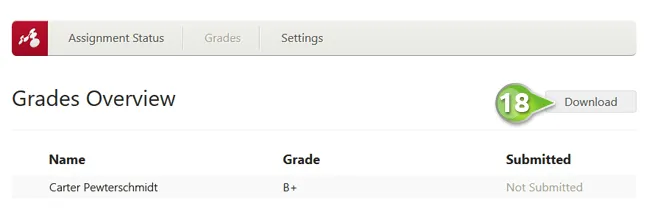
To see all grades and download a grading report, go to Grades, then Grades Overview (17), and click Download (18).

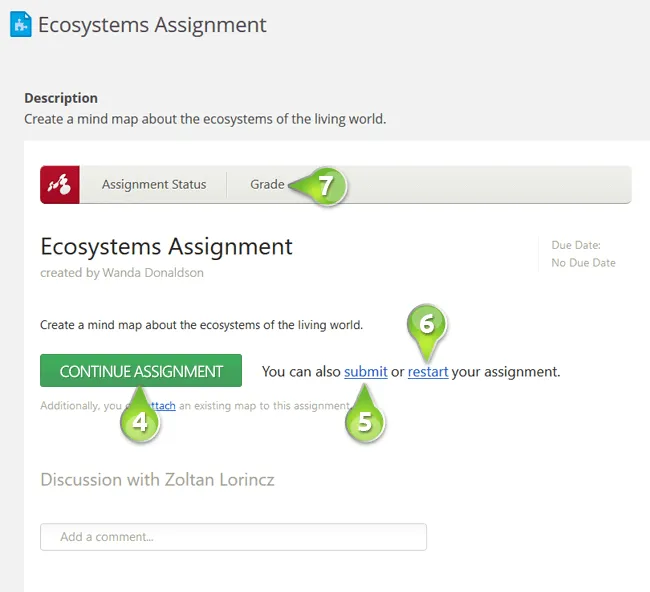
How will students work on their mind map assignments?
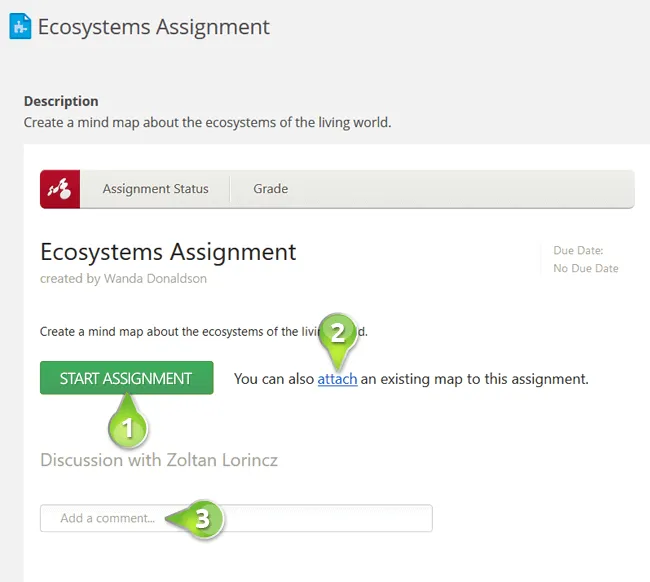
When students click on the assignment in itslearning for the first time, they will be able to:
- Start the assignment (1).
- Attach another mind map to the assignment (2).
- Engage in an individual discussion with the teacher who assigned the task (3).
When students return to an assignment that has already been started, they need to click Continue Assignment (4).
- When they are ready, they can submit the assignment (5).
- They can restart the assignment at any time (6), but previous work will be lost. Students are notified before restarting.
- They can check their grades at any time (7).