Task Management with Mind Maps
Mind maps help you keep everything in one place in an organized manner: from objectives and due dates to schedules and locations. With Mindomo mind maps you can keep track of your tasks and organize your to-do lists.
Turn a mind map into tasks
Section titled “Turn a mind map into tasks”Use the TAB and ENTER keys to quickly insert topics and subtopics that you can turn into tasks and subtasks.
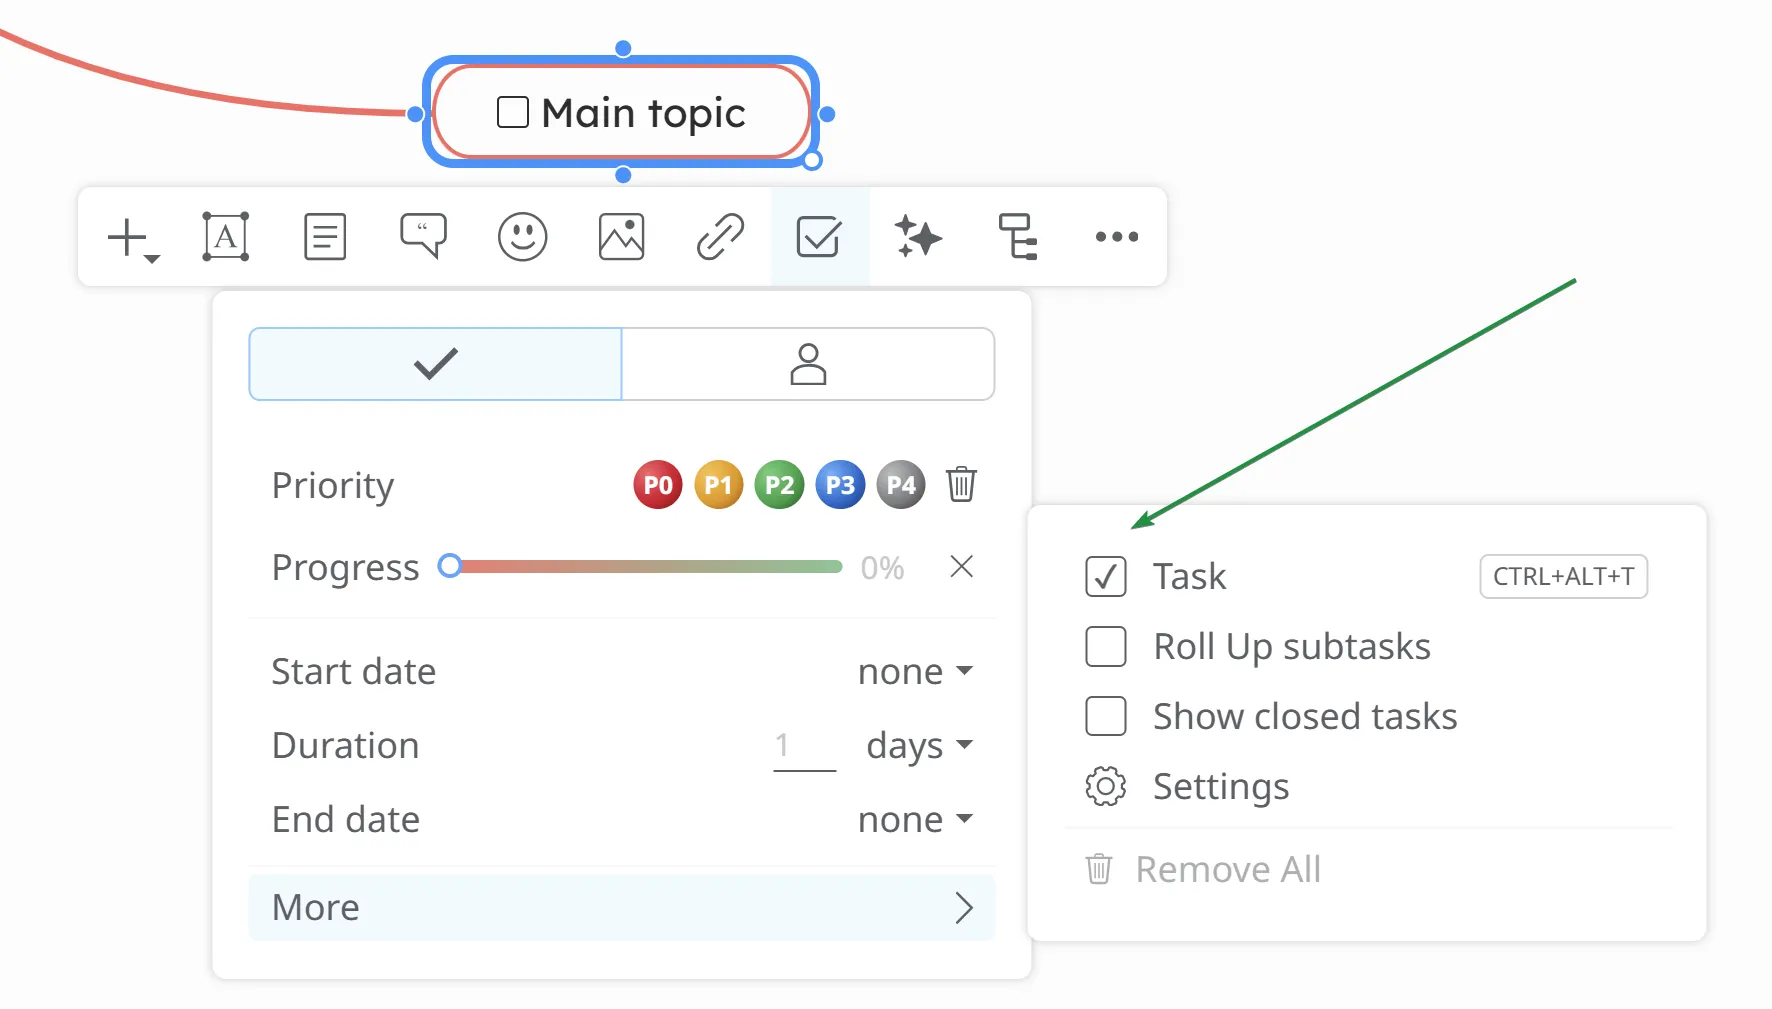
Select a topic or subtopic and click the Task button on its toolbar. Then choose More → Task. The topic will be converted into a task, which can be divided into smaller, assignable subtasks.
Tasks and subtasks are organized hierarchically which gives you a clear overview of all tasks and their priority.
If the main topic has the Task option enabled, all new subtopics will inherit it and will become subtasks.You can always remove the check mark so the newly added subtopics will not turn into subtasks. A branch can have tasks and topics at the same time.
Task Information
Section titled “Task Information”-
Priority: Set the importance level of the task (P0–P4).
-
Progress: Track completion percentage. You can adjust it manually by dragging the progress bar or it can be automatically calculated.
-
Start Date: Choose when the task begins.
-
Duration: Specifies how long the task will take. It can be set in minutes, hours, or days. The end date is automatically calculated based on the specified duration and the task settings.
-
End Date: Automatically calculated based on the duration, or can be set manually (in which case the duration will be updated automatically).
Roll up Subtasks
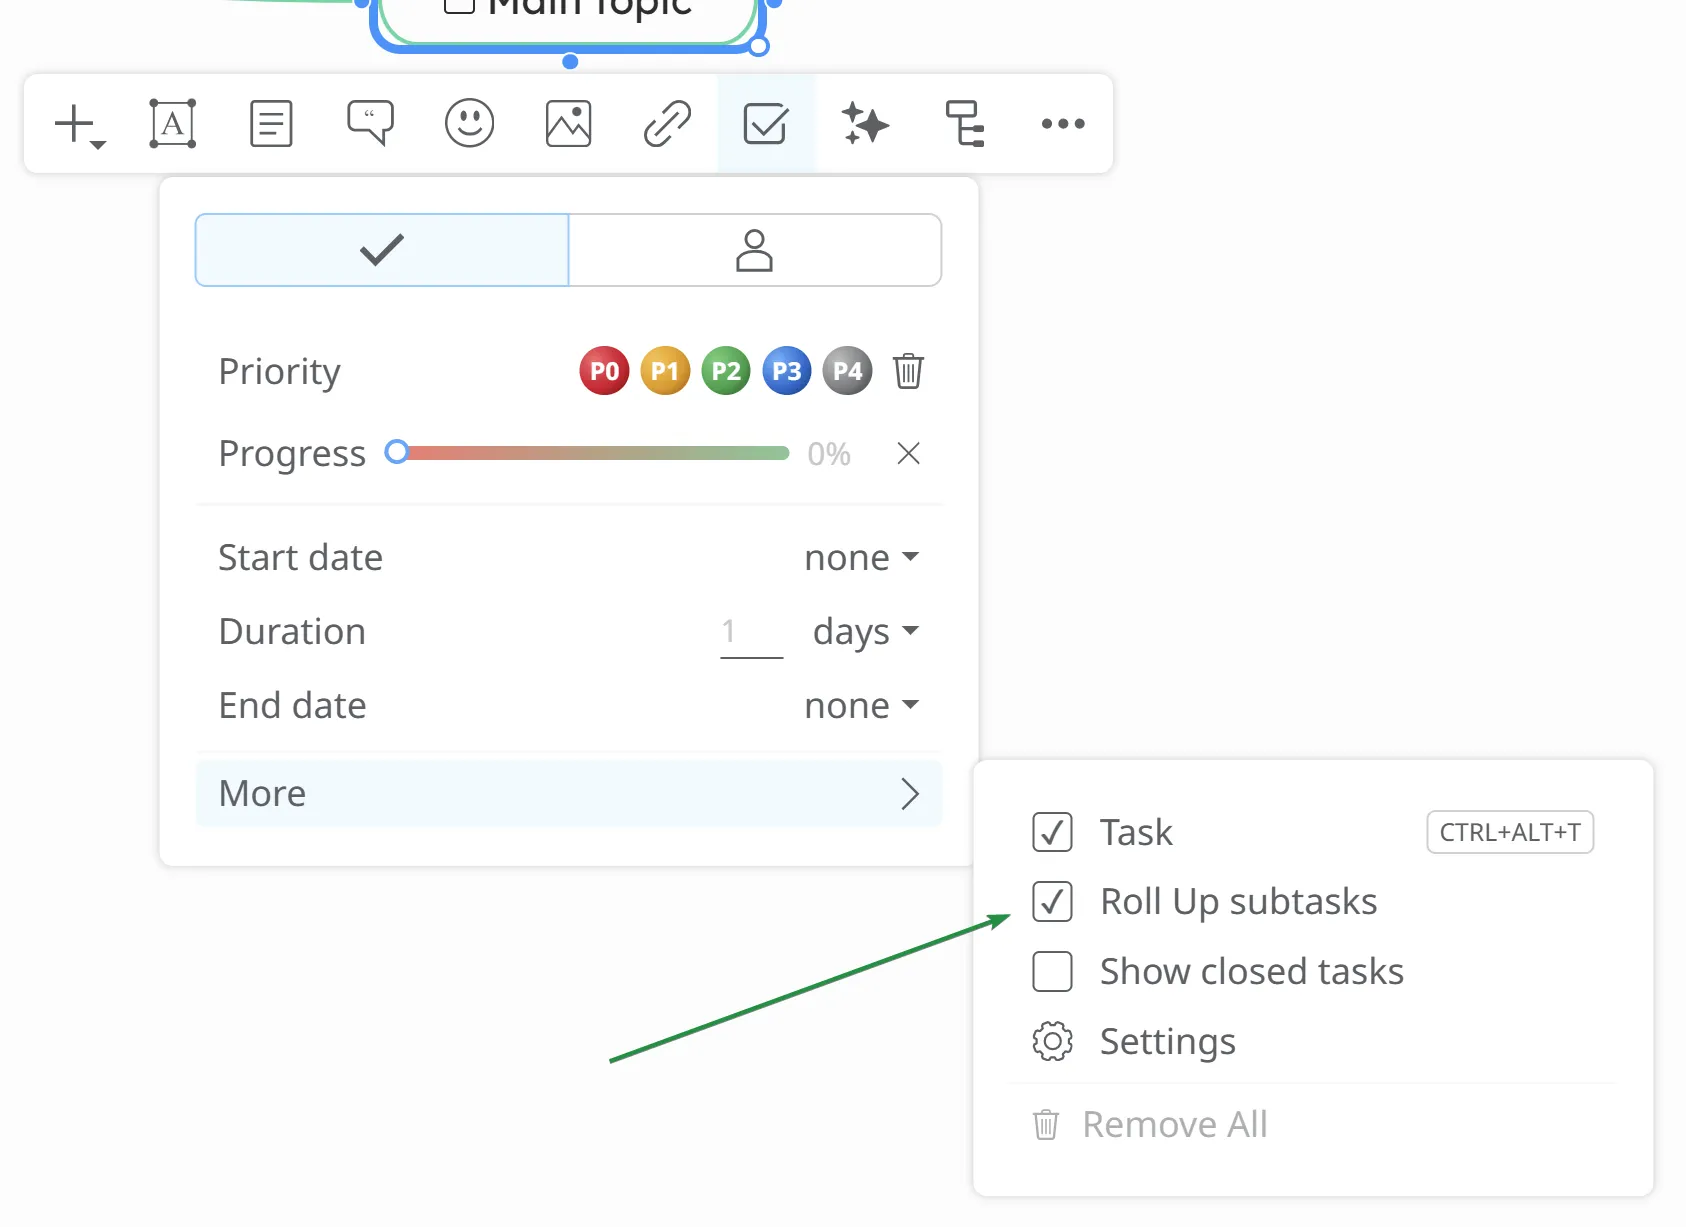
Section titled “Roll up Subtasks”To use this feature, make sure “Roll up Subtasks” is turned on in Task menu → More. By default, it is activated whenever subtasks are added.
If this option is activated, parent node progress will be calculated based on the completion levels of their leaf node tasks.
If the tasks have deadlines and Roll up Subtasks option is enabled, they are taken into account when calculating the progress of the parent task. It is calculated by comparing the total duration of completed subtasks to the total duration of all subtasks. The working hours per day are taken into account to convert durations accurately, ensuring the rolled-up progress reflects the proportion of completed work.
Set deadline
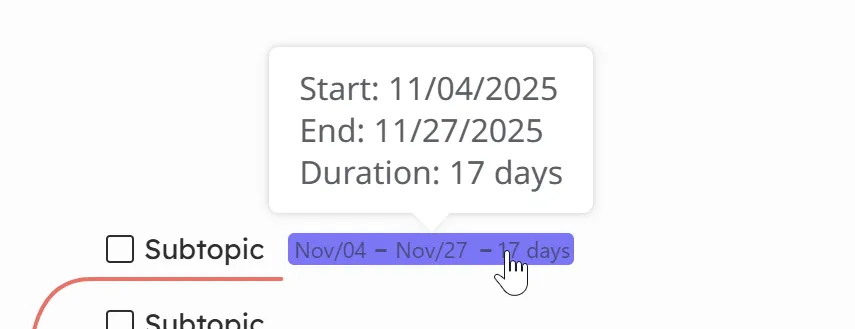
Section titled “Set deadline”You can set a task’s deadline through the context menu by defining the Start Date, End Date, and Duration (days, hours, or minutes), or alternatively from the Comments tab.
- Roll up Subtasks option disable
Select a task, then set the Start Date, End Date, and Duration. The deadline will then be added and displayed next to the task.
- Roll up Subtasks option enabled
Select a task, then set the Start Date, End Date, and Duration. Then deadline will be added and displayed next to the task.
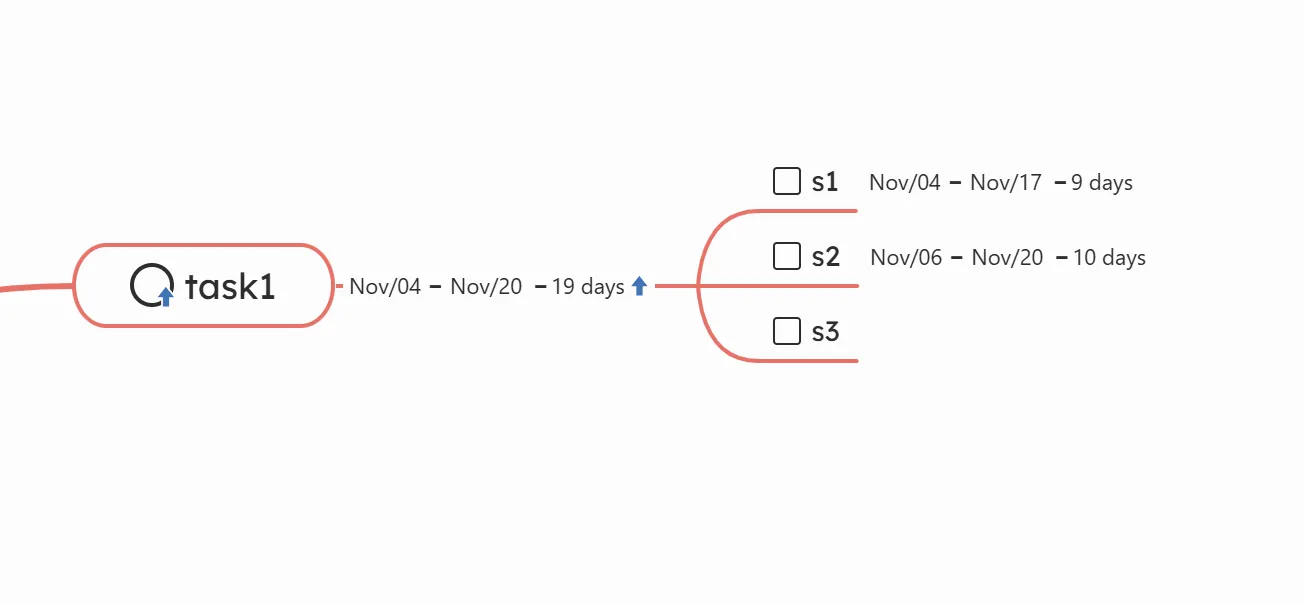
The deadline for a parent task is automatically calculated based on its subtasks:
- Start Date: The earliest start date among all subtasks
- End Date: The latest end date among all subtasks
- Duration: The sum of the durations of all subtasks(displayed in days)
Overview of completed tasks
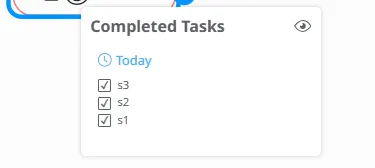
Section titled “Overview of completed tasks”Completed tasks are grouped under a checklist icon. This icon will show you the overall number of tasks, and by clicking it you can access each task separately. You can open any task again by clicking on it and remove the check mark.
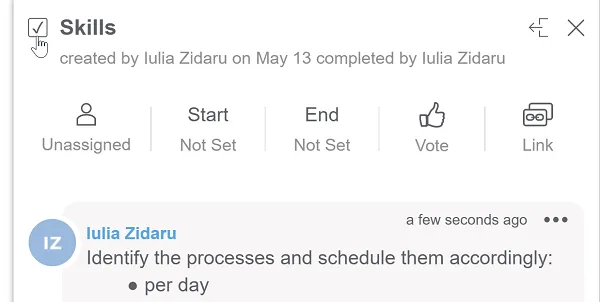
You can close the task also from the Comments panel (left/center overlay).
Task Settings
Section titled “Task Settings”Select a task and open context menu. Go to More options and open the Settings.
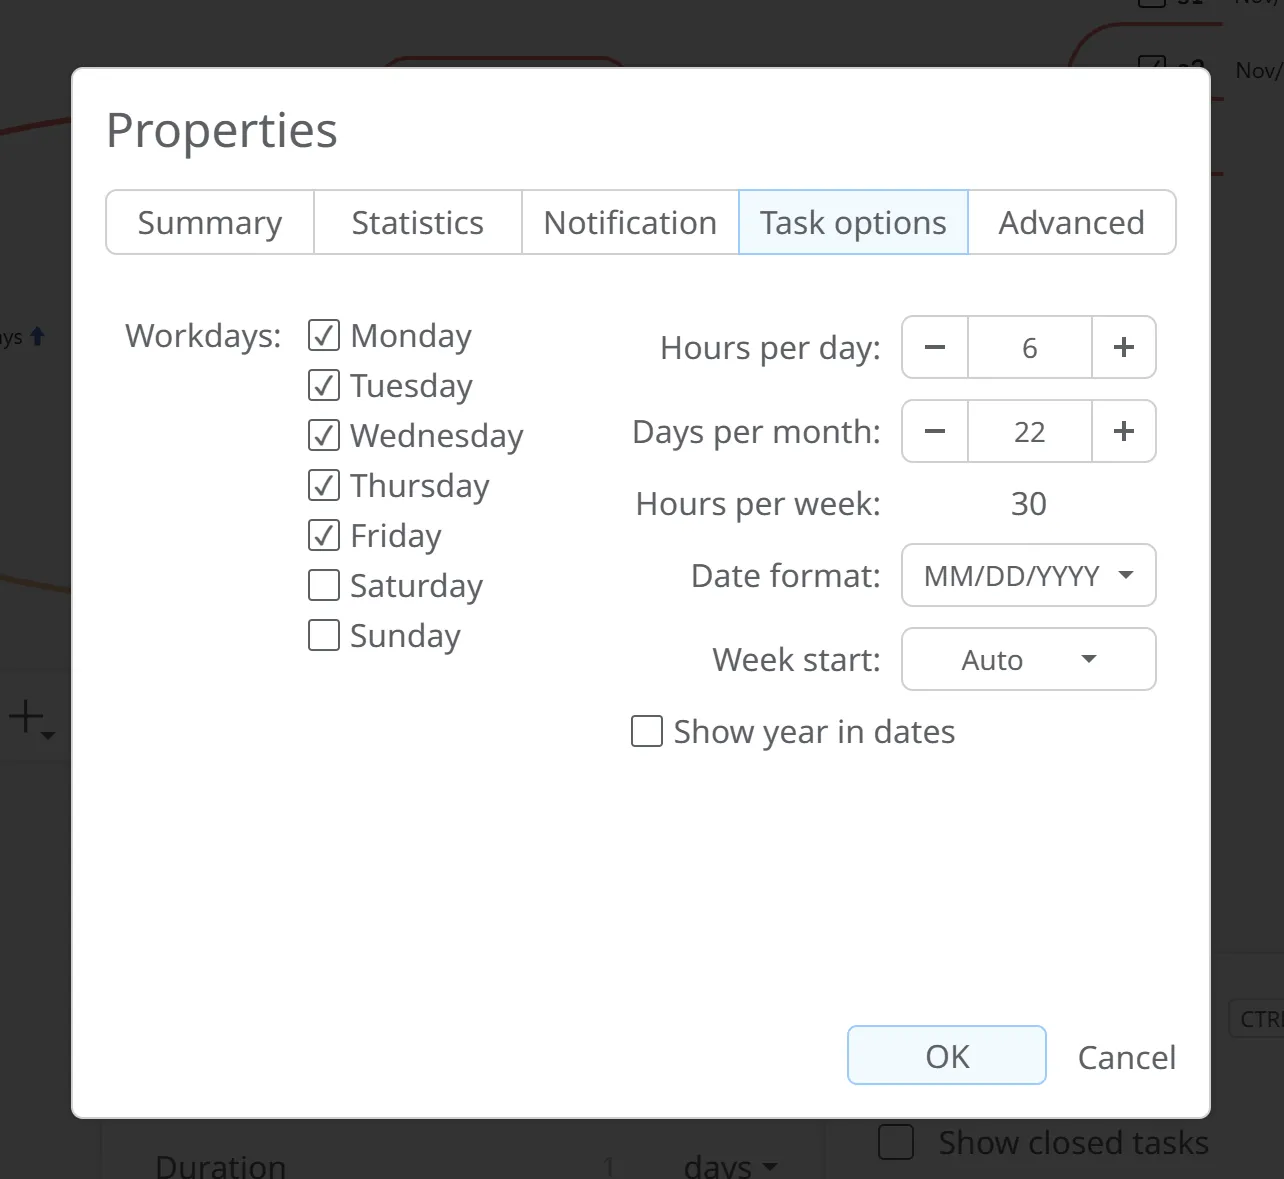
You can configure the following settings:
-
Workdays: Select which days of the week are considered workdays
-
Hours per day: Used to automatically calculate task durations
-
Days per month: Define the number of working days in a month
-
Date format: Choose the preferred date display format
-
Week start: Select the first day of the week (Monday, Sunday, or Auto—Auto adjusts based on your location).
-
Show year in dates: Option to display the year alongside dates.
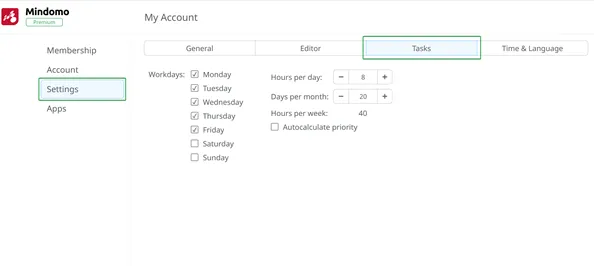
You can also make these changes from your Account section. To access the ‘My Account’ panel, click on your initials or picture on your Dashboard, then on your name, or on the ‘Account’ section. Here, go to the ‘Settings’ section on the left side of the screen, then select the ‘Tasks’ tab at the top of the screen.
The changes you make here will apply to tasks created on new diagrams. They will not modify existing tasks.
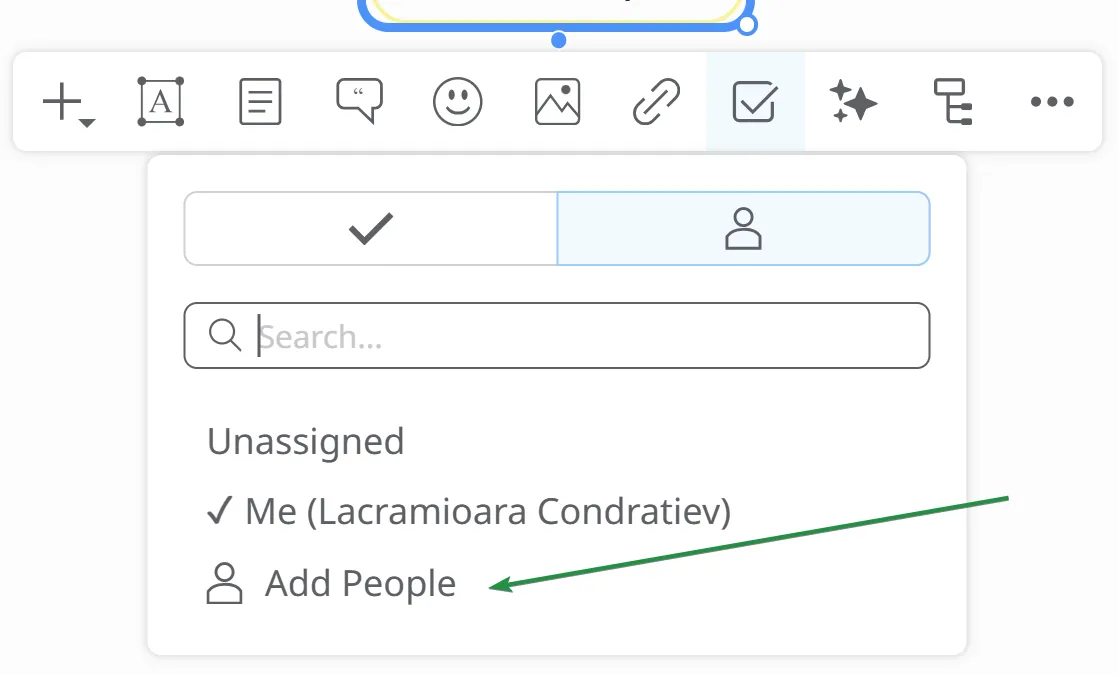
Assign Tasks
Section titled “Assign Tasks”To assign a task, open the Task menu and select the Assign task option. You can assign the task to yourself or to others. By selecting Add people, you will be redirected to the Share page, where you can enter the email addresses of the collaborators you wish to invite. Both Mindomo users and Ghost users can be invited.
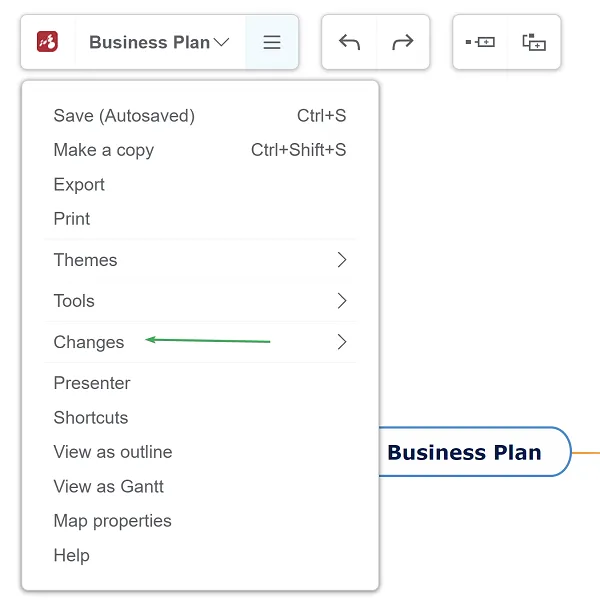
History of changes
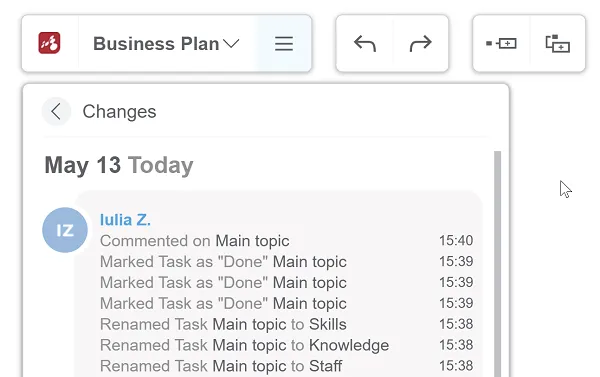
Section titled “History of changes”Be up to date with the latest changes in your map: who did what and the exact date. From the top Toolbar, select Changes.
Navigate through tasks
Section titled “Navigate through tasks”Collapse or expand the view of your project by using the ’+’ and ’-’ icons on task lines.
You have the option to select which levels are displayed (Level 1, Level 2, Level 3, or All levels).
With the drilldown option you can focus on a specific task list and hide the rest of the project, leaving you focused on the tasks from that list. Choose Tools from the context menu of the task and click on Drilldown (or shortcut F6). Do the same to return to the original mind map.
Task notifications
Section titled “Task notifications”Email notifications are sent automatically and instantly in various situations:
- when you assign a task to someone
-
when a task is starting
-
when you set a deadline
-
when the task is due or overdue
-
when the task is completed or reopened
Notifications for all tasks due or overdue during the current week are sent once a day, in the morning.
The system sends task change notifications based on the following logic:
-
If a task has an assigned person and it has a start date or due date (e.g. due today), only the assigned person will receive the notification.
-
If no one is assigned to a task that is due today, the notification is sent to everyone, with the following details:
-
The owner of the map receives a notification only about that unassigned task.
-
All other users receive a notification about their own assigned tasks plus the unassigned task that is due.
-
Notifications of all tasks due or overdue the current week are sent once a week, on Monday morning.
When new comments are added on the task, you can choose who to receive the notification and type in the email address(s) of the people you want to share the comments with.
All you need to do is create a task and share it with people from your team by email. Mindomo will use the emails you added to send email notifications.
iCal task feed
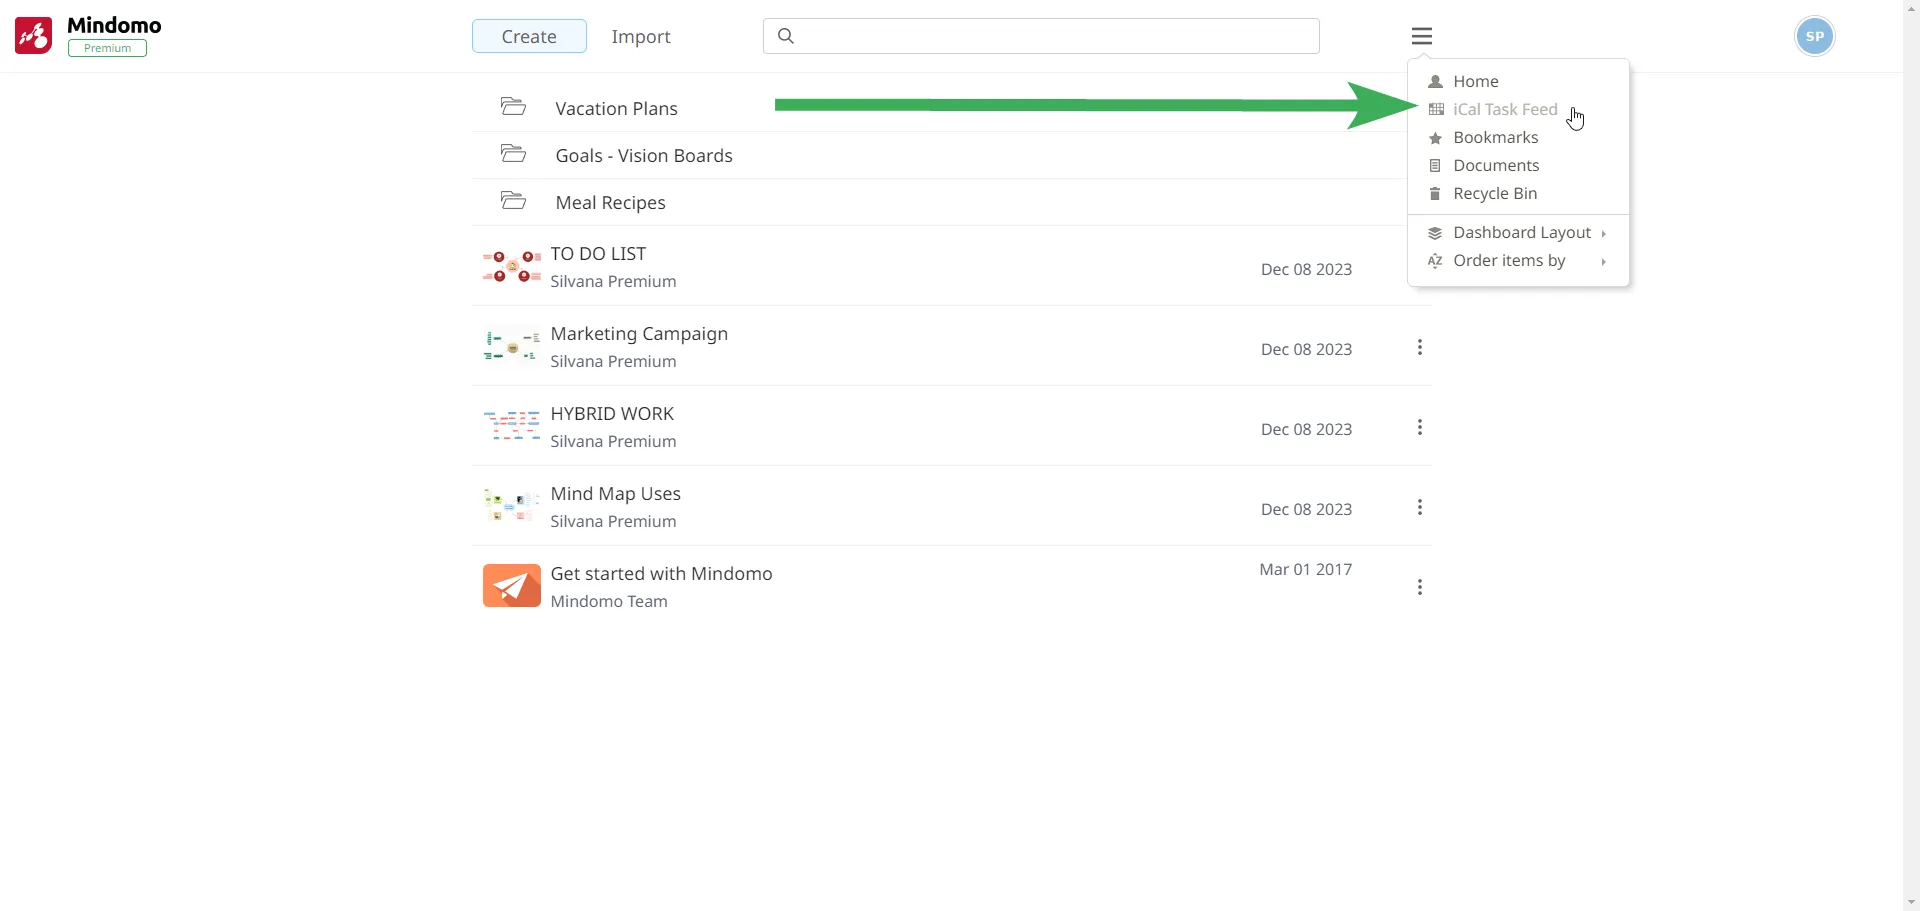
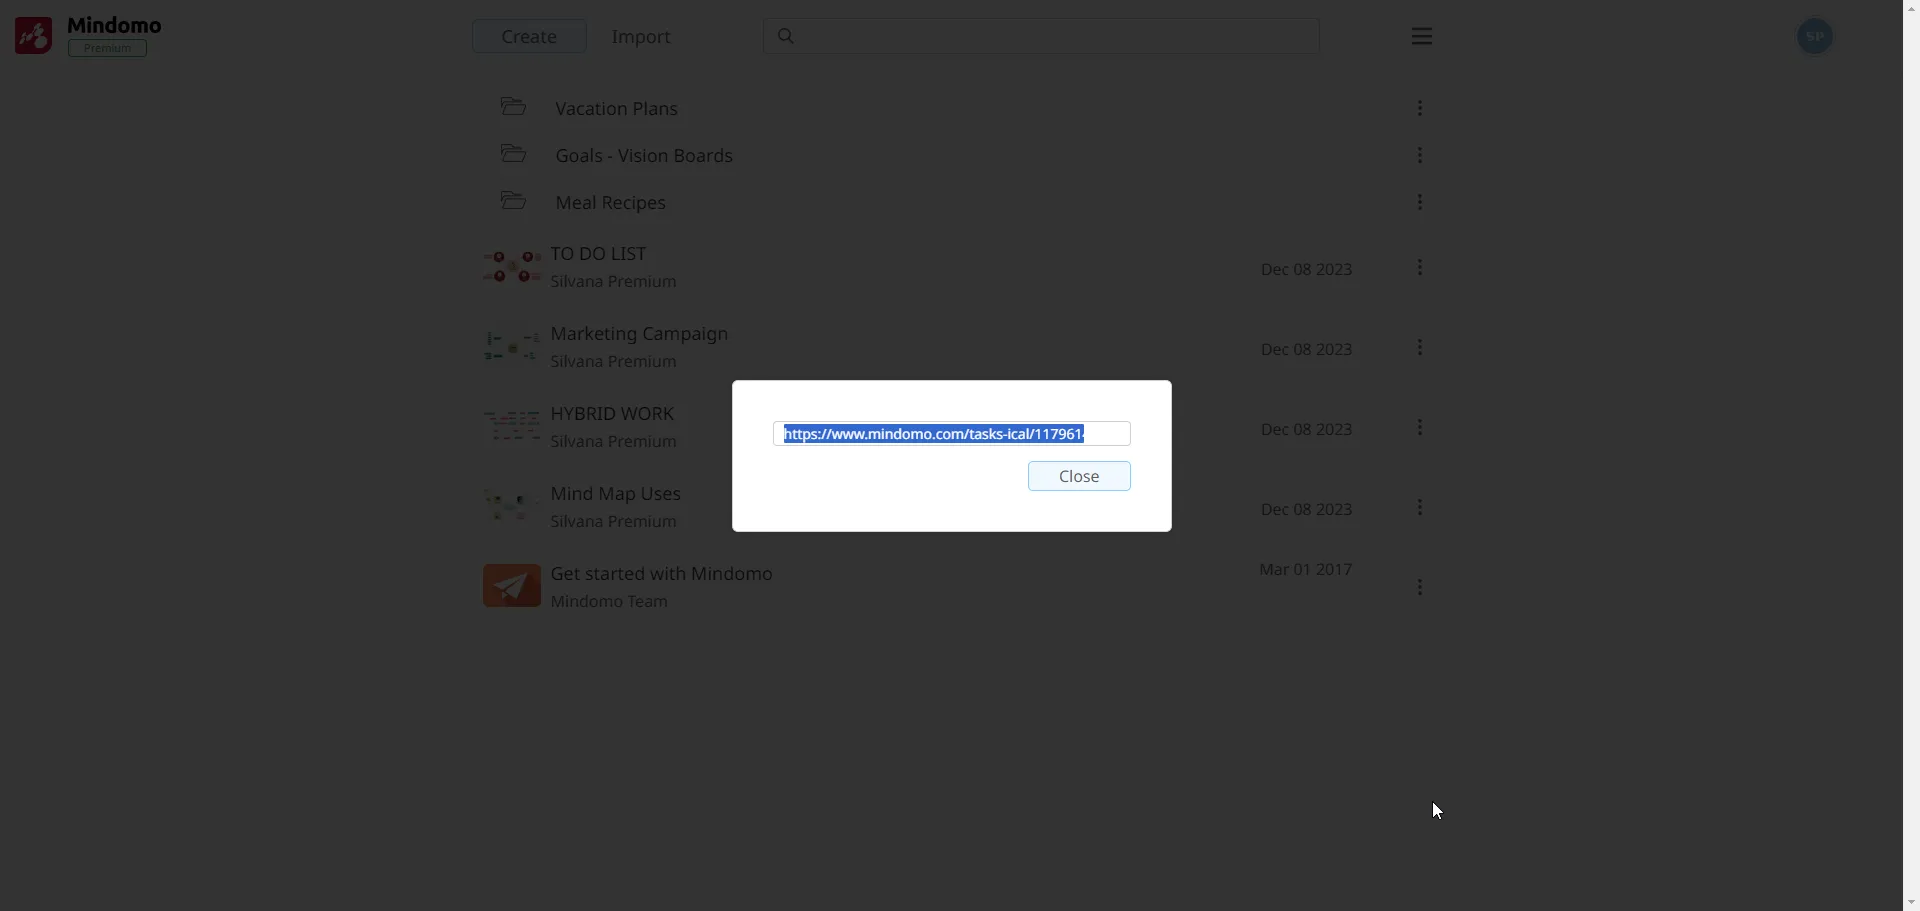
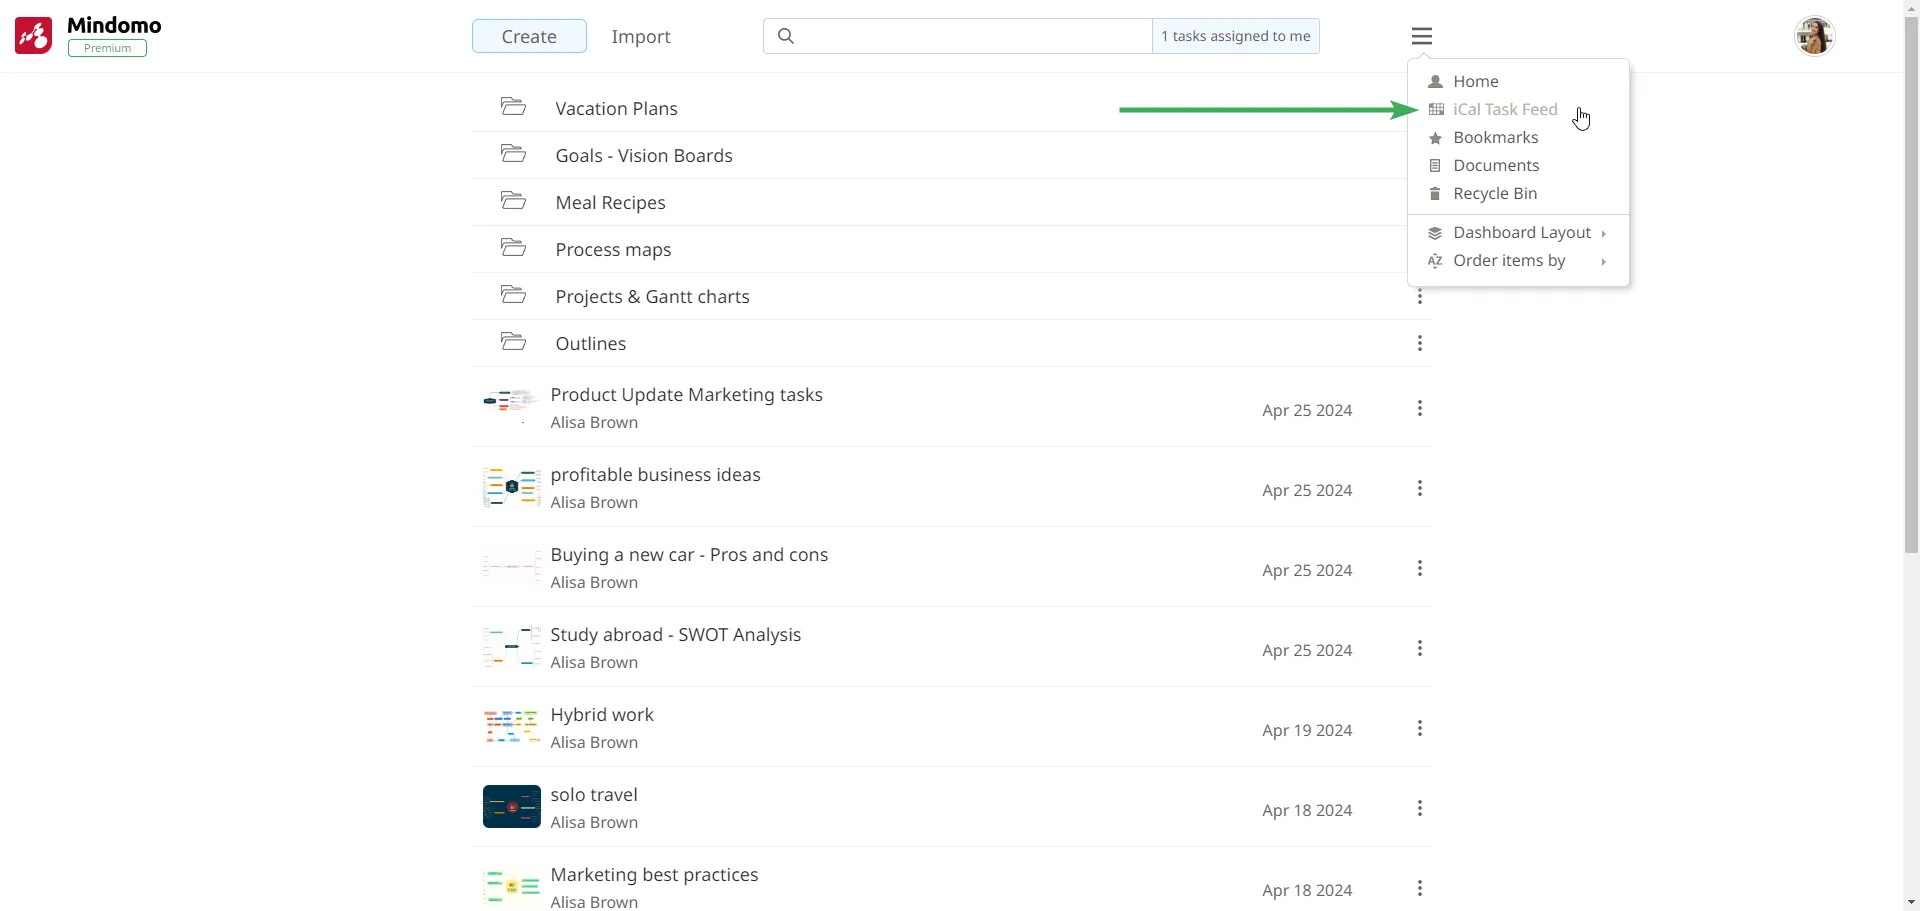
Section titled “iCal task feed”Integrate your tasks into any calendar or application which supports iCal. From your dashboard click on the file list menu, then on the iCal Task Feed functionality, which will generate a link with all your tasks from all your mind maps. Copy the link and add it to the calendar of your choice.

Once the calendar feed is added, your tasks will be synced automatically with your Calendar.
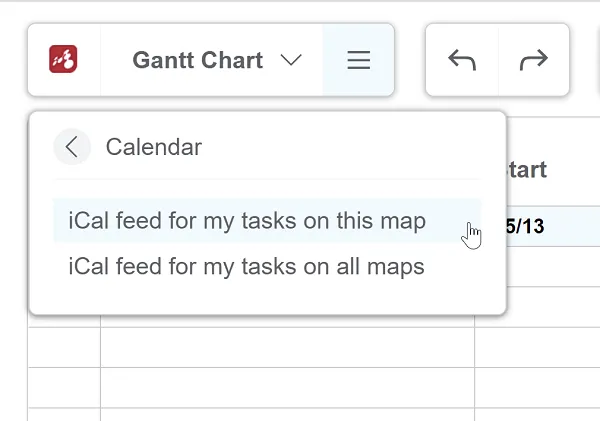
To get the iCal feed for each map, go to the file list menu, and switch to Gantt view. You will then find the Calendar option from the file list menu where you can access the iCal feed for this map.
Sync Mindomo tasks with Microsoft Calendar
Section titled “Sync Mindomo tasks with Microsoft Calendar”Mindomo offers integration for tasks with the Outlook calendar, utilizing the iCal calendar format. Follow these steps to import Mindomo’s tasks into Outlook Calendar:
-
Go to your Mindomo’s dashboard, click on the 3-line sign, then click on iCal Task Feed.
-
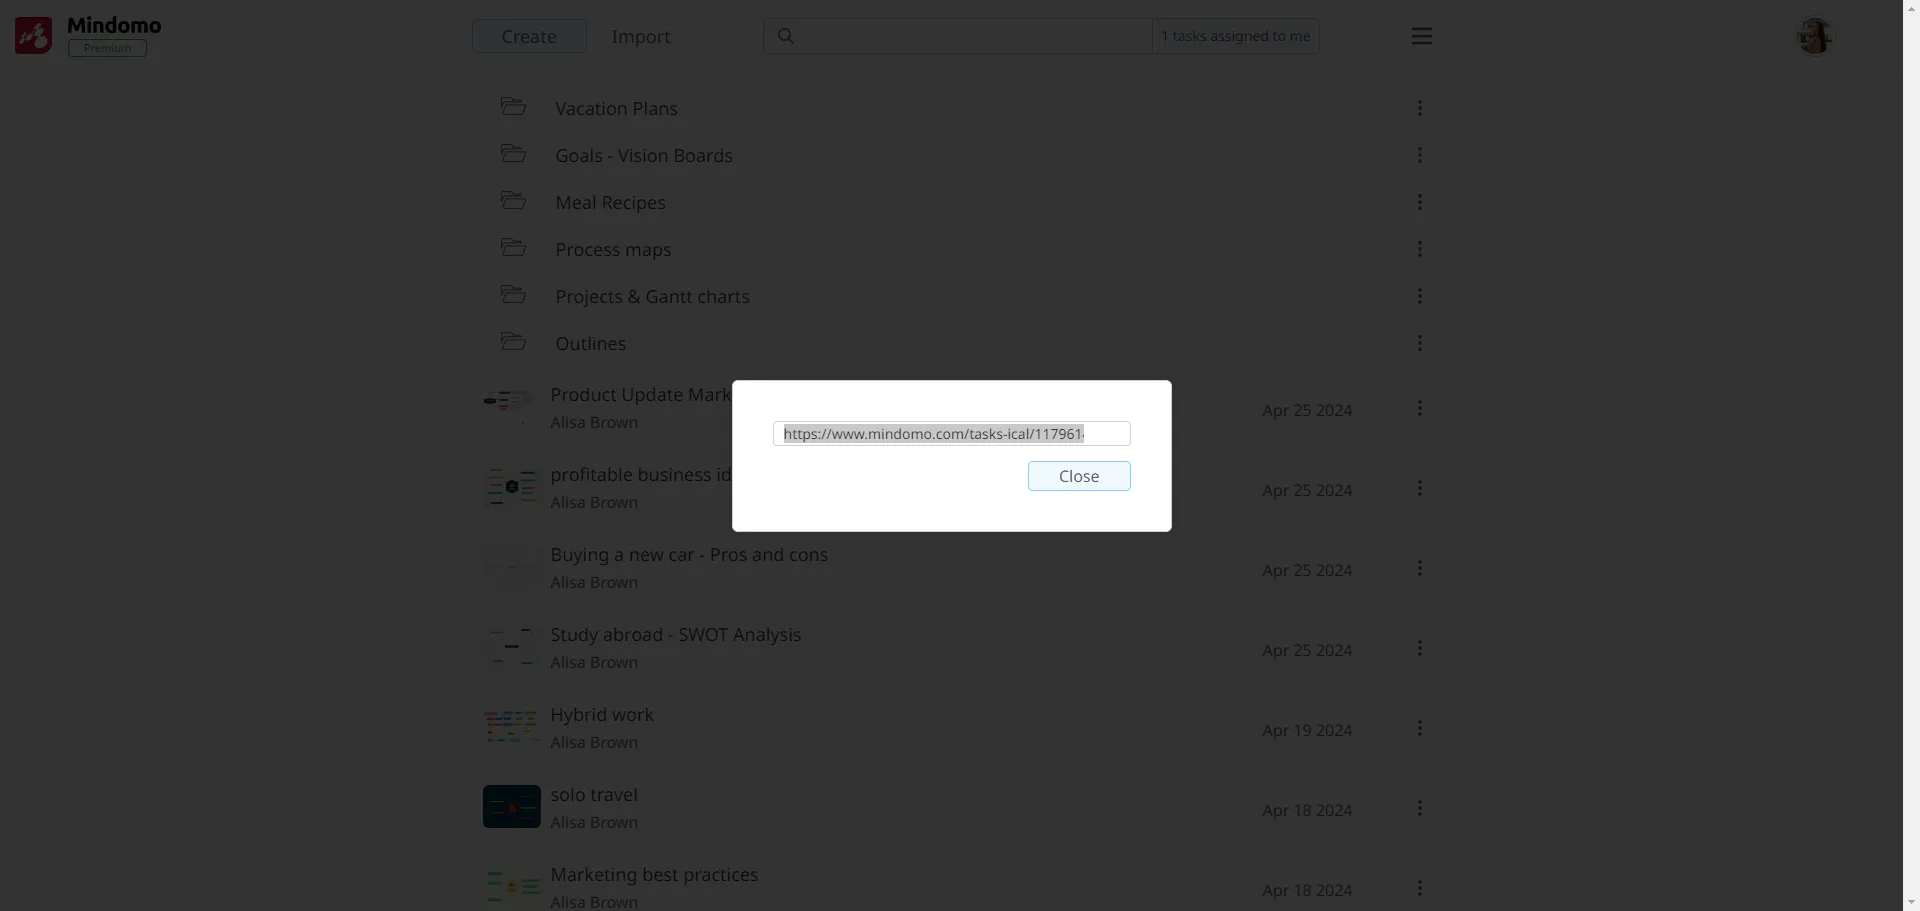
Copy the link that appears on the screen.
-
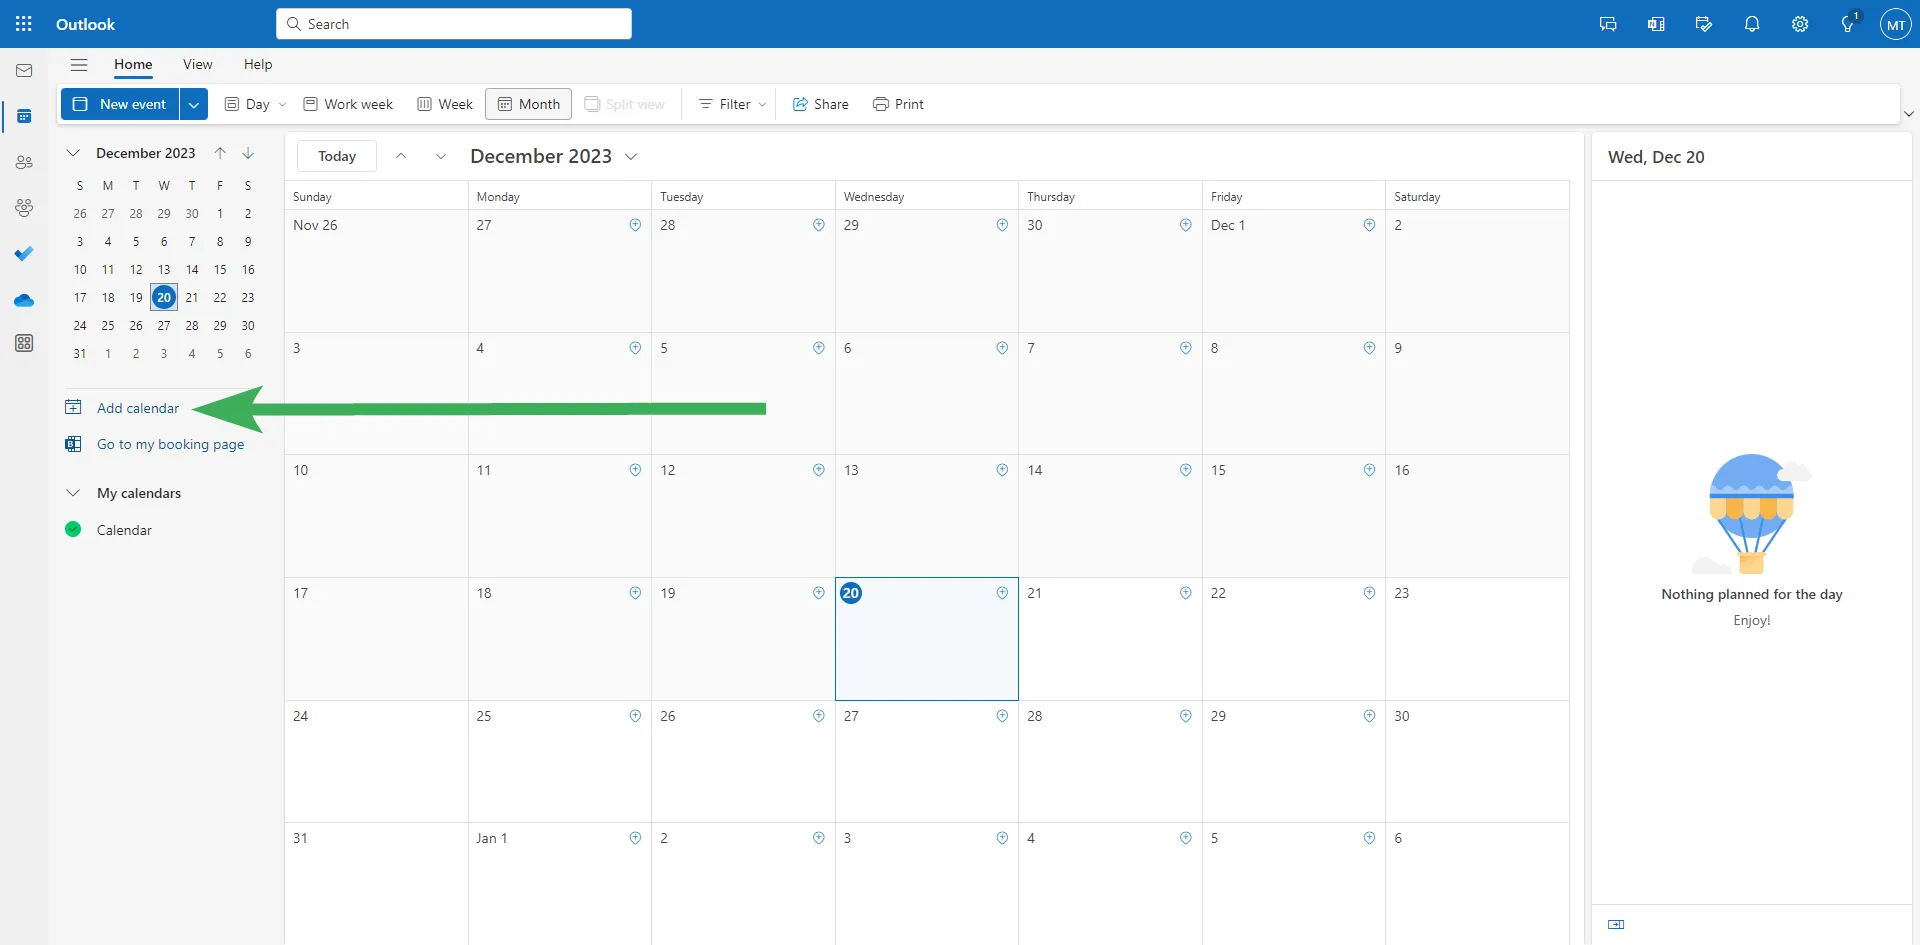
Go to Outlook Calendar and click on Add calendar:
-
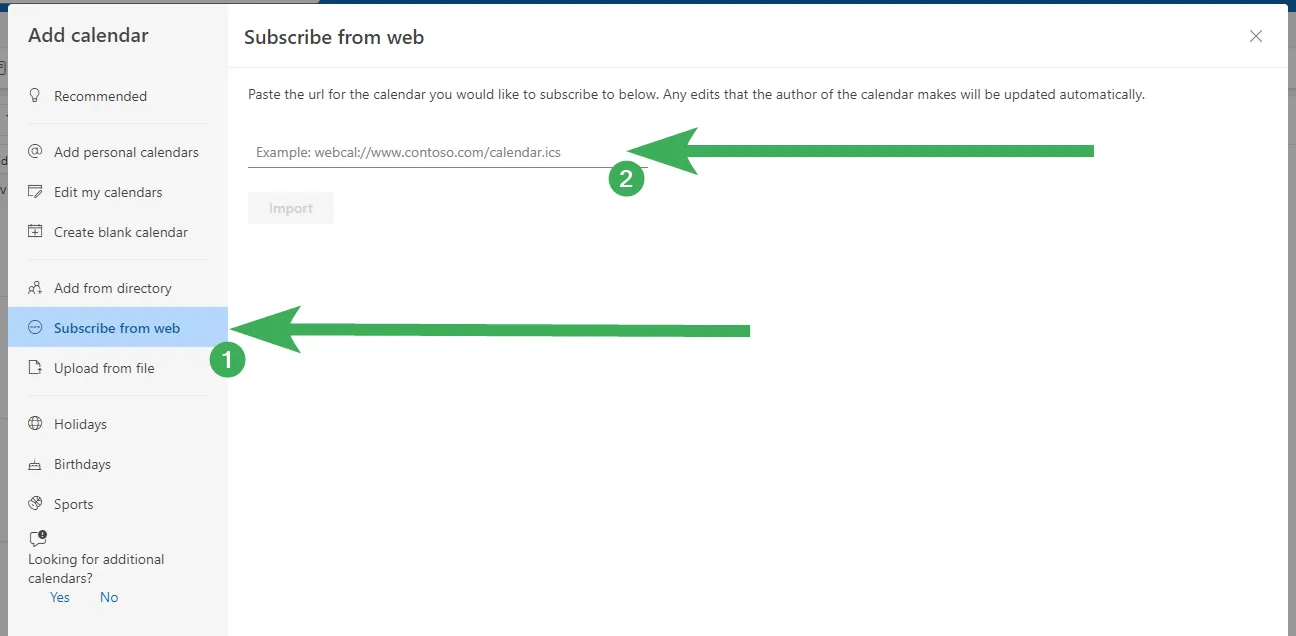
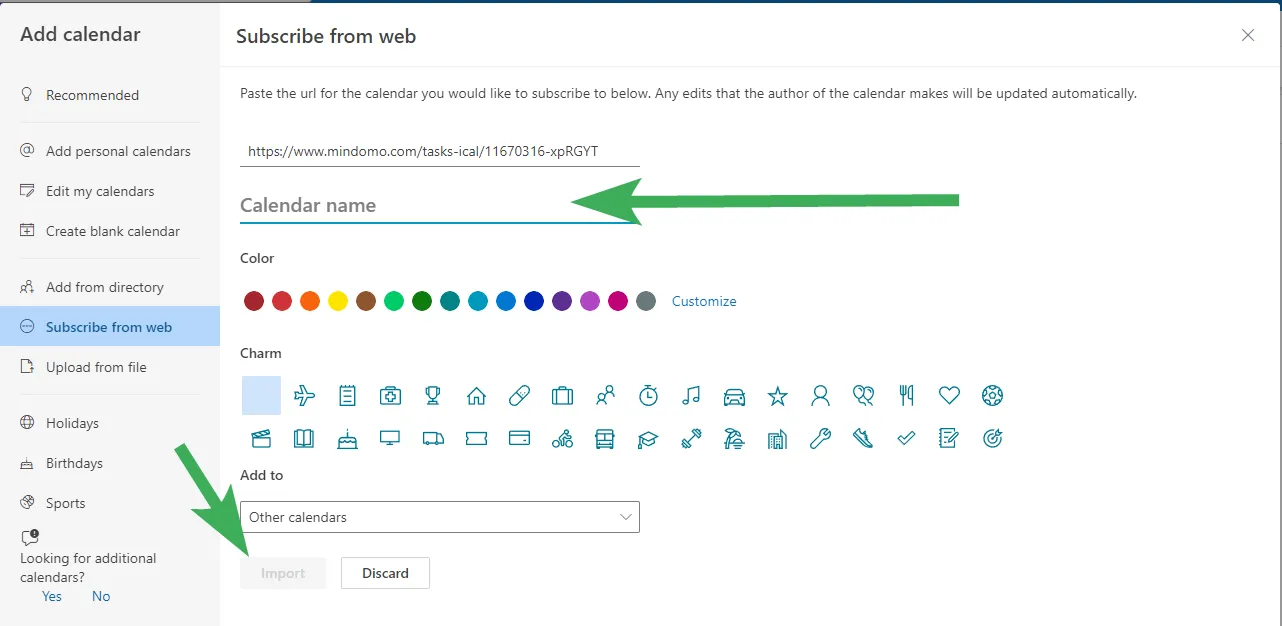
Click on Subscribe from web, and there you’ll have a text box where you need to paste the link you’ve copied from Mindomo.
-
After you paste the link, you can give it a name and then click import.
-
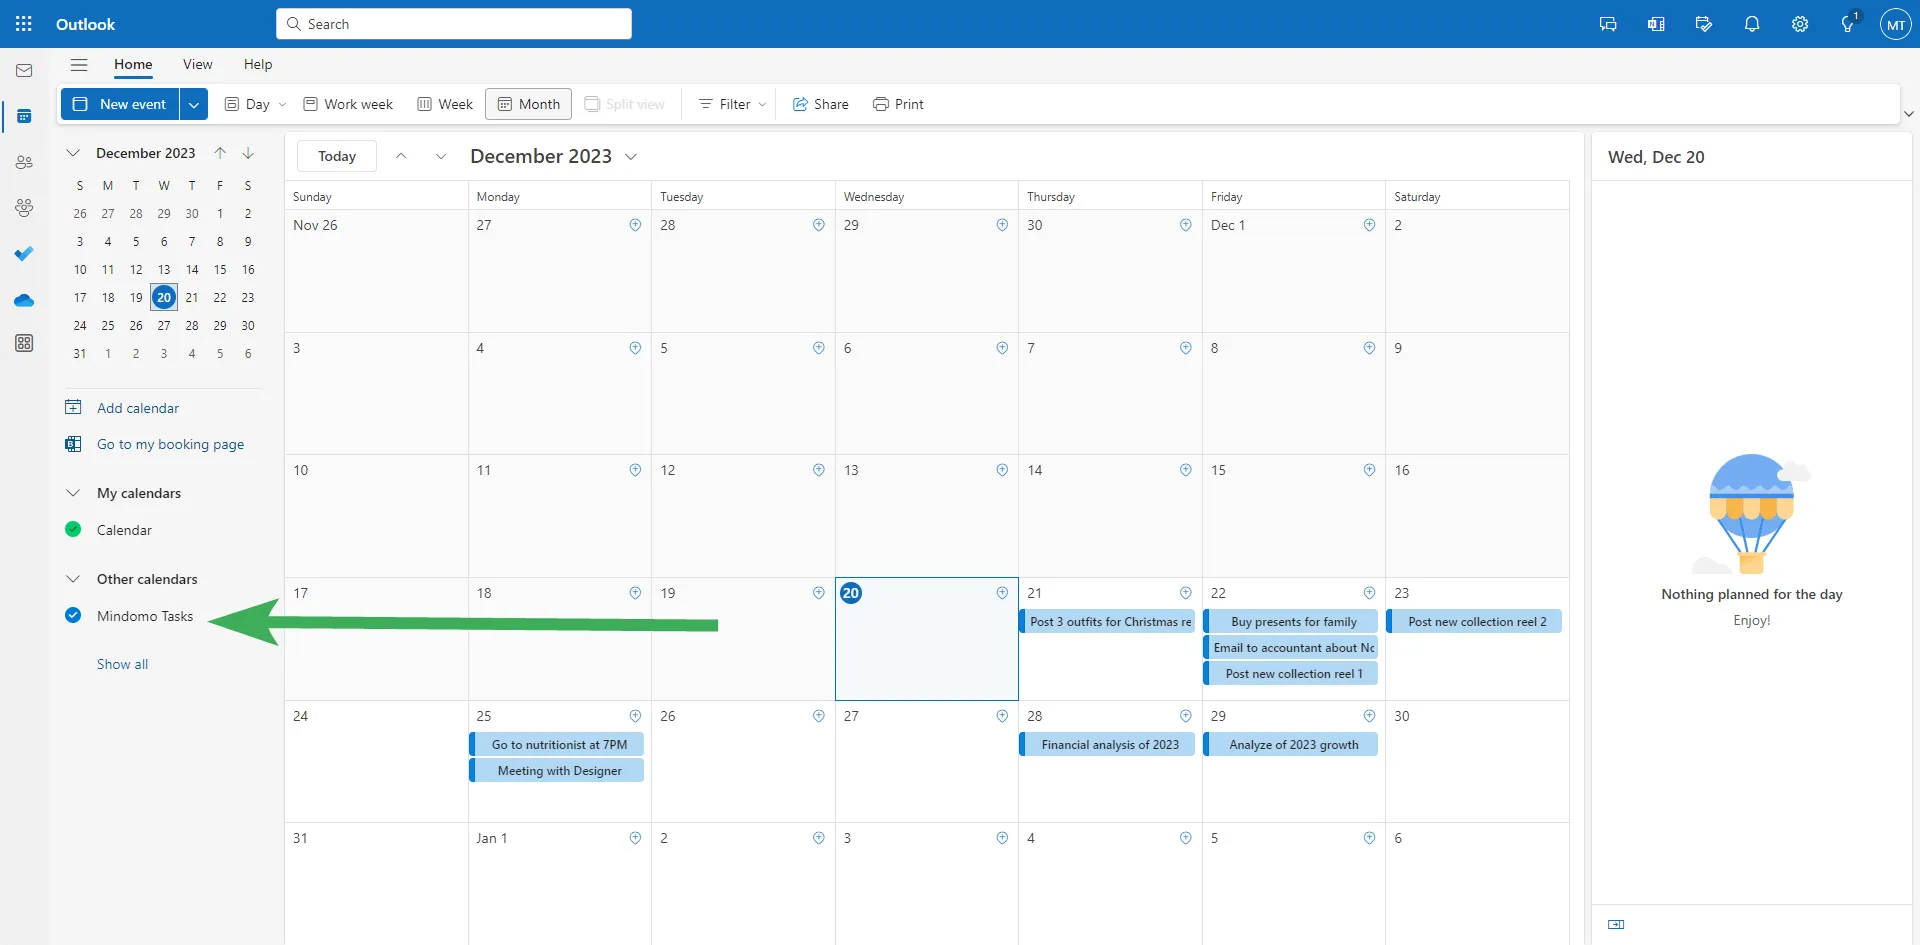
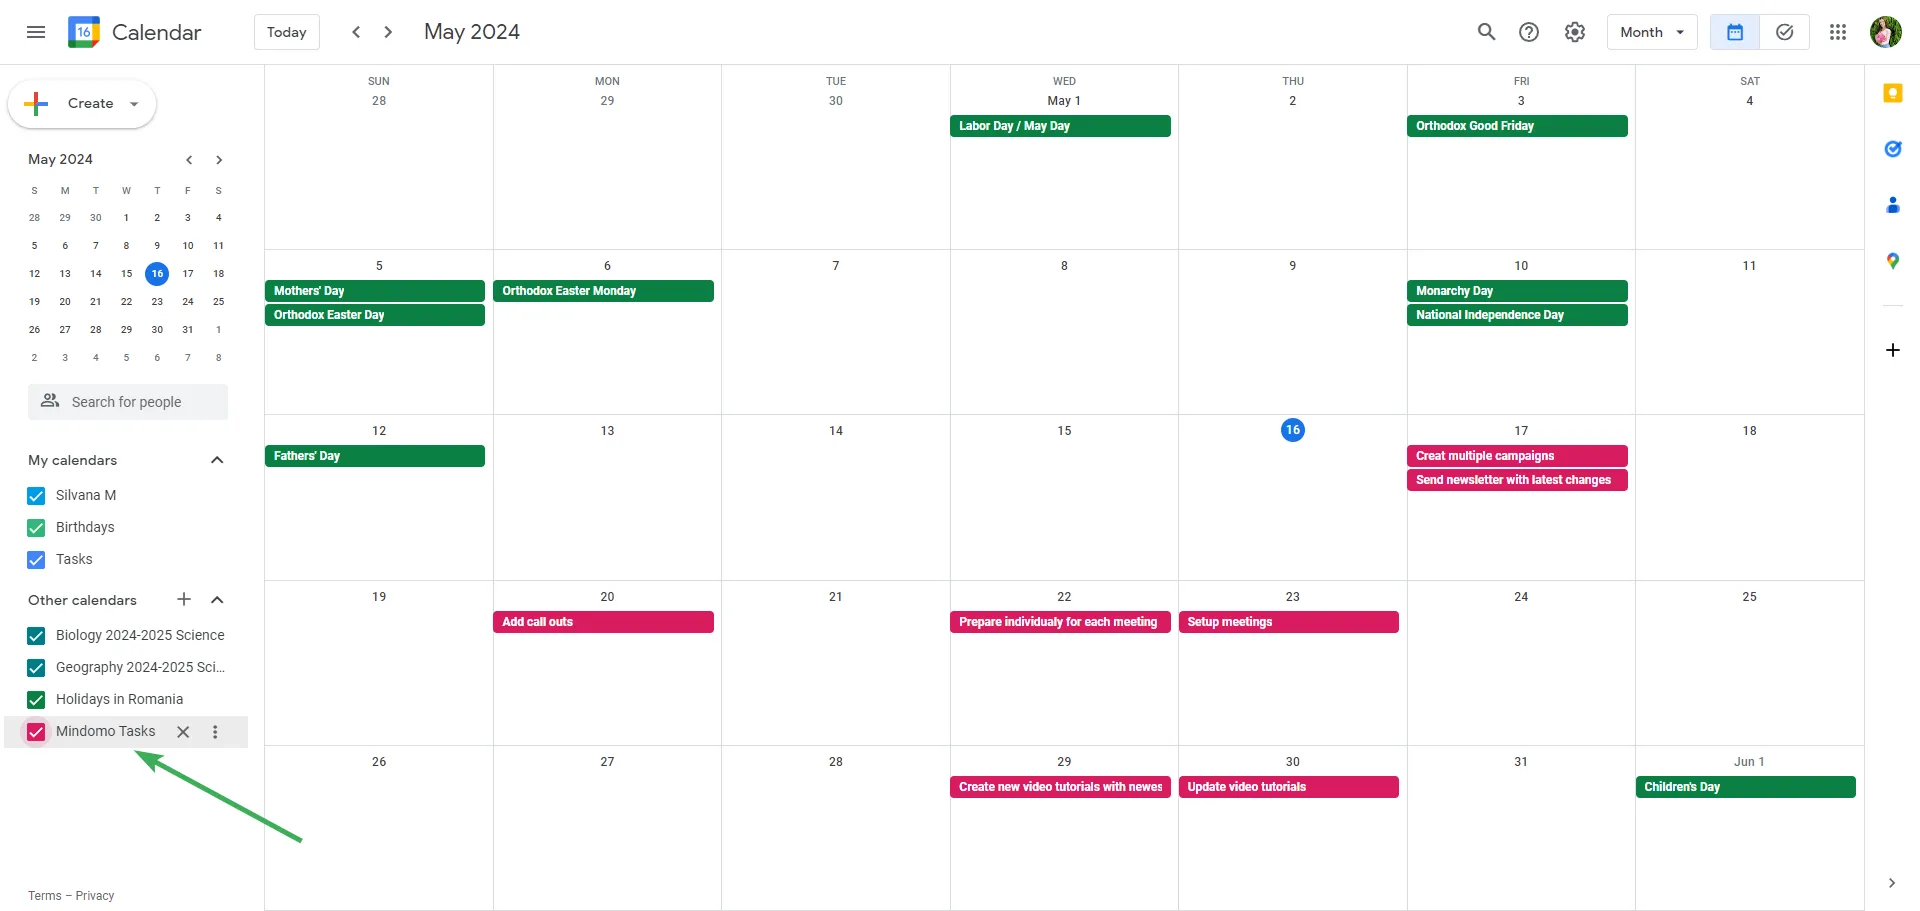
Once added, all the tasks you schedule in Mindomo will be synced on your Outlook calendar. You can find it under the Other calendars section.
Sync Mindomo tasks with Google Calendar
Section titled “Sync Mindomo tasks with Google Calendar”Mindomo offers task management integration with Google Calendar. Follow these steps to import Mindomo’s tasks into your Google Calendar:
-
Go to your Mindomo’s dashboard, click on the 3-line sign, then click on iCal Task Feed.
-
Copy the link that appears on the screen.
-
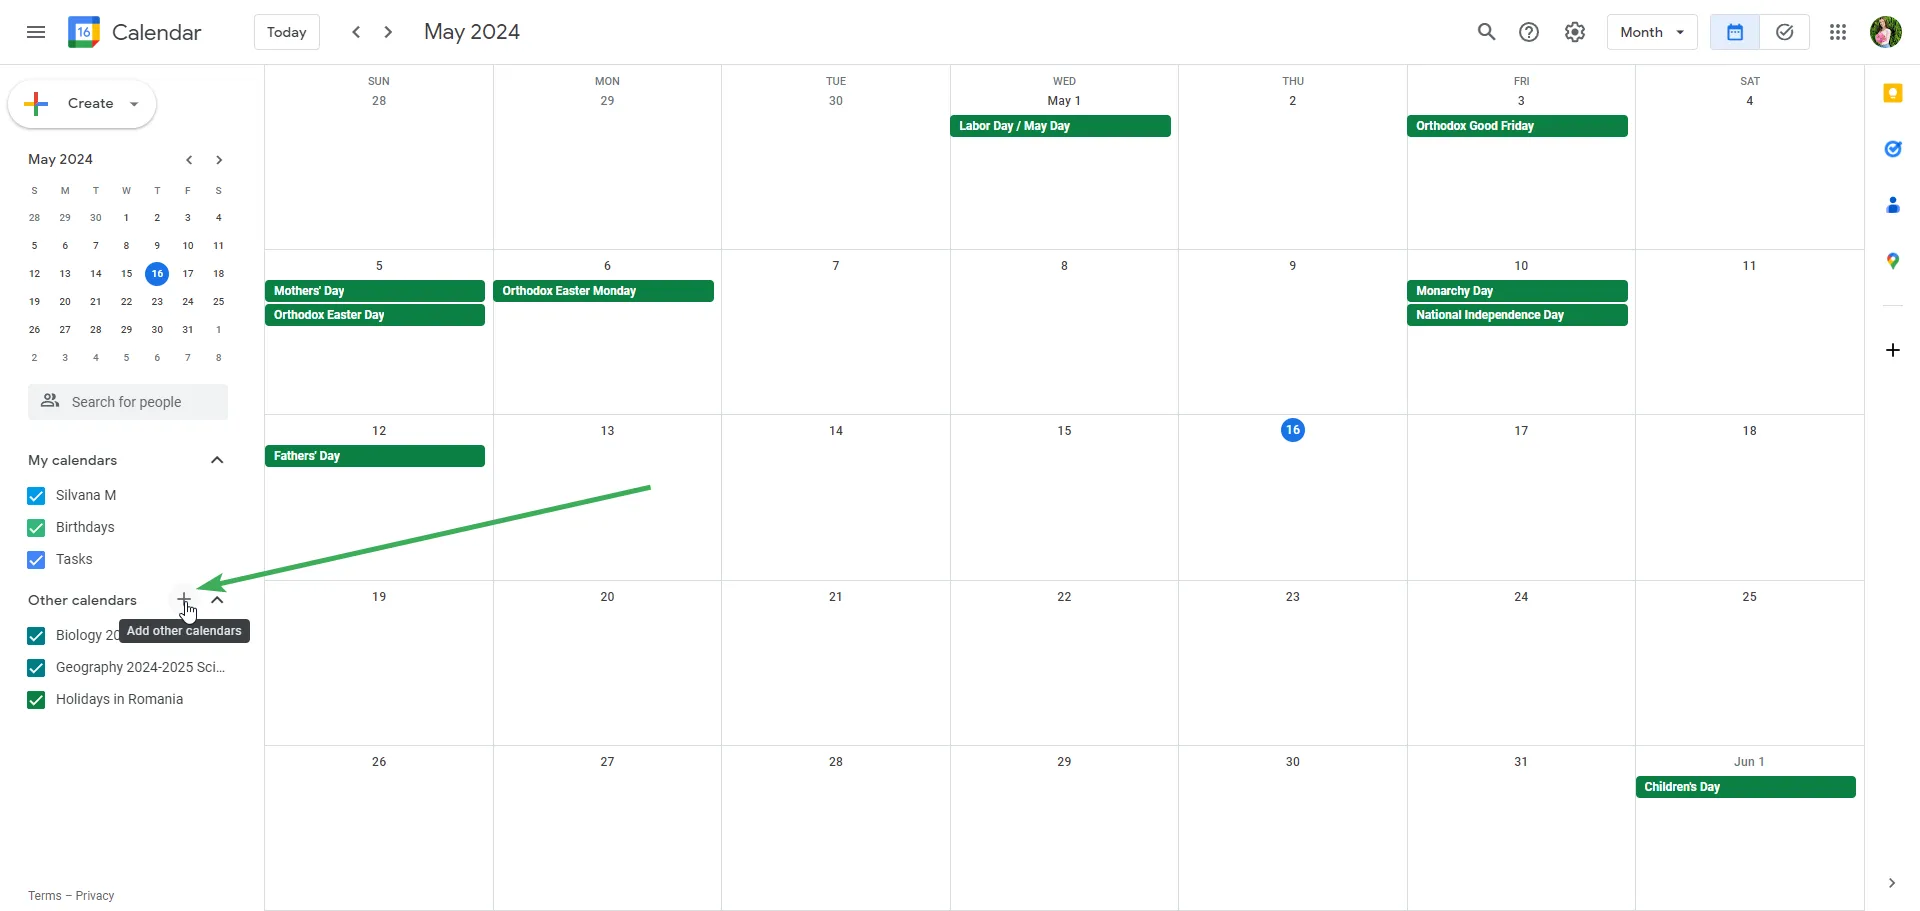
Go to Google Calendar and click on + button from Other calendars section:
-
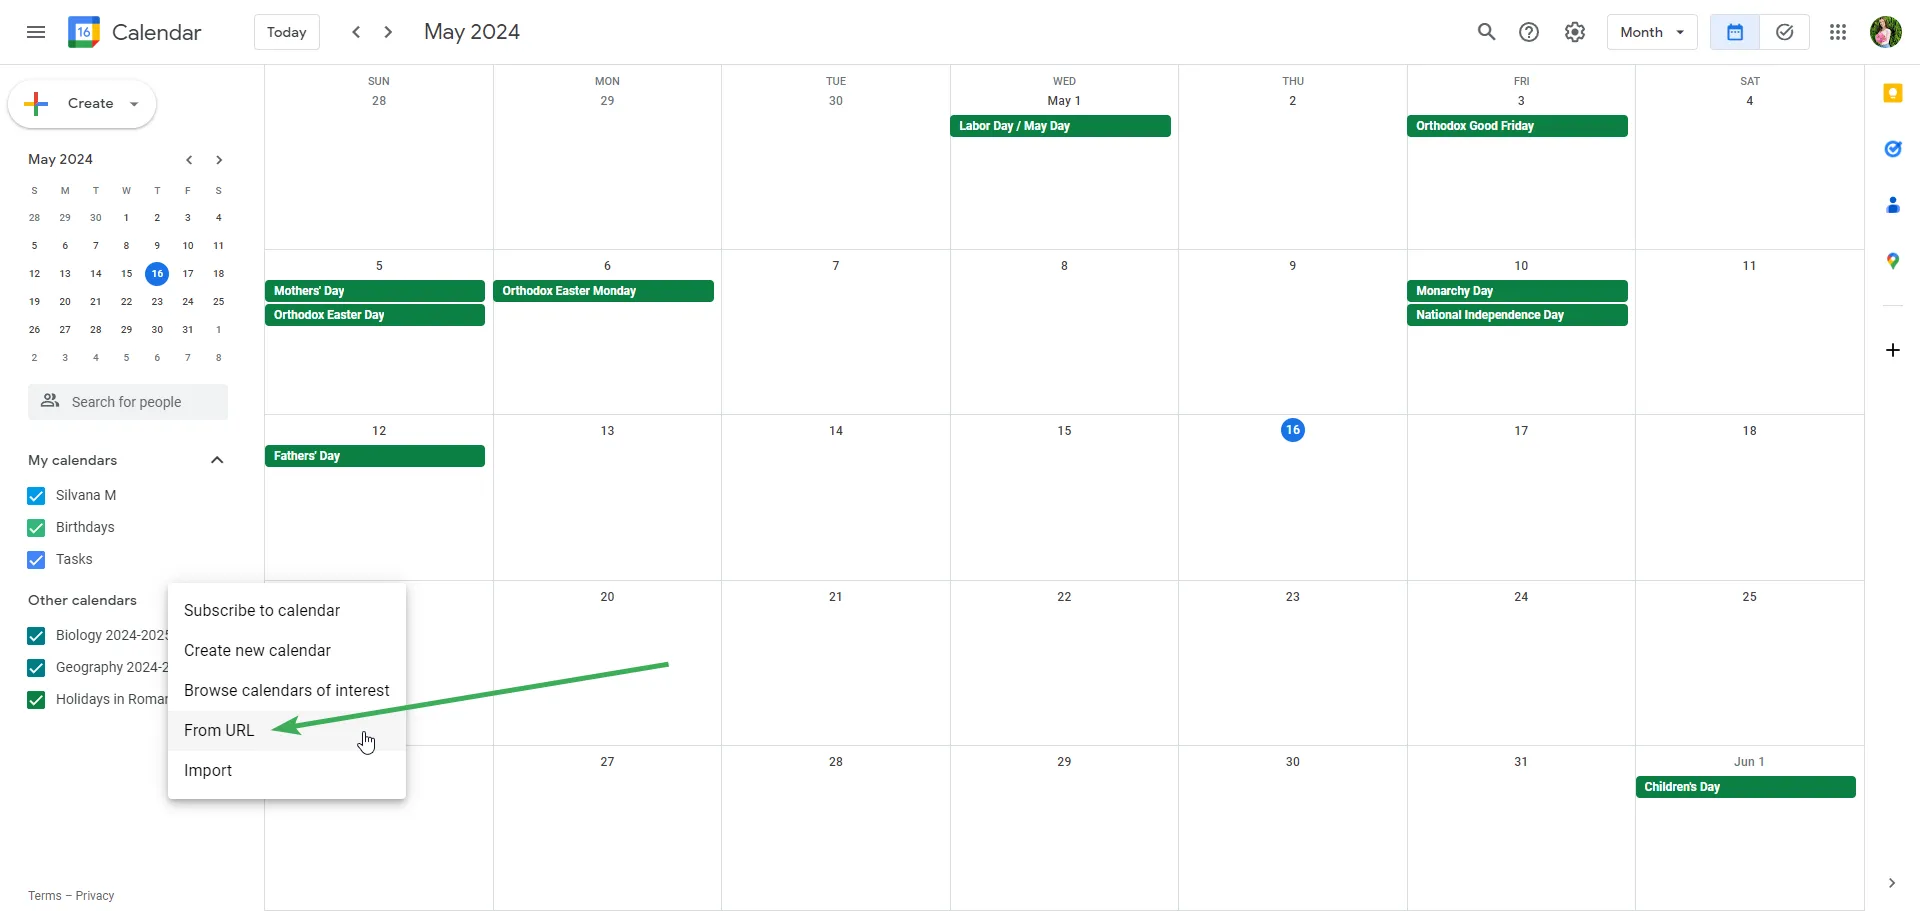
Click on From URL:
-
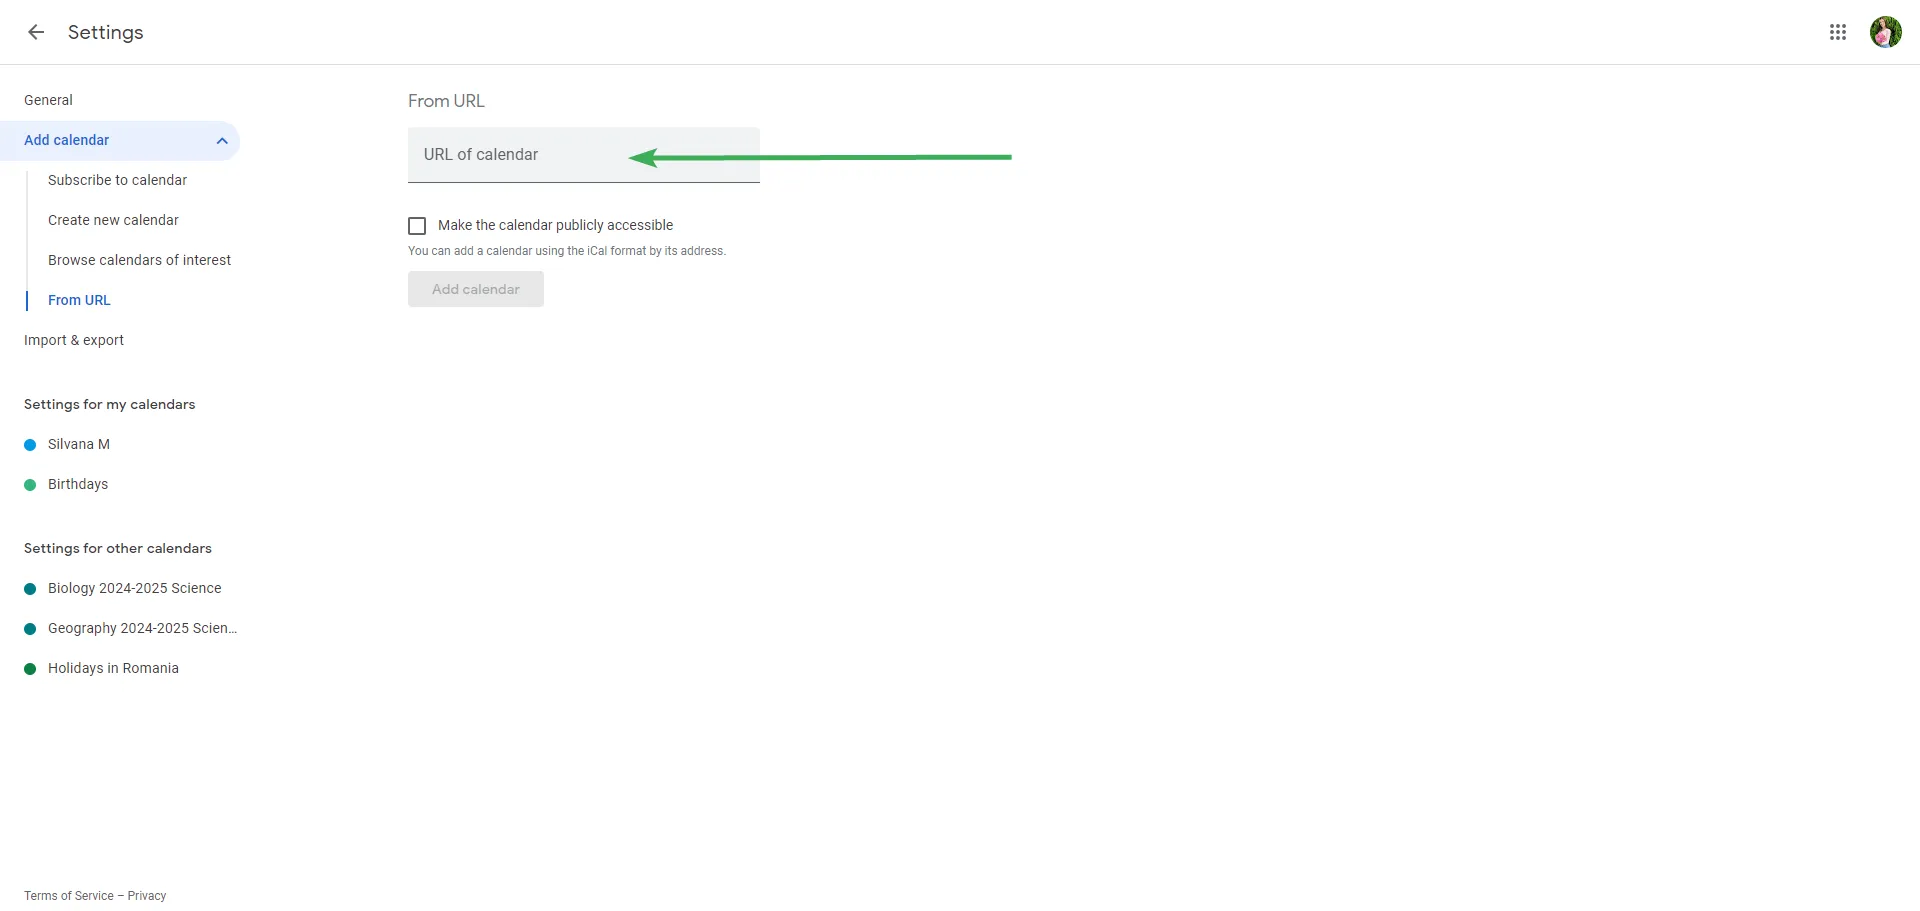
A text box will appear and you need to paste the link you’ve copied from Mindomo, then click on Add calendar.
-
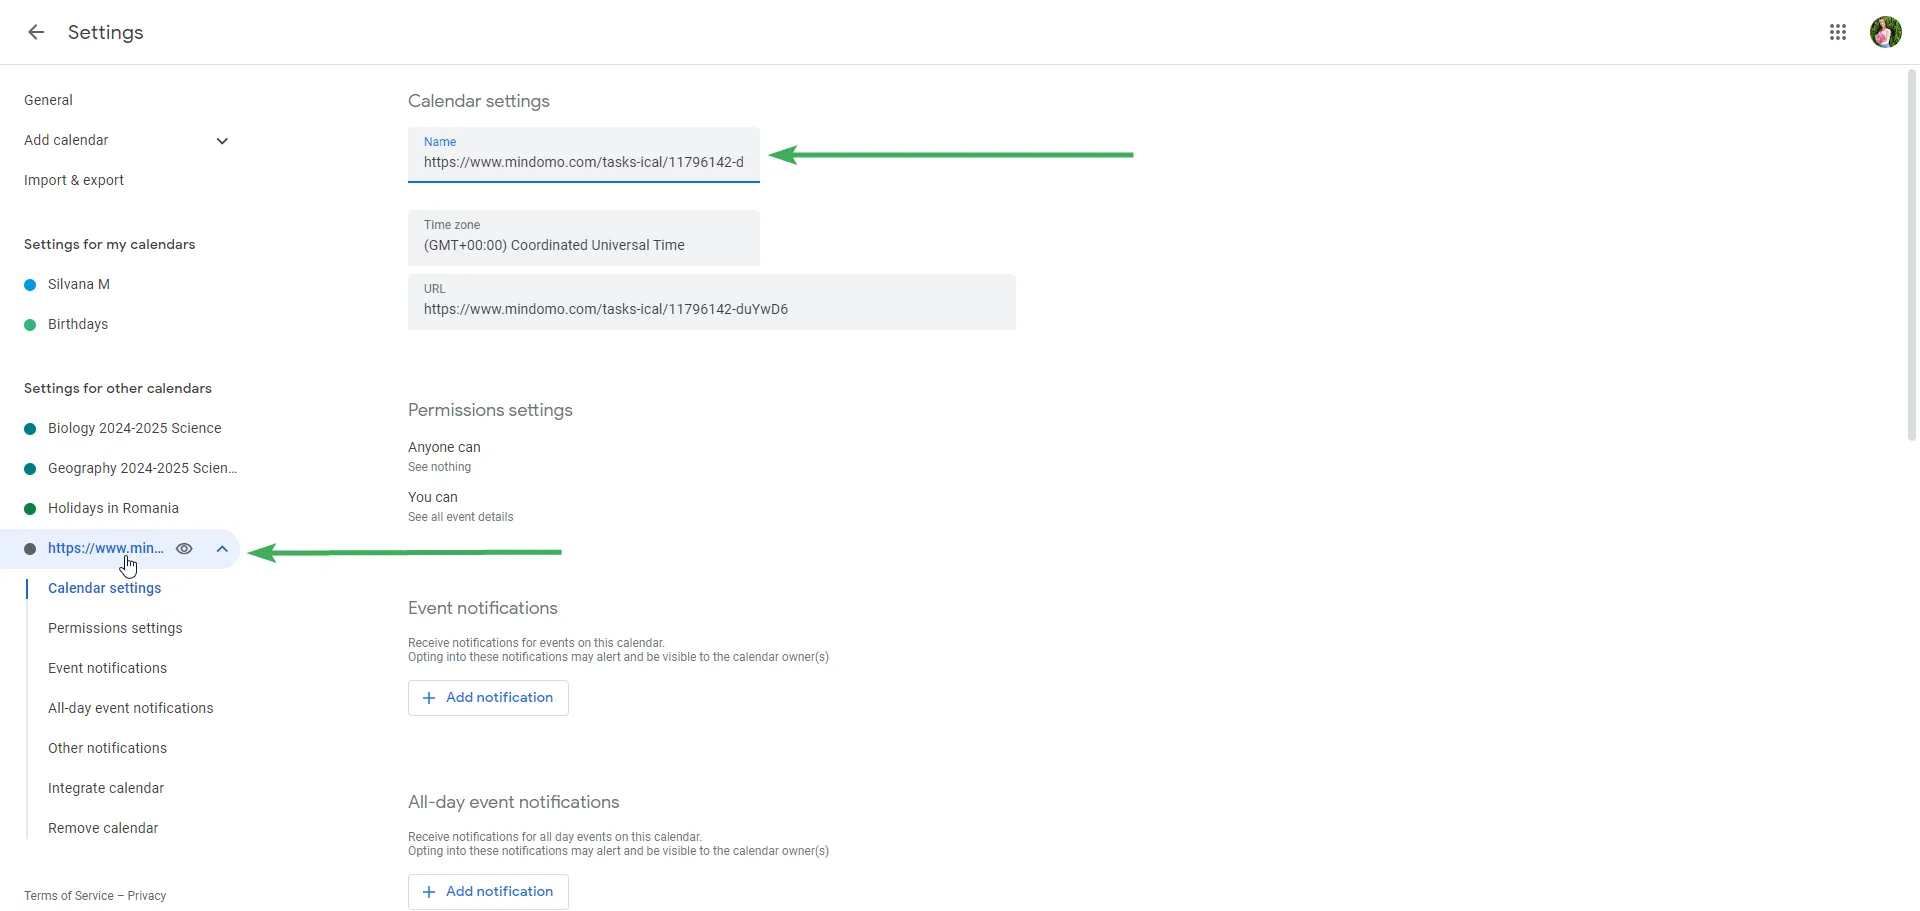
After you paste the link, you will see it on the left side (on Other calendars section). If you click on it you can give it a name or customize the other settings available: permissions, notifications, etc.
-
Once added, all the tasks you schedule in Mindomo will be synced on your Google calendar.
Recurring tasks
Section titled “Recurring tasks”To set a recurring task, go to Task menu -> End Date -> “Doesn’t repeat” option.
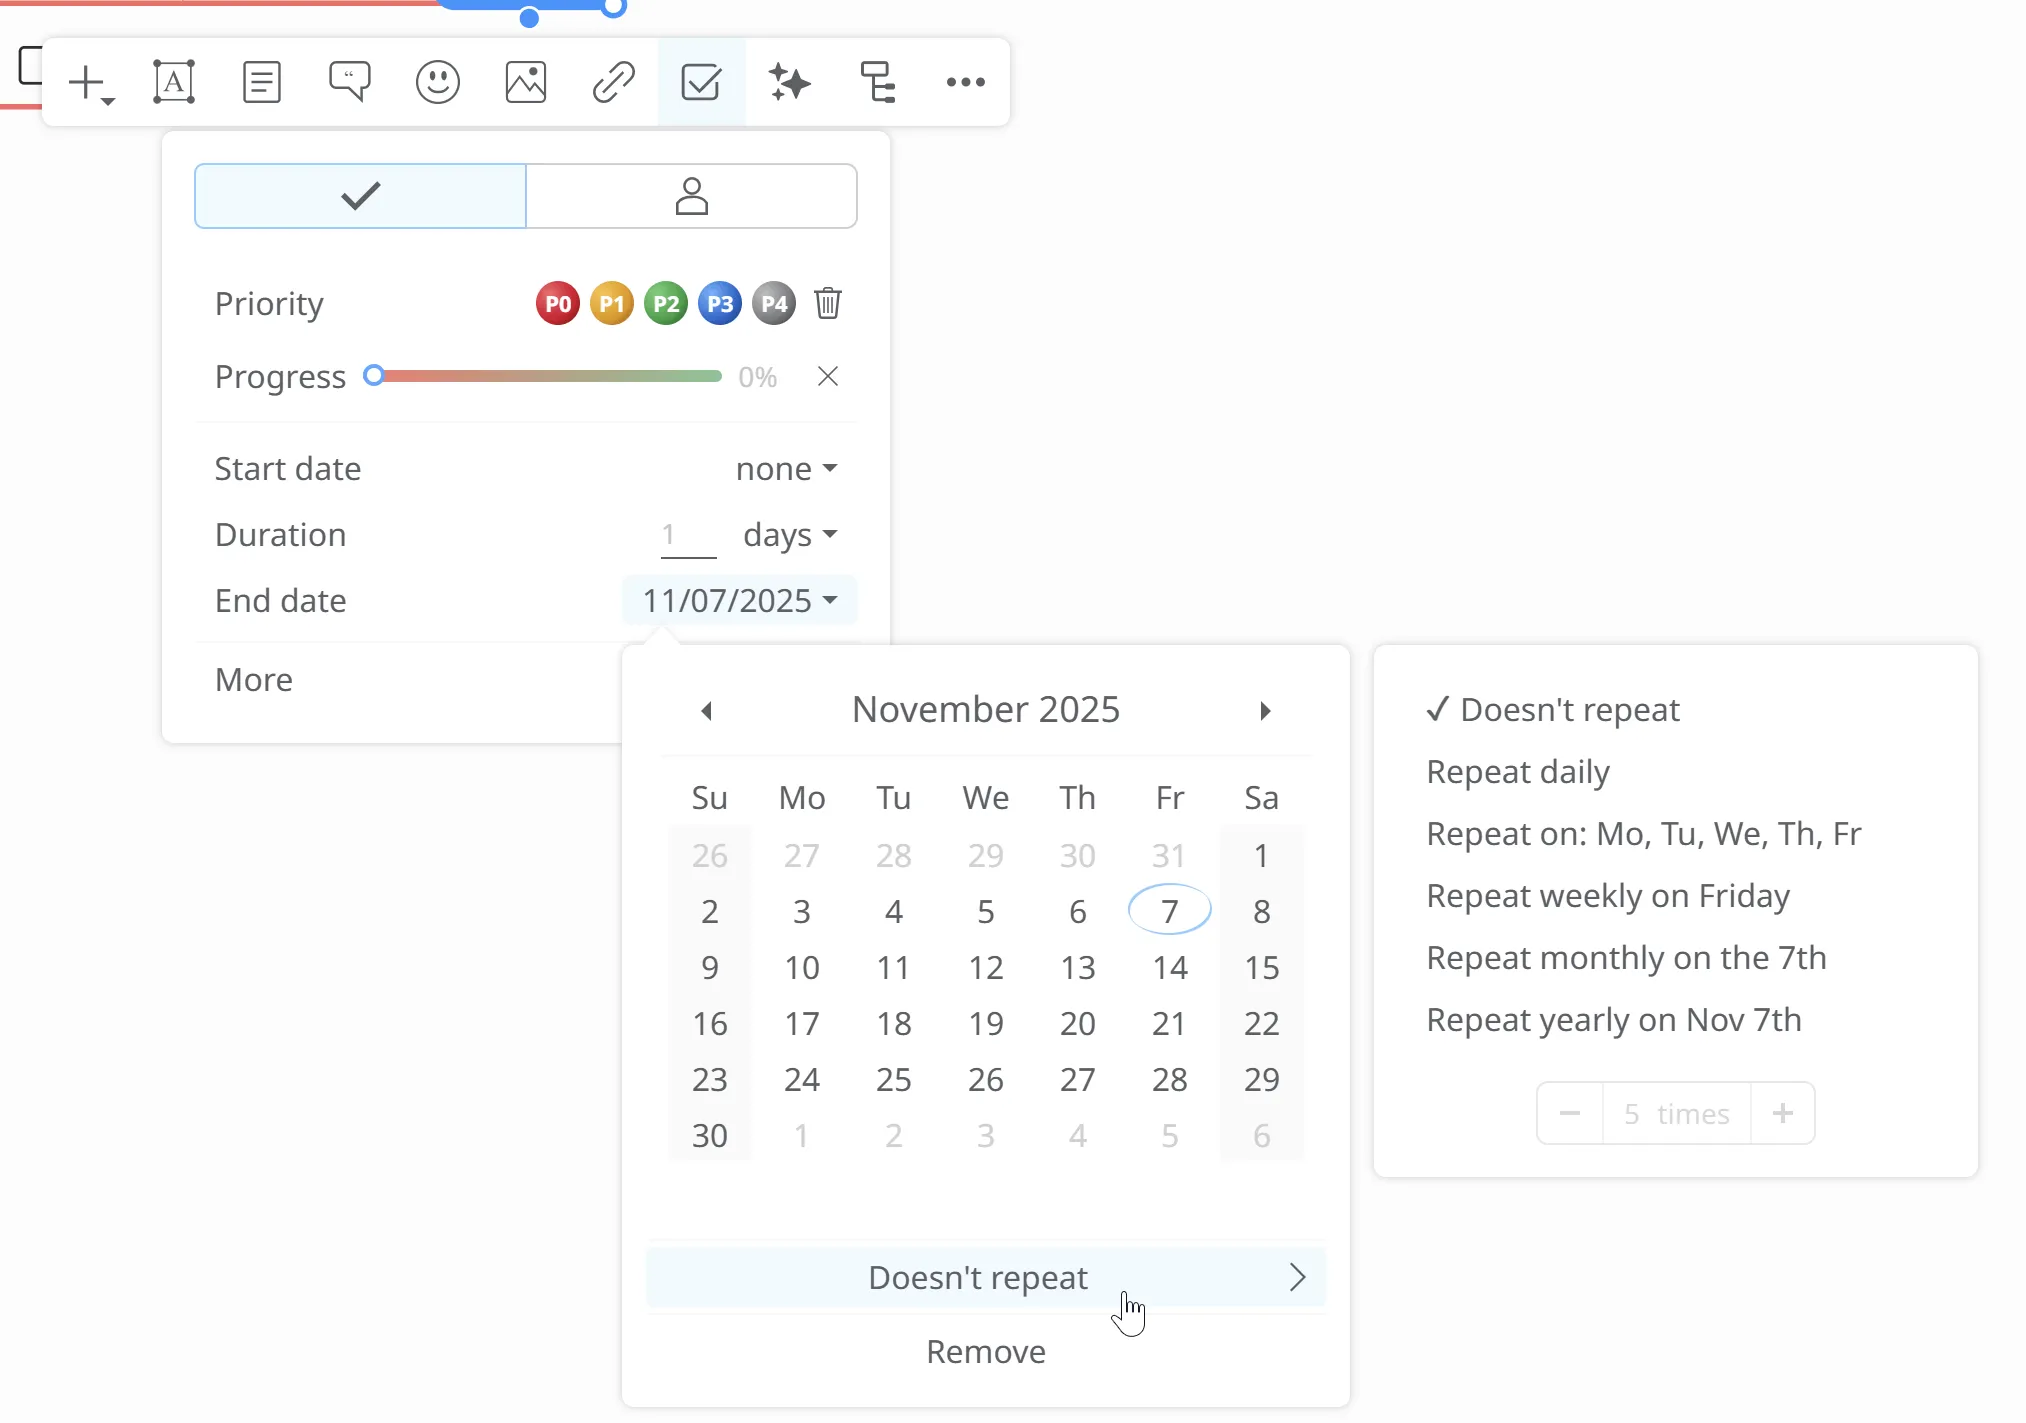
Select the date when your recurring task should start — for example, November 14, 2025. From the drop-down menu, you can choose how often it repeats.
- Daily
- On working days
- Weekly
- Monthly
- Yearly
To change the default settings of the working days click on the File list menu from the top-left corner and select Map properties or directly from Task menu -> More -> Settings.
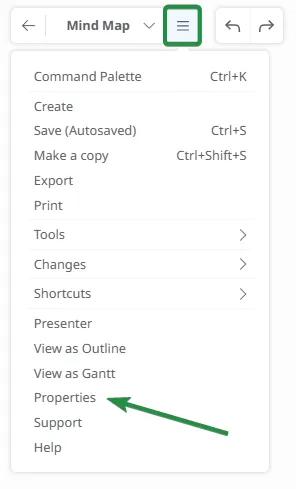
From the Map Properties panel select Task options and choose the days you would like to set as workdays, and click OK.
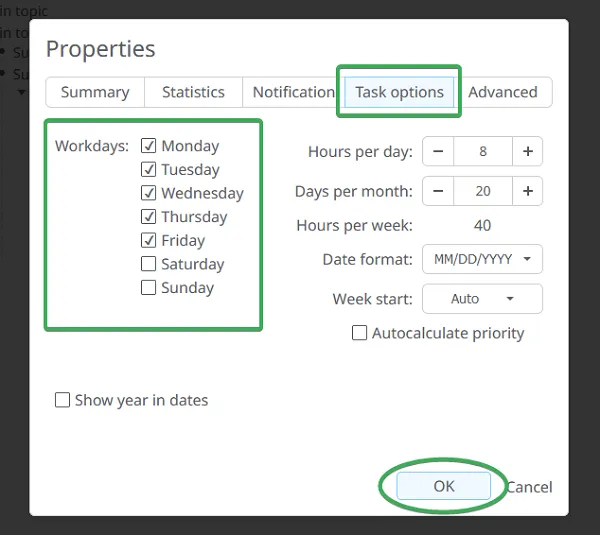
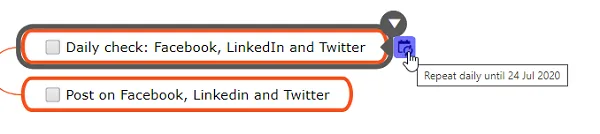
Recurring tasks will have a different icon and you can see the frequency of repetition of a task if you hover over it.