Team administration
Each team license has a default team admin, who can add or delete users, add other admins depending on the project they are currently working on, personalize the settings of the team account, etc. By default, the team admin is the person who originally purchased the license.
Add team members
Section titled “Add team members”-
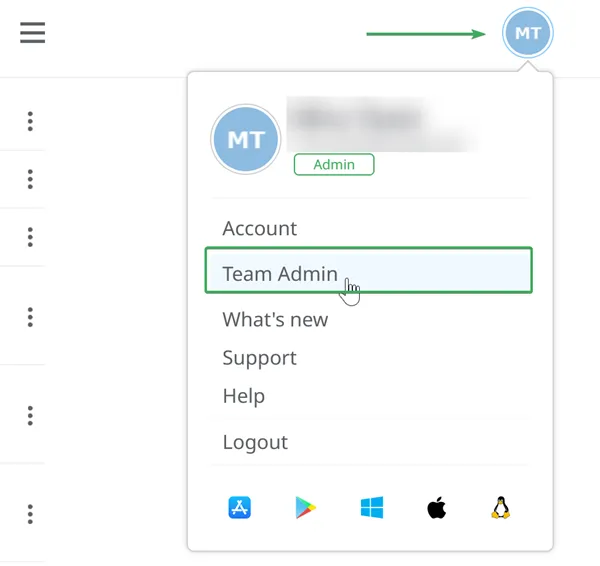
Access the Team Admin panel.
-
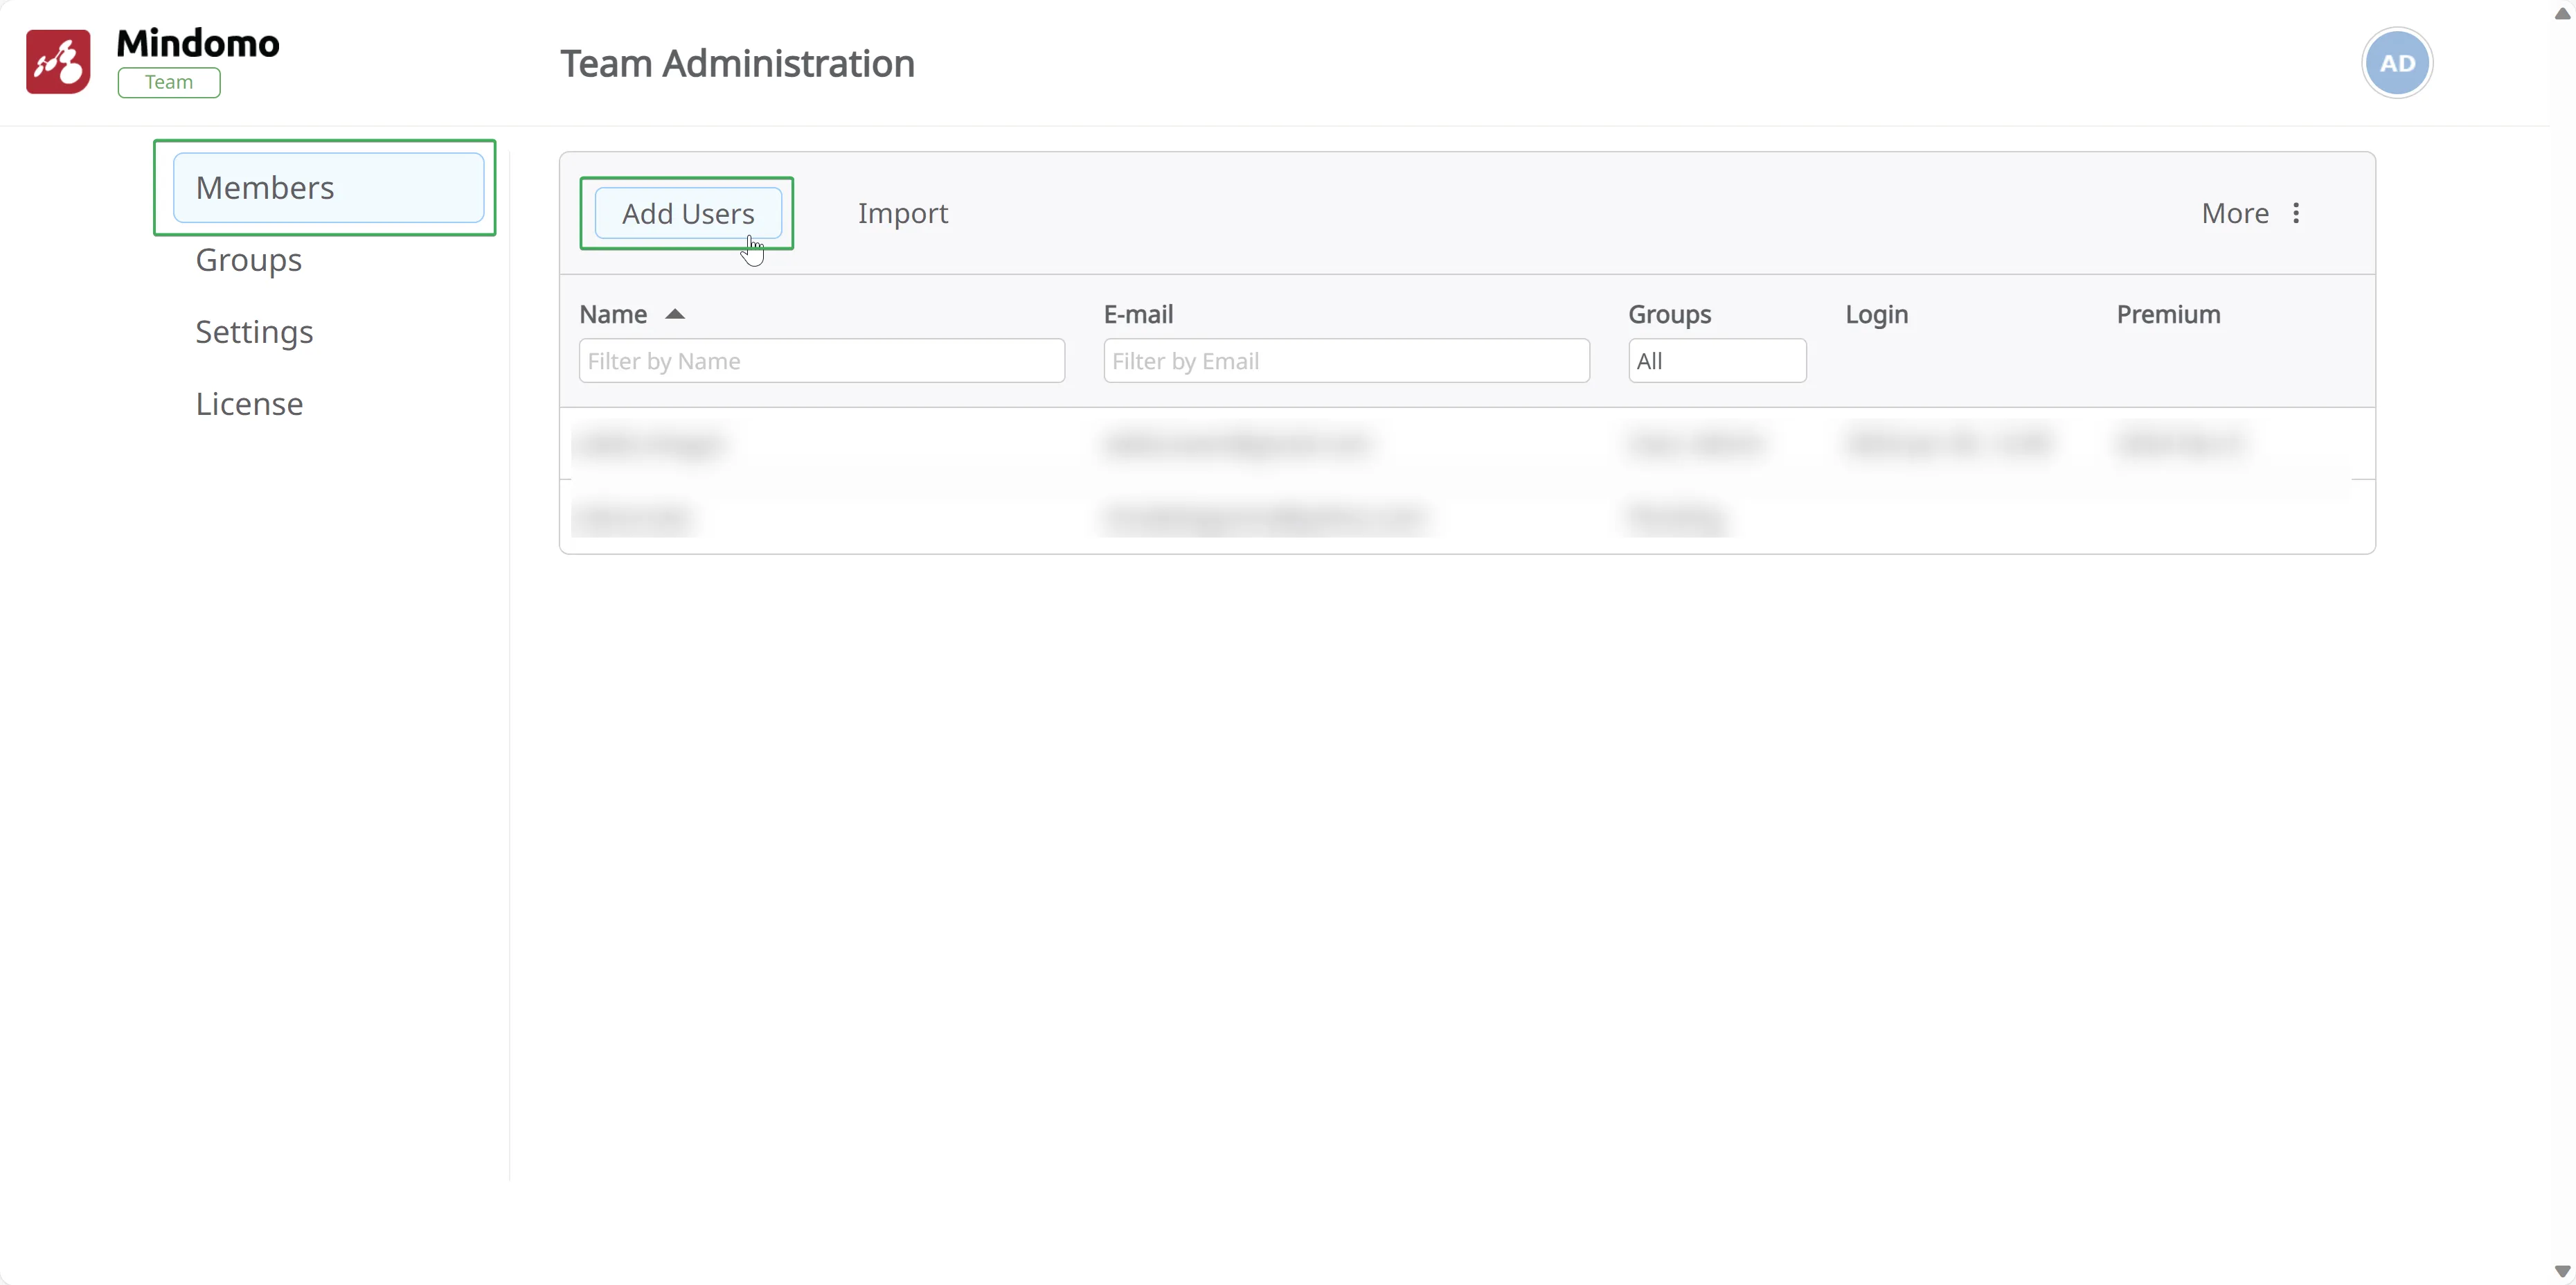
Click on the Add User button. This opens a pop-up box where you need to type in the email address of the user you want to add to your license.

-
Type in the email address, then click on Invite.
-
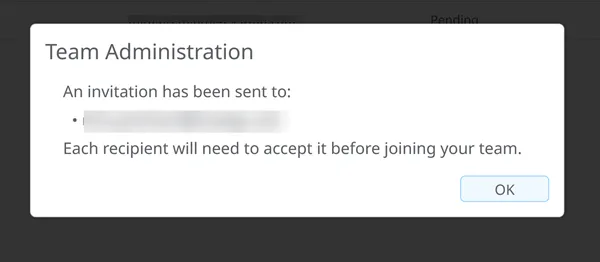
A dialog box will appear, confirming that your invitation was sent to the email address entered above.
-
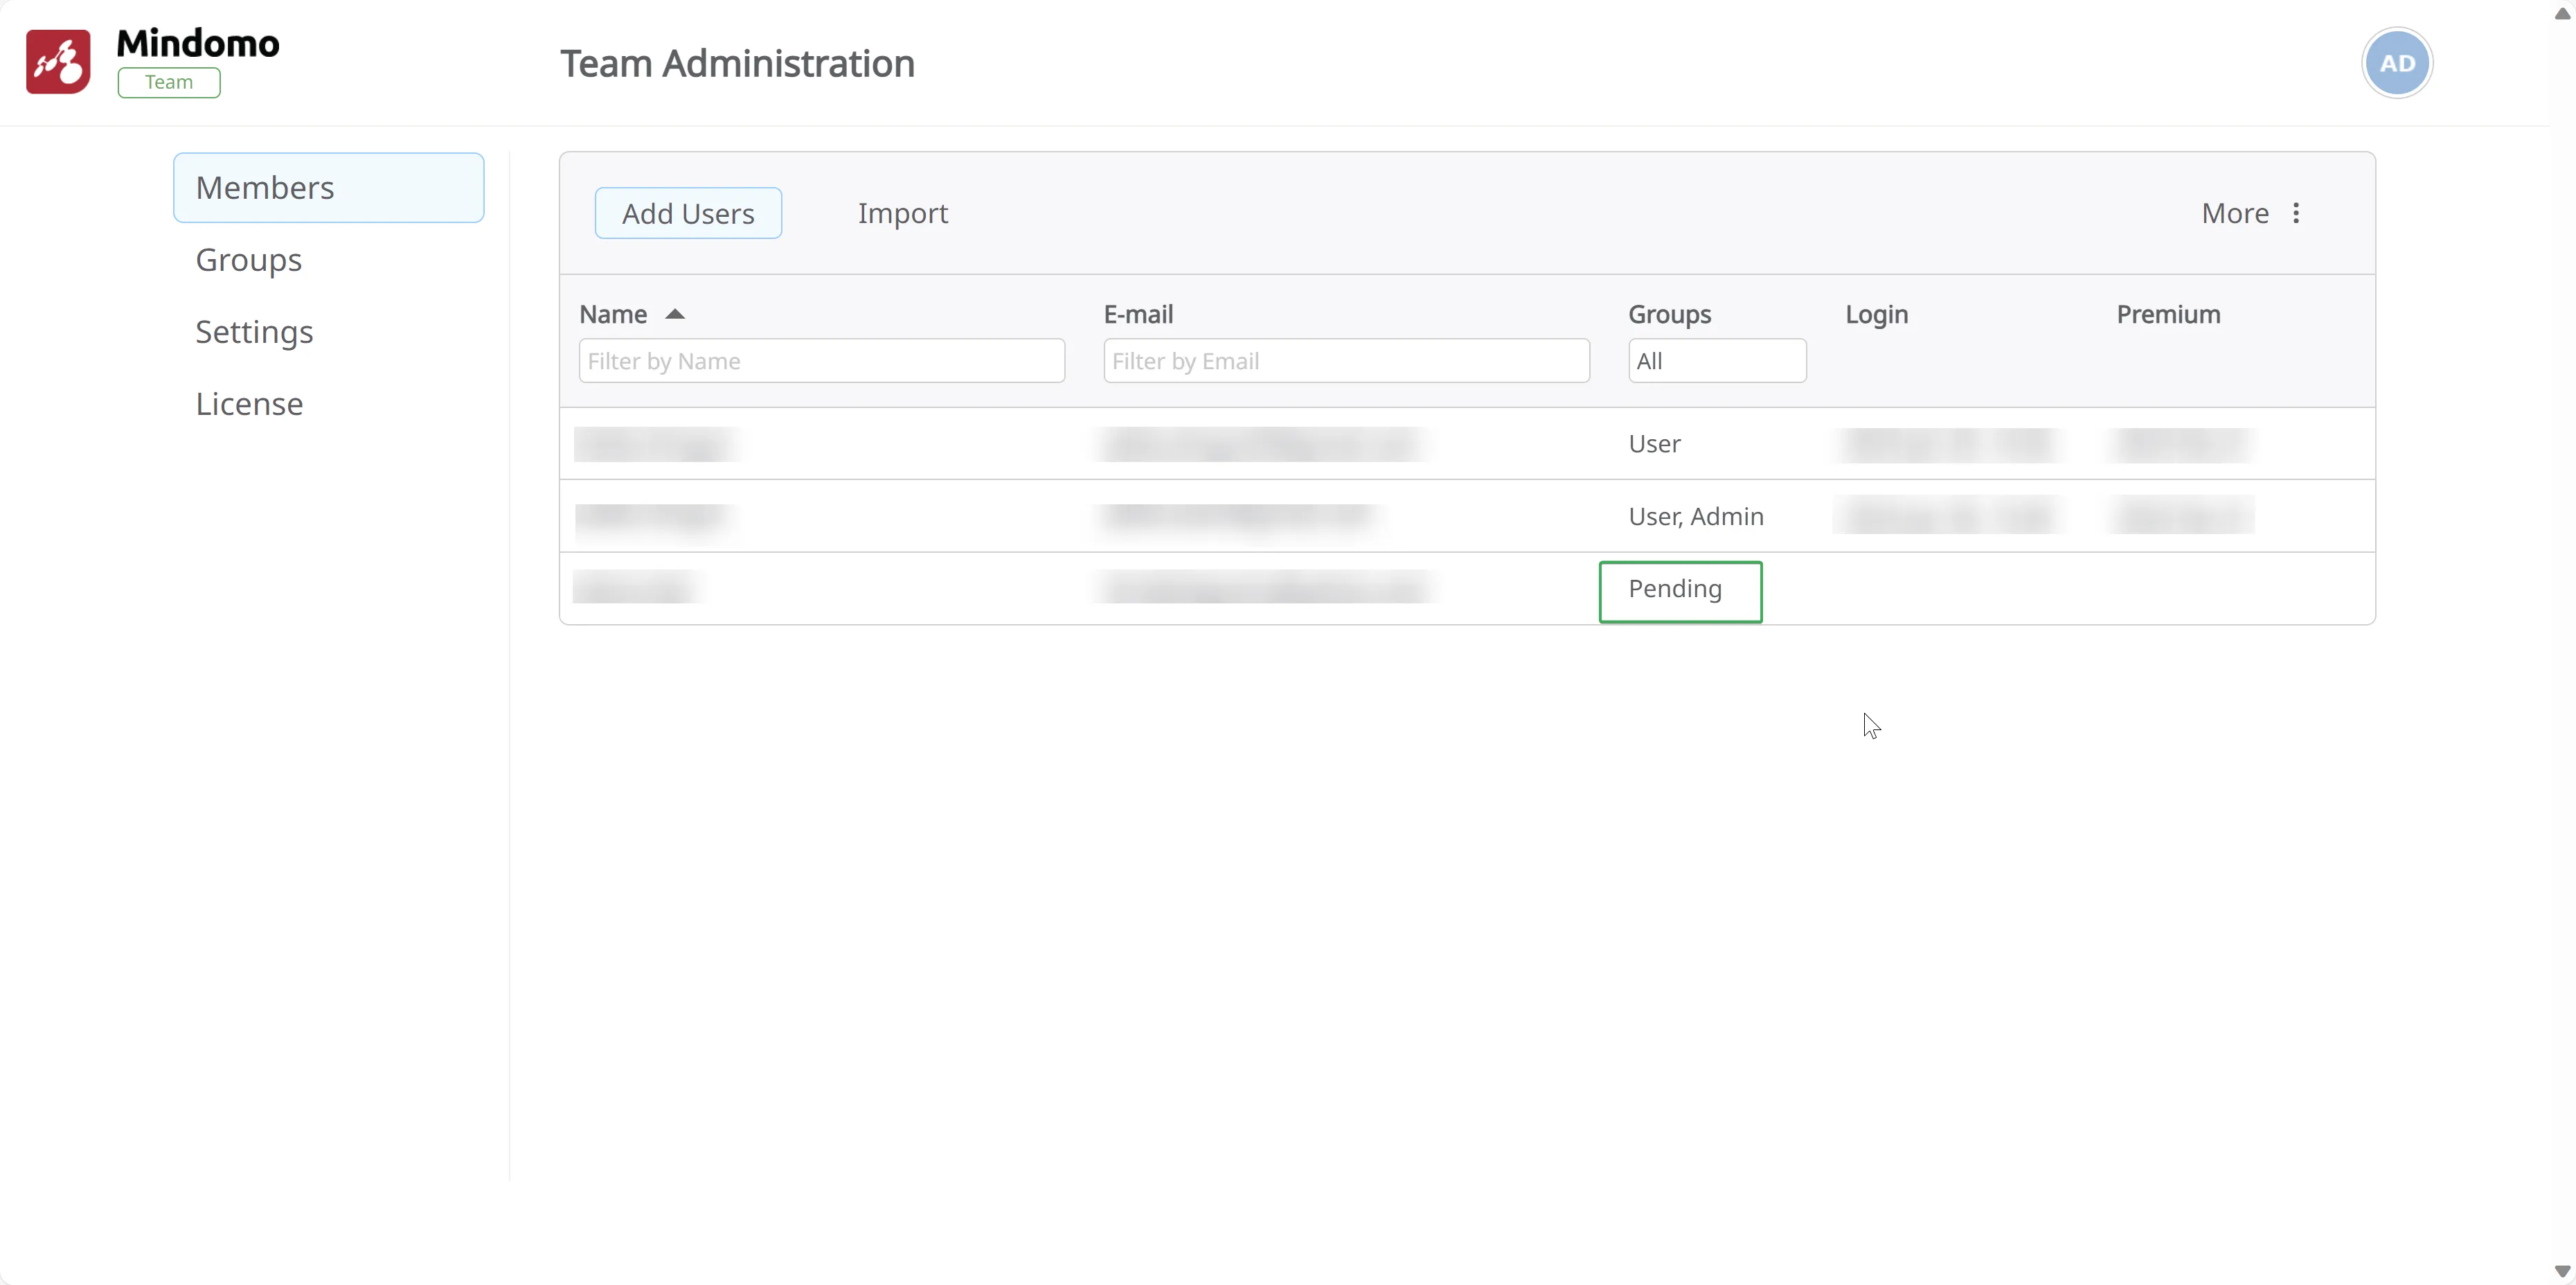
The prospective team member will then appear under the User section as Pending until they respond to the invitation by either accepting or declining it.
-
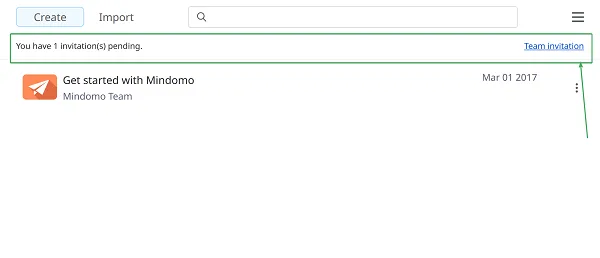
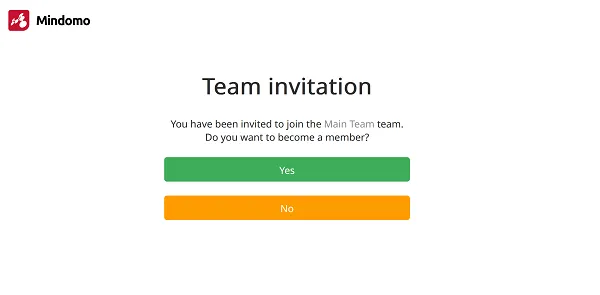
If a user already has a Mindomo account, they can accept the invitation in two ways: by clicking on the invitation link in their email, or by clicking on the Accept invitation prompt on their Dashboard. If the user accepts the invitation, they will automatically be added to your Team license. This will also be reflected in your Team Admin panel.
-
If a user doesn’t have a Mindomo account, they will receive the invitation link in their email. Upon clicking on the link, they will be redirected to create an account first, after which they will be added to your Team license automatically.
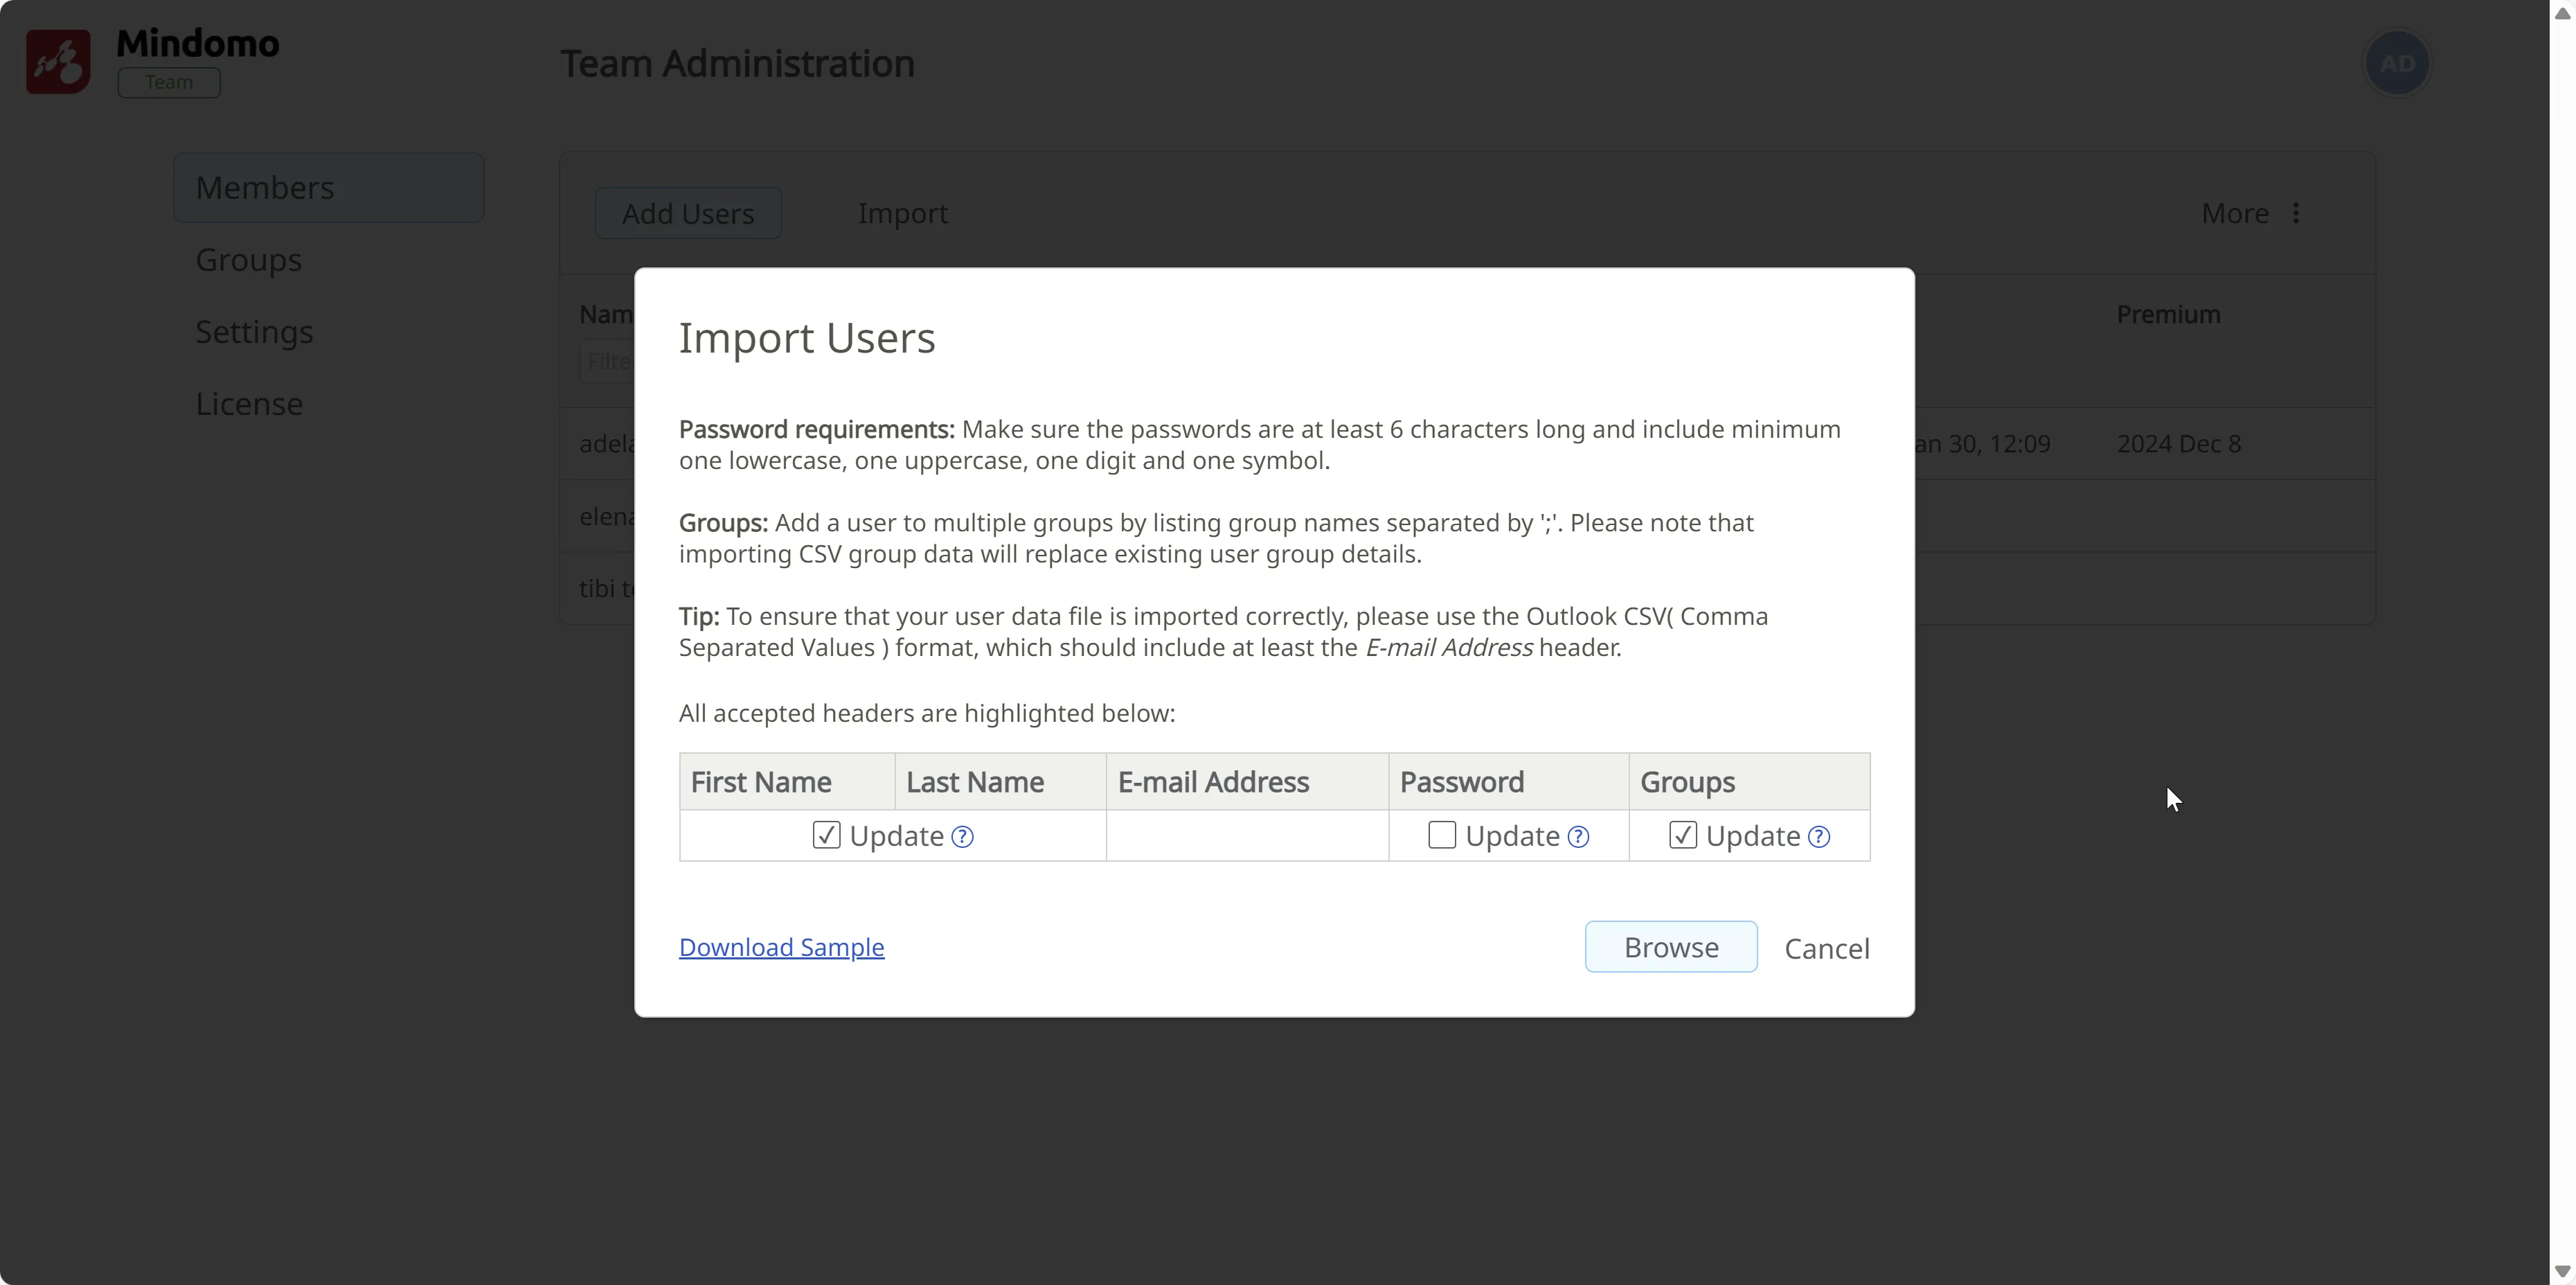
You can also easily import users to your team account from a .xls file.
You will see a pop-up box with specific details on how to structure the user information. Fill out your file accordingly, then click on Browse to select it.
Remove team members
Section titled “Remove team members”-
Access the Team Admin panel.
-
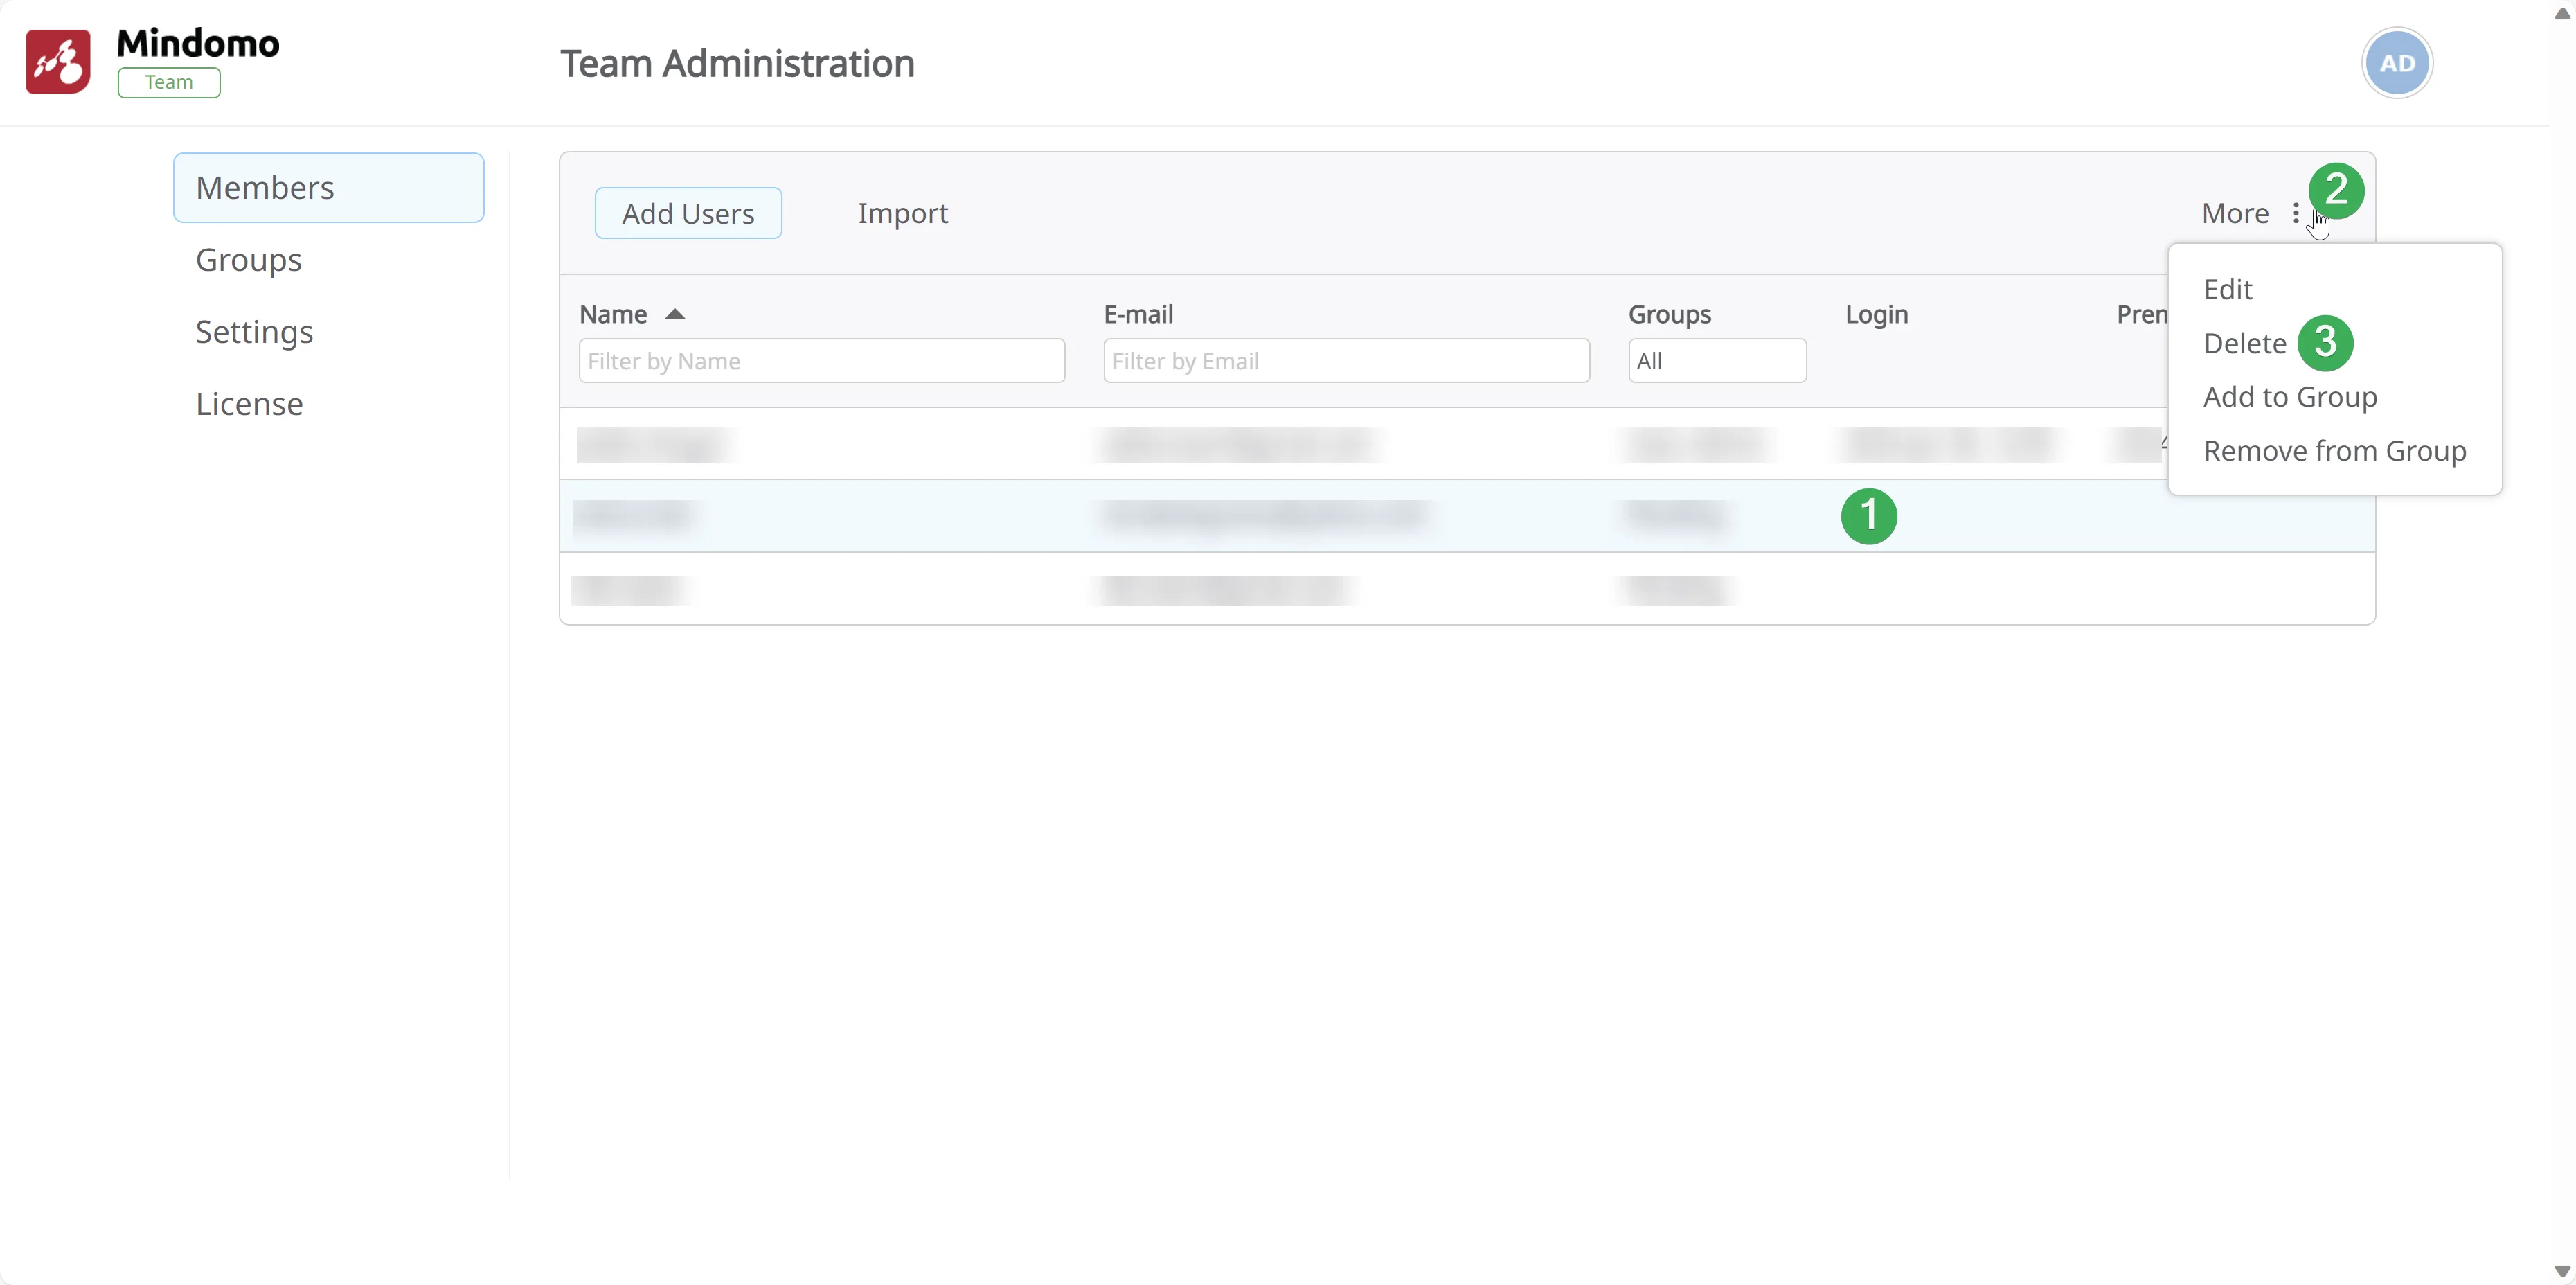
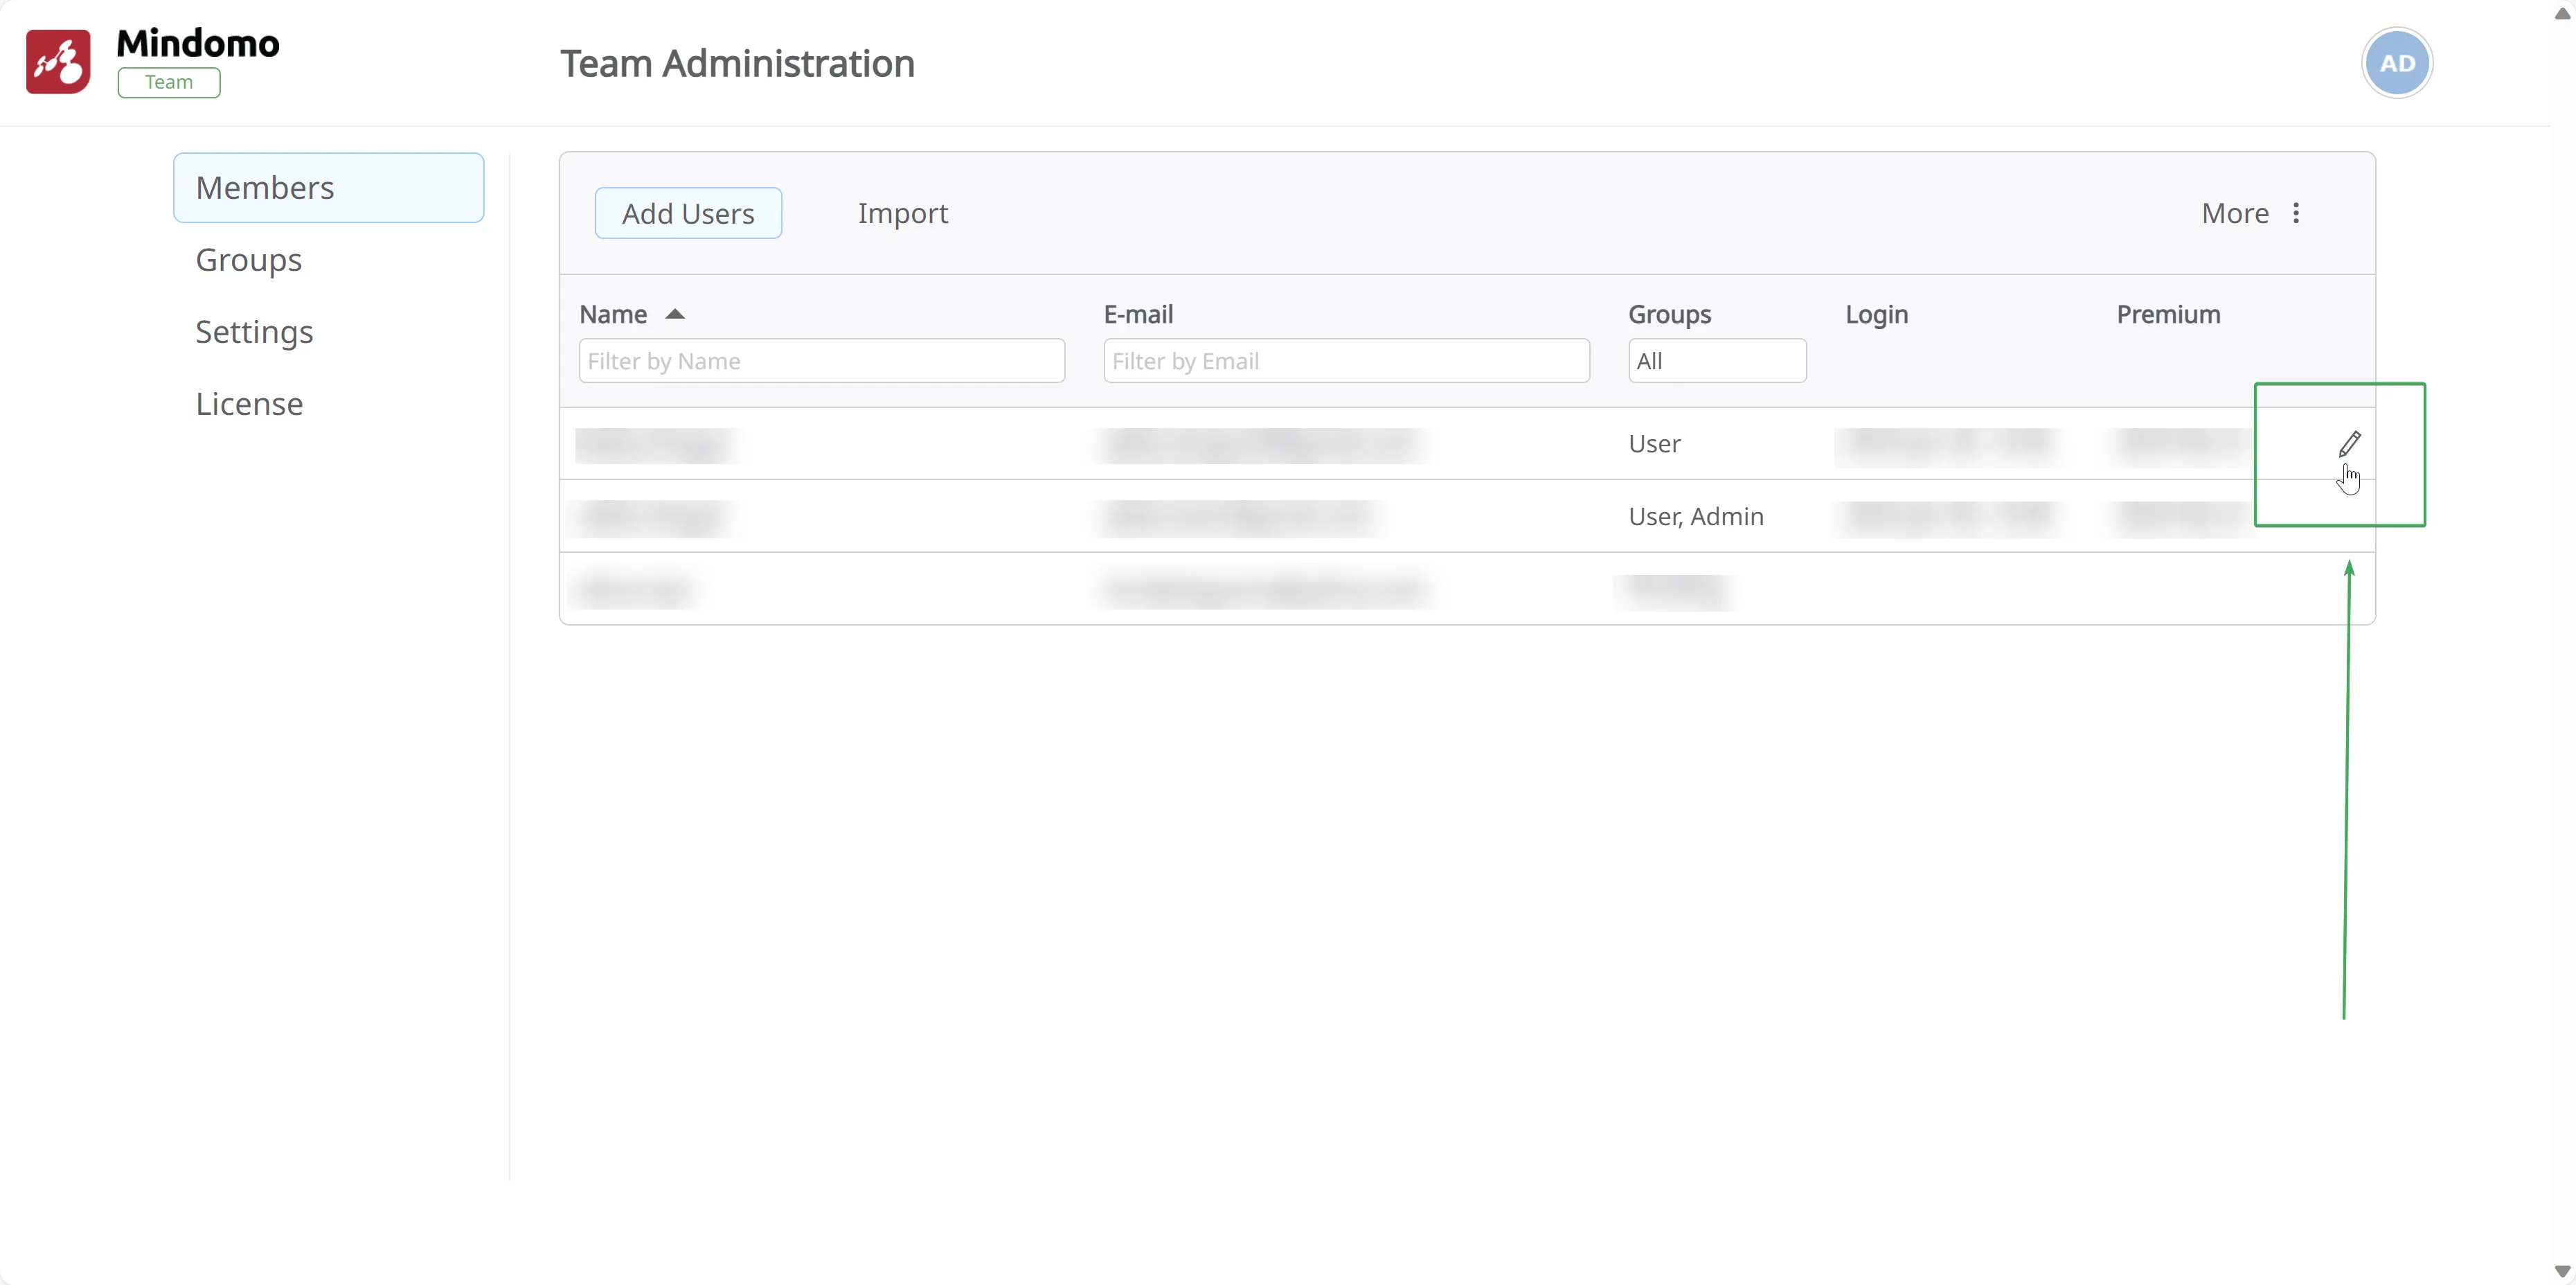
Click on the user and make sure they are highlighted. Then, click on the three-dots button labeled More at the top of the list of users and select Delete.
-
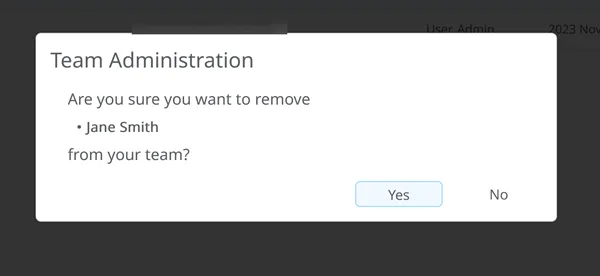
A pop-up dialog will open, asking you to confirm that you wish to delete the user. Click Yes to remove them from the license.
Add another admin
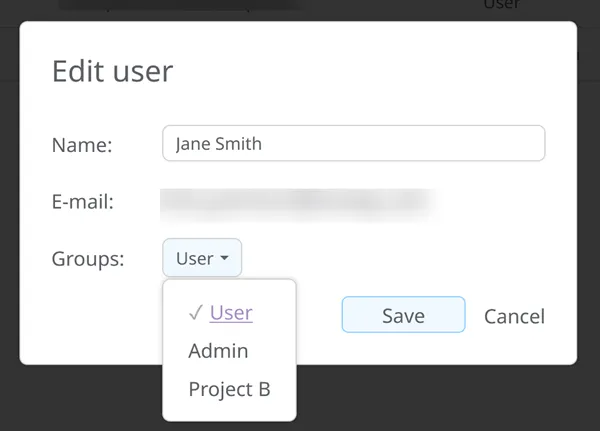
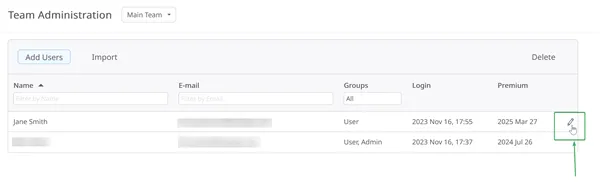
Section titled “Add another admin”Hover over the name of any user in your list and you will see an icon allowing you to update their role from user to admin.
Team groups
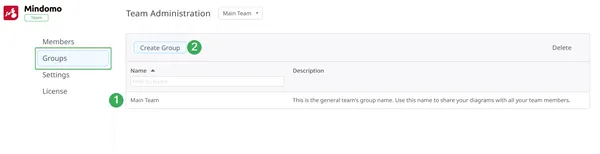
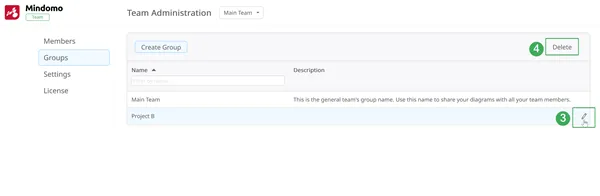
Section titled “Team groups”Each team license has a default team group (1) where all members are added automatically. You can change the name of the group by hovering next to it, but you cannot remove users from this group.
From the Team Admin panel, you can also create Team Groups. This is a great solution if you are working on separate projects with your team and want to share different mind maps with each group. Click on the Create Group button to create a new group (2).
Hover over the name of the group and you will see an edit icon that allows you to update the group name (3).
If you wish to delete a group, click on it and make sure it is highlighted. Then, click on the Delete button at the top of the list of groups (4).
To add a user to a group, go to the Members section and hover over the name of any user in your list. You will see an icon allowing you to update their role and add them to a group.
Team sharing
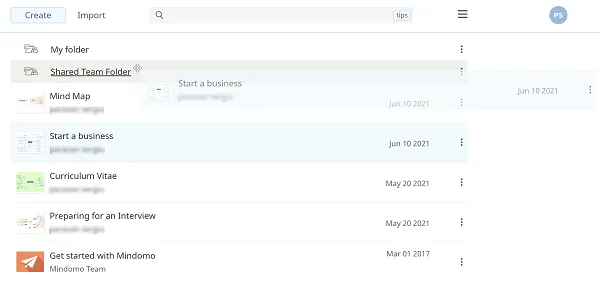
Section titled “Team sharing”Each team has one default group folder, the Shared Team Folder, which allows any team member to instantly access their colleagues’ work without additional sharing.
Any mind map created in or moved to this folder is shared with the other team members, who can view or edit it.
To move your maps to the Shared Team Folder and make them available to your colleagues, simply drag and drop them into the folder.
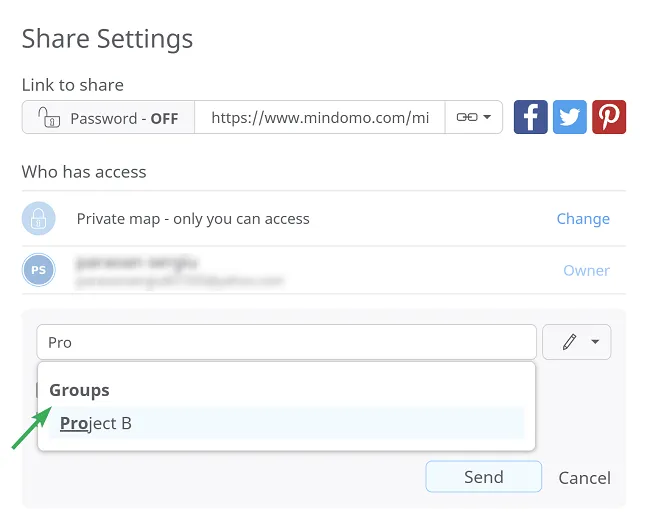
A team member can also choose to share a mind map with the team from their personal account, without using the Shared Team Folder.
Click on the mind map’s Share dialog and type in the name of your team. This acts as group sharing: each team member will have individual access to the mind map and will see it in the Shared with me folder in their own account.
Team Folders
Section titled “Team Folders”The team admin can create Team Folders and share them directly with previously created team groups.
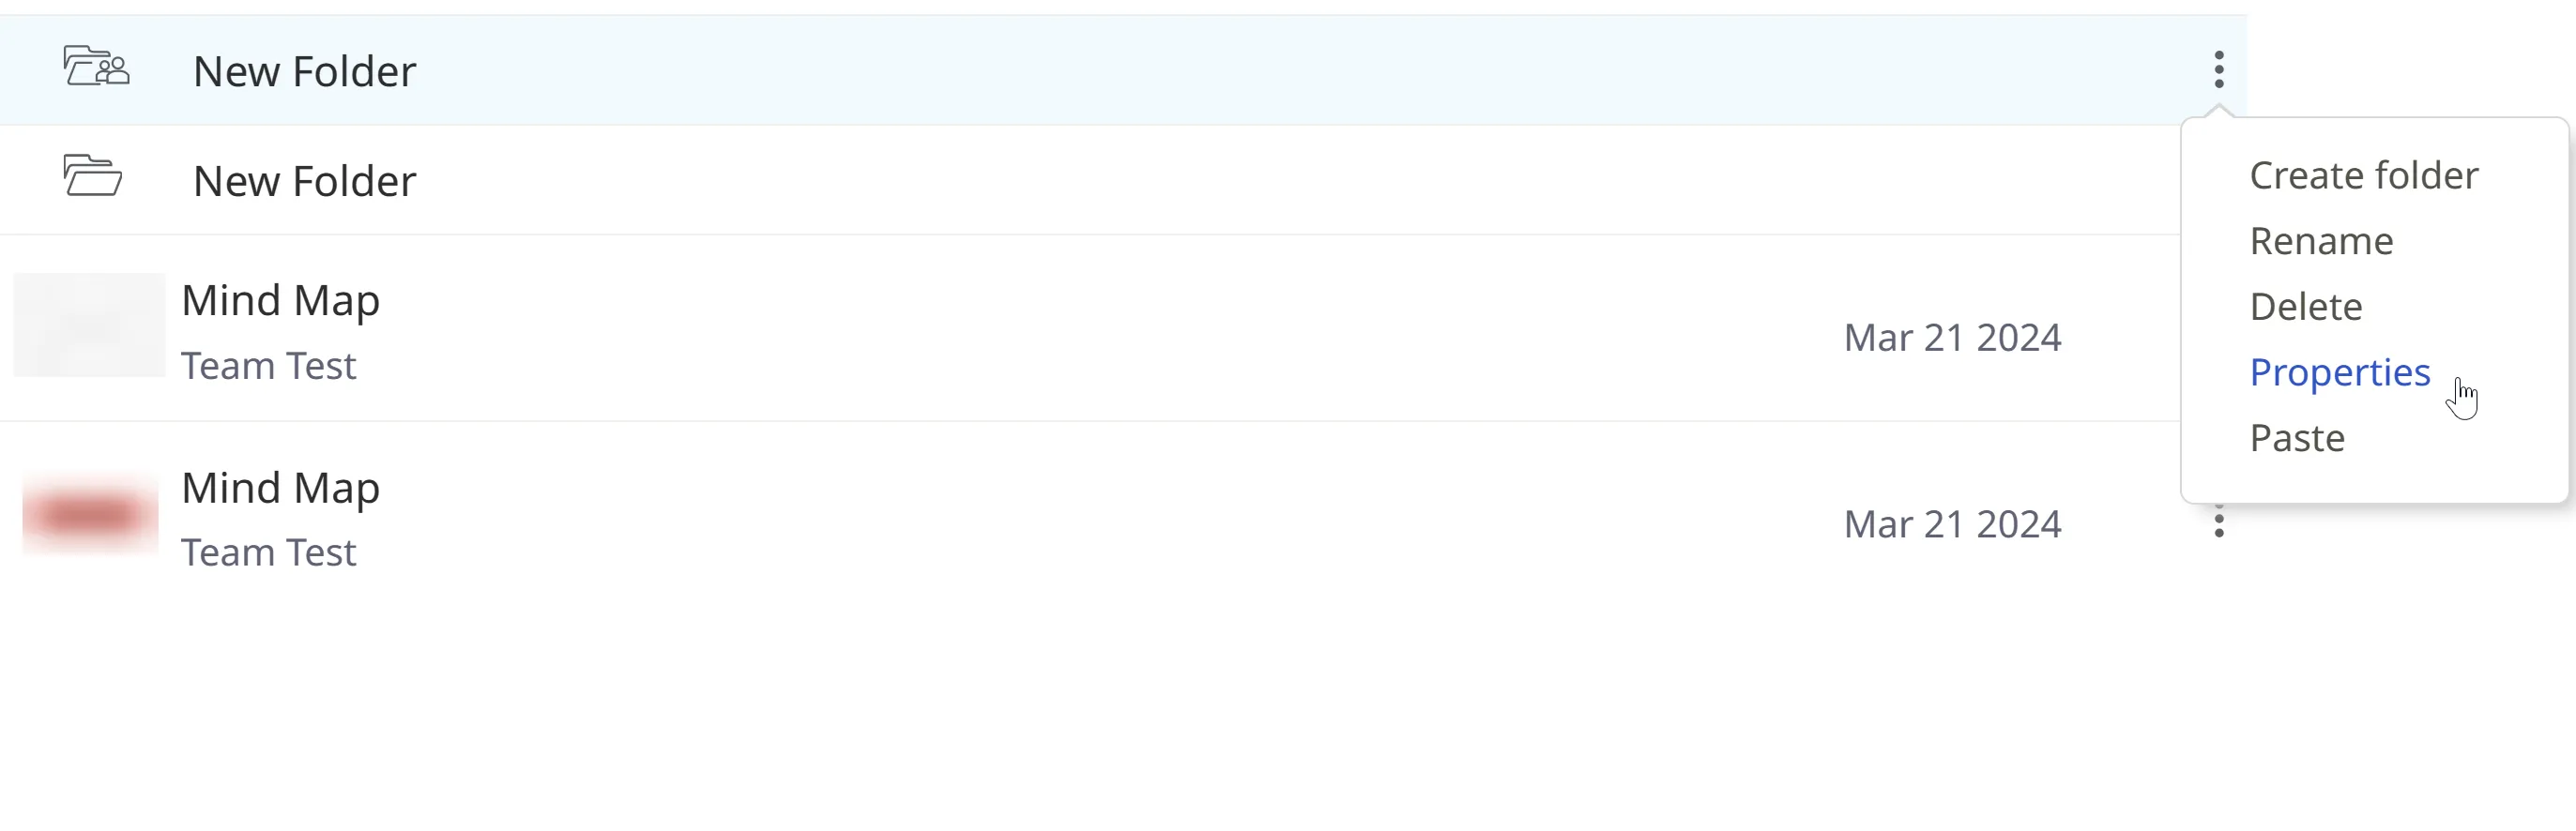
The Team Folder has the same icon as the default Shared Team Folder. Click Create from the Dashboard to create another team folder.
Add a name to your folder, then select the group you want to share it with from the drop-down menu. You can also choose the access rights you want to give to members who have access to this folder.

You can change the rights later from the Dashboard by accessing the Properties panel. You can also switch the folder type to private by choosing the option to share it with Nobody.
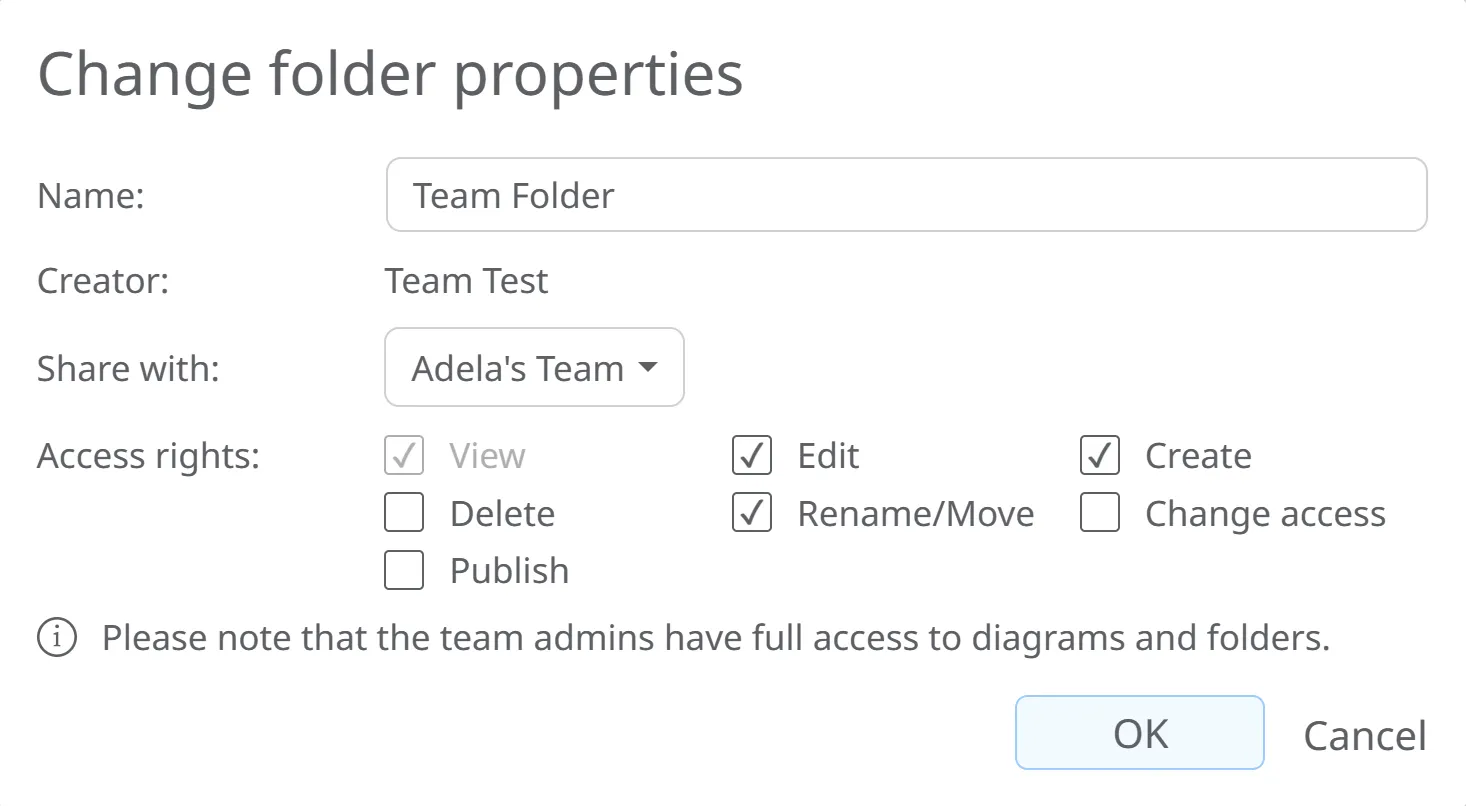
- View: Users can view diagrams without editing capabilities.
- Edit: Users can edit diagrams.
- Create: Users can create diagrams.
- Delete: Users can delete folders, subfolders, and diagrams.
- Rename/Move: Users can rename and move folders, subfolders, and diagrams.
- Change access: Users can manage other collaborators’ diagram permissions.
- Publish: Users can change the sharing settings of diagrams.
Note: Publish rights require Change access rights to be enabled as well.
Guest editing can be enabled by anyone who has Publish rights and Change access enabled on the map.
All admins have access to all shared folders and are exempt from folder rights restrictions.
Add more users to your license
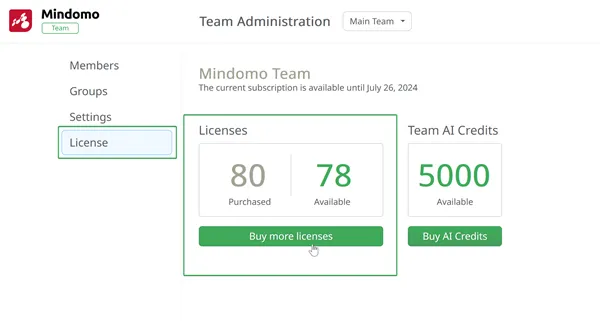
Section titled “Add more users to your license”Add users to your license from the Team Admin panel by going to the License section on the left side of the screen, then clicking on Buy more licenses.
You will be redirected to the license extension panel, where the first row displays information about your current license (number of users, availability, and expiration date), along with a drop-down menu where you can select how many users you want to add.
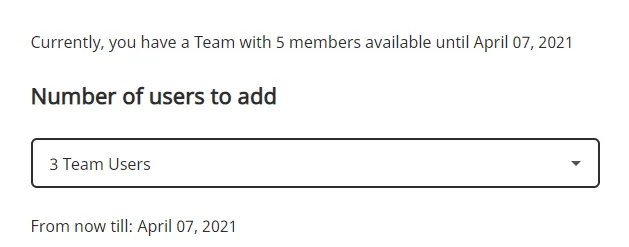
The price is calculated based on the remaining license period.
Templates for your team
Section titled “Templates for your team”You can set a diagram as a starting template for your team members, so all new mind maps start from that diagram with predefined settings.
-
Go to your Dashboard and create a diagram.
-
Personalize it, apply a theme, and set a layout. You can also add starting topics.
-
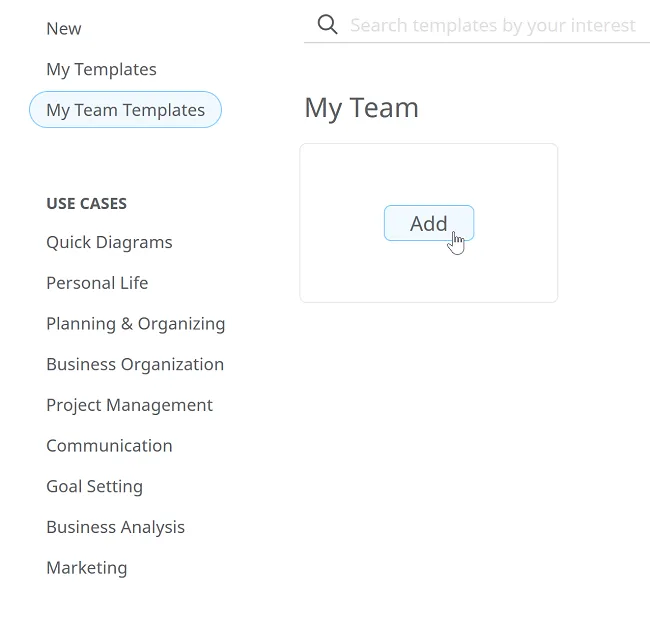
Go to the Create panel, open your team’s templates, then click Add.
-
Select the diagram and click Add as a Template.
-
Alternatively, you can add one of our templates or create your own fillable template.
-
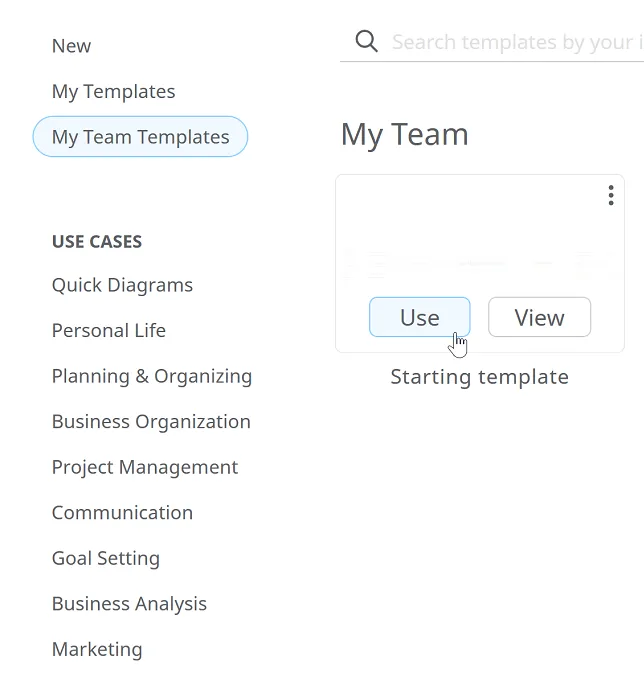
Your team members can use these templates from this section:
Two-factor authentication for Team license
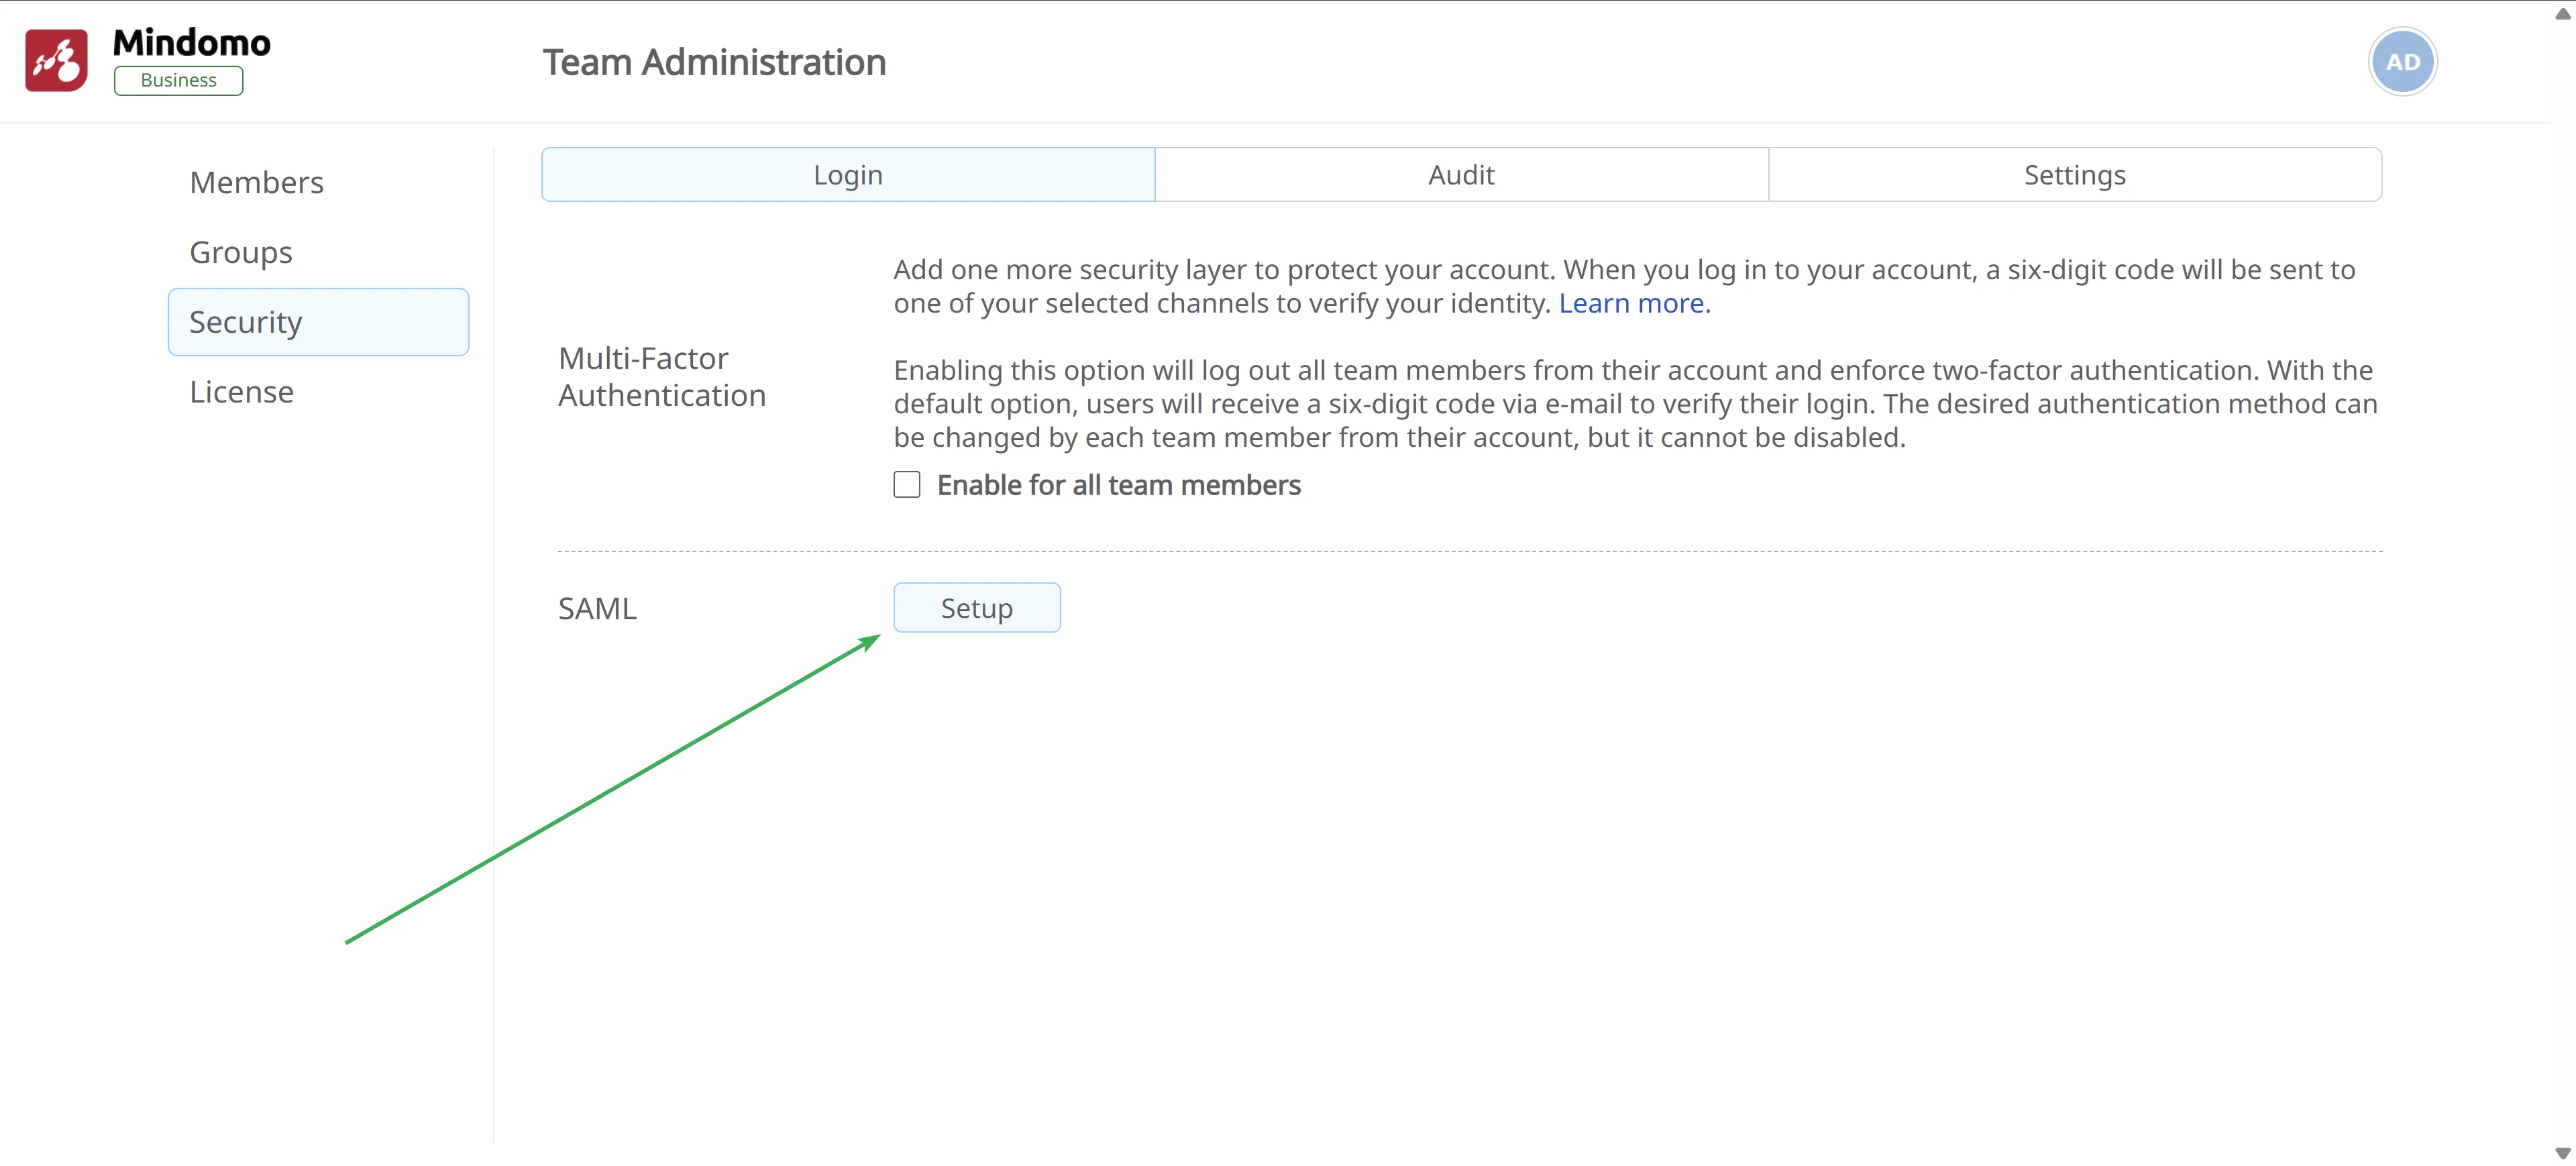
Section titled “Two-factor authentication for Team license”A Team Owner/Admin can enable two-factor authentication for all team members. Enabling this option logs out all team members and enforces two-factor authentication. Once enabled, team members cannot disable it themselves.
By default, team members receive a six-digit code via email to verify their login. They can later change the authentication method from their account, but only the Team Owner/Admin can disable the feature.
Enabling Two-factor authentication option for all Team members
Section titled “Enabling Two-factor authentication option for all Team members”To enable this option, the Team Owner/Admin should:
- Access the Team Admin panel by clicking on their initials or picture in the Dashboard, then selecting Team Admin.
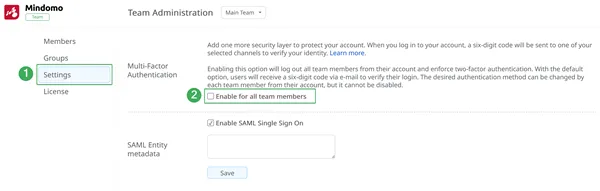
- Click on the Settings section and check the Enable for all team members box.
To disable this option, simply uncheck the Enable for all team members box.
Business features
Section titled “Business features”Advanced security features are available in the Team Administration section by upgrading your Team license to a Business plan.
Upgrading unlocks SAML SSO, access to the Audit panel, and advanced security options.
Audit Logs
Section titled “Audit Logs”The Audit panel provides detailed information about your team’s activities. Click Choose a team member to view the user list.
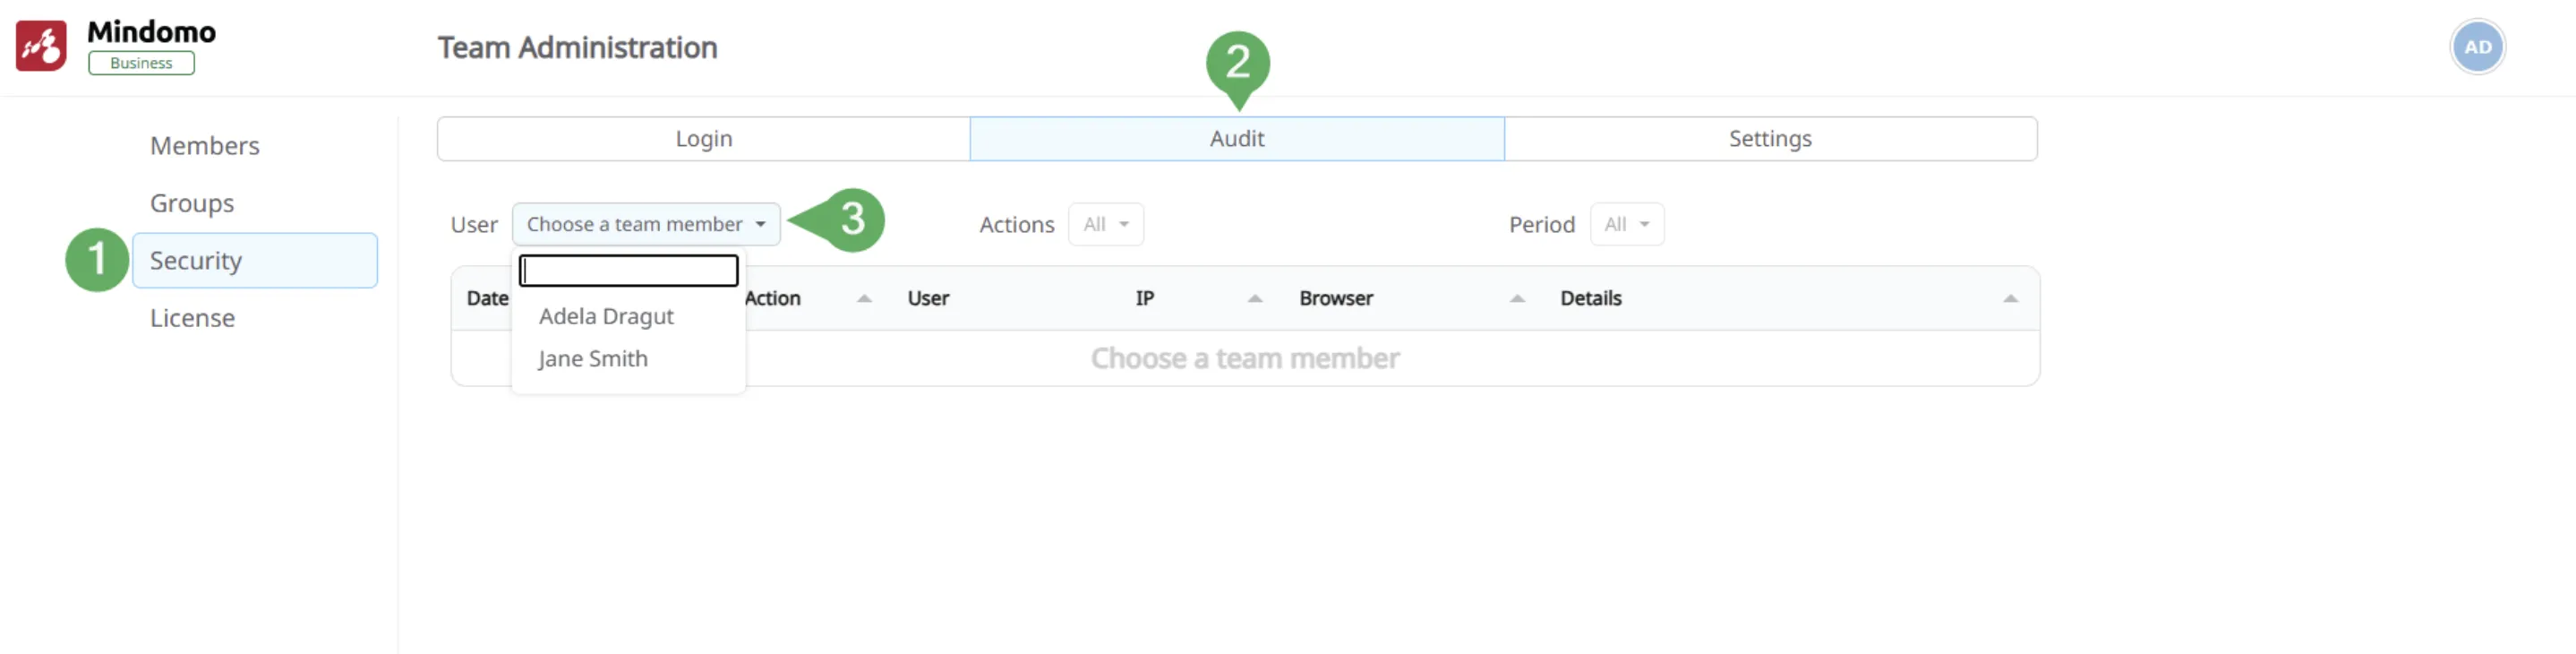
After selecting a user, you can view details such as date (1), action type (2), user name (3), IP address (4), browser type (5), and a description (6) of the action.
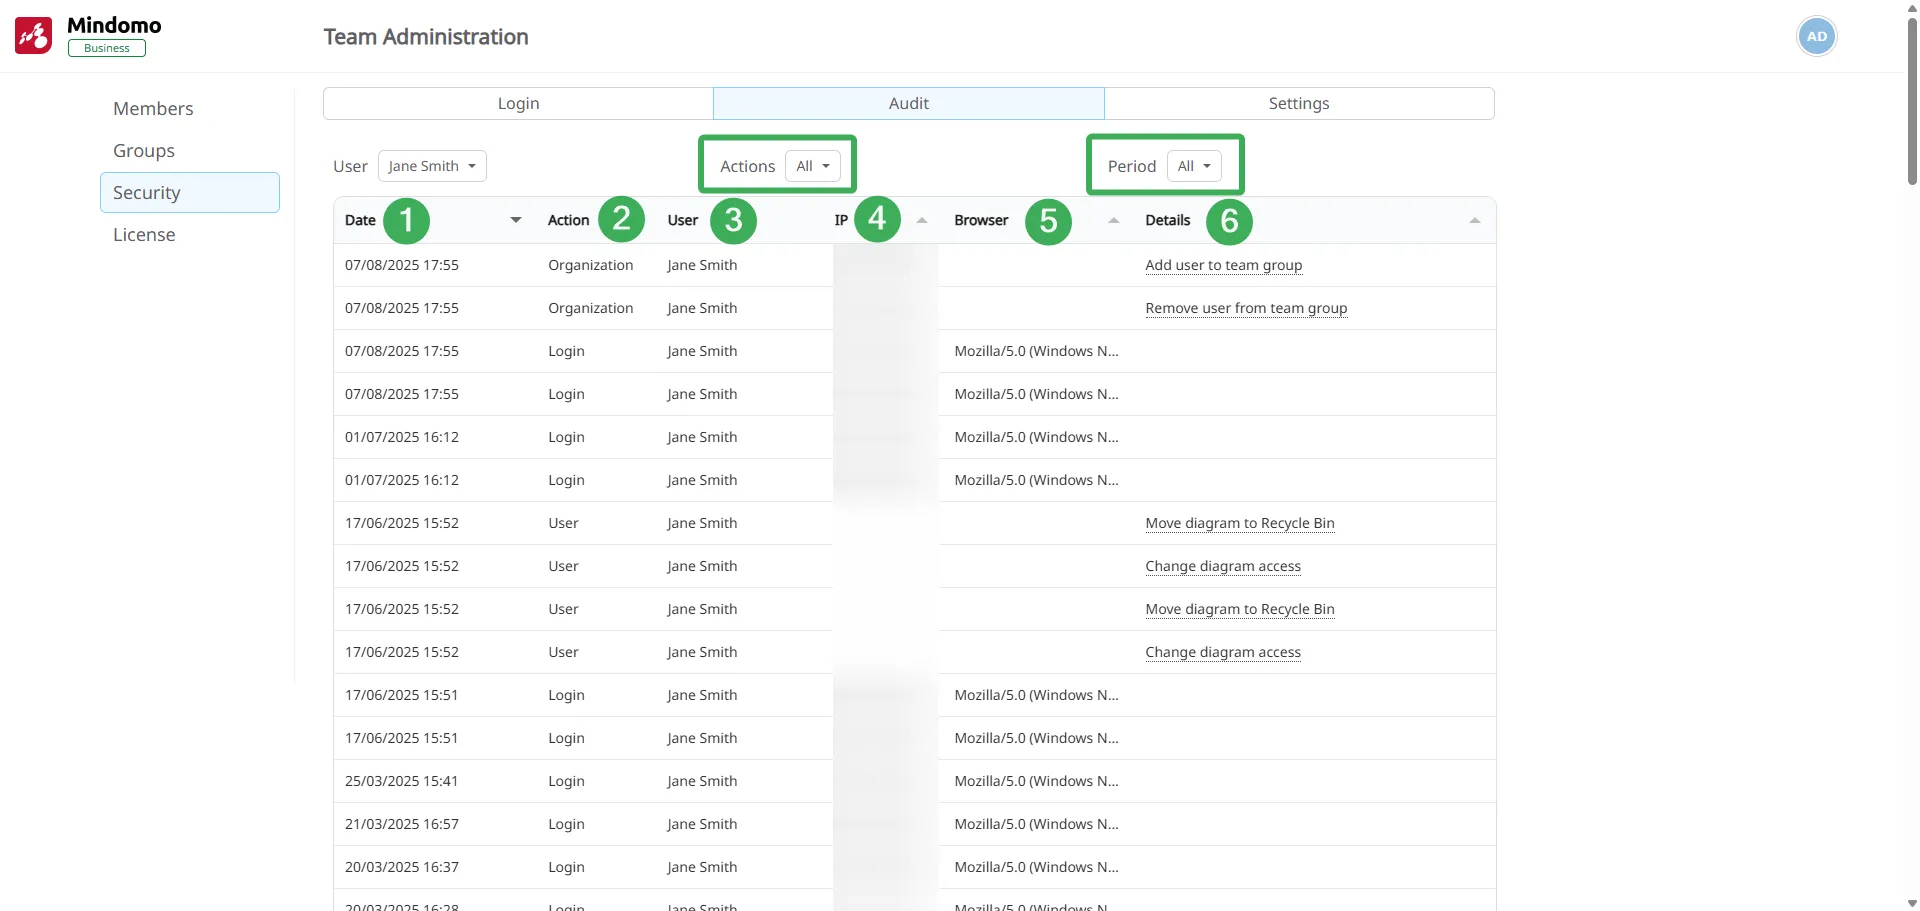
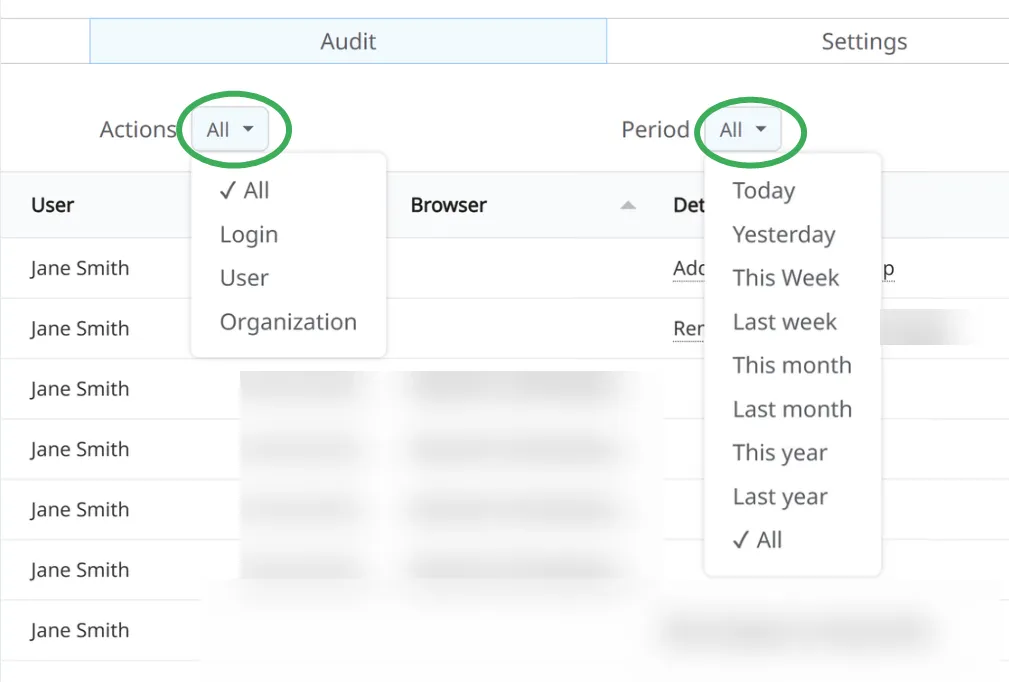
Actions are grouped into categories such as All, Login, User, and Organization. Use the Actions dropdown to filter by category.
You can also filter actions by time period using the dropdown on the right.
Security Controls
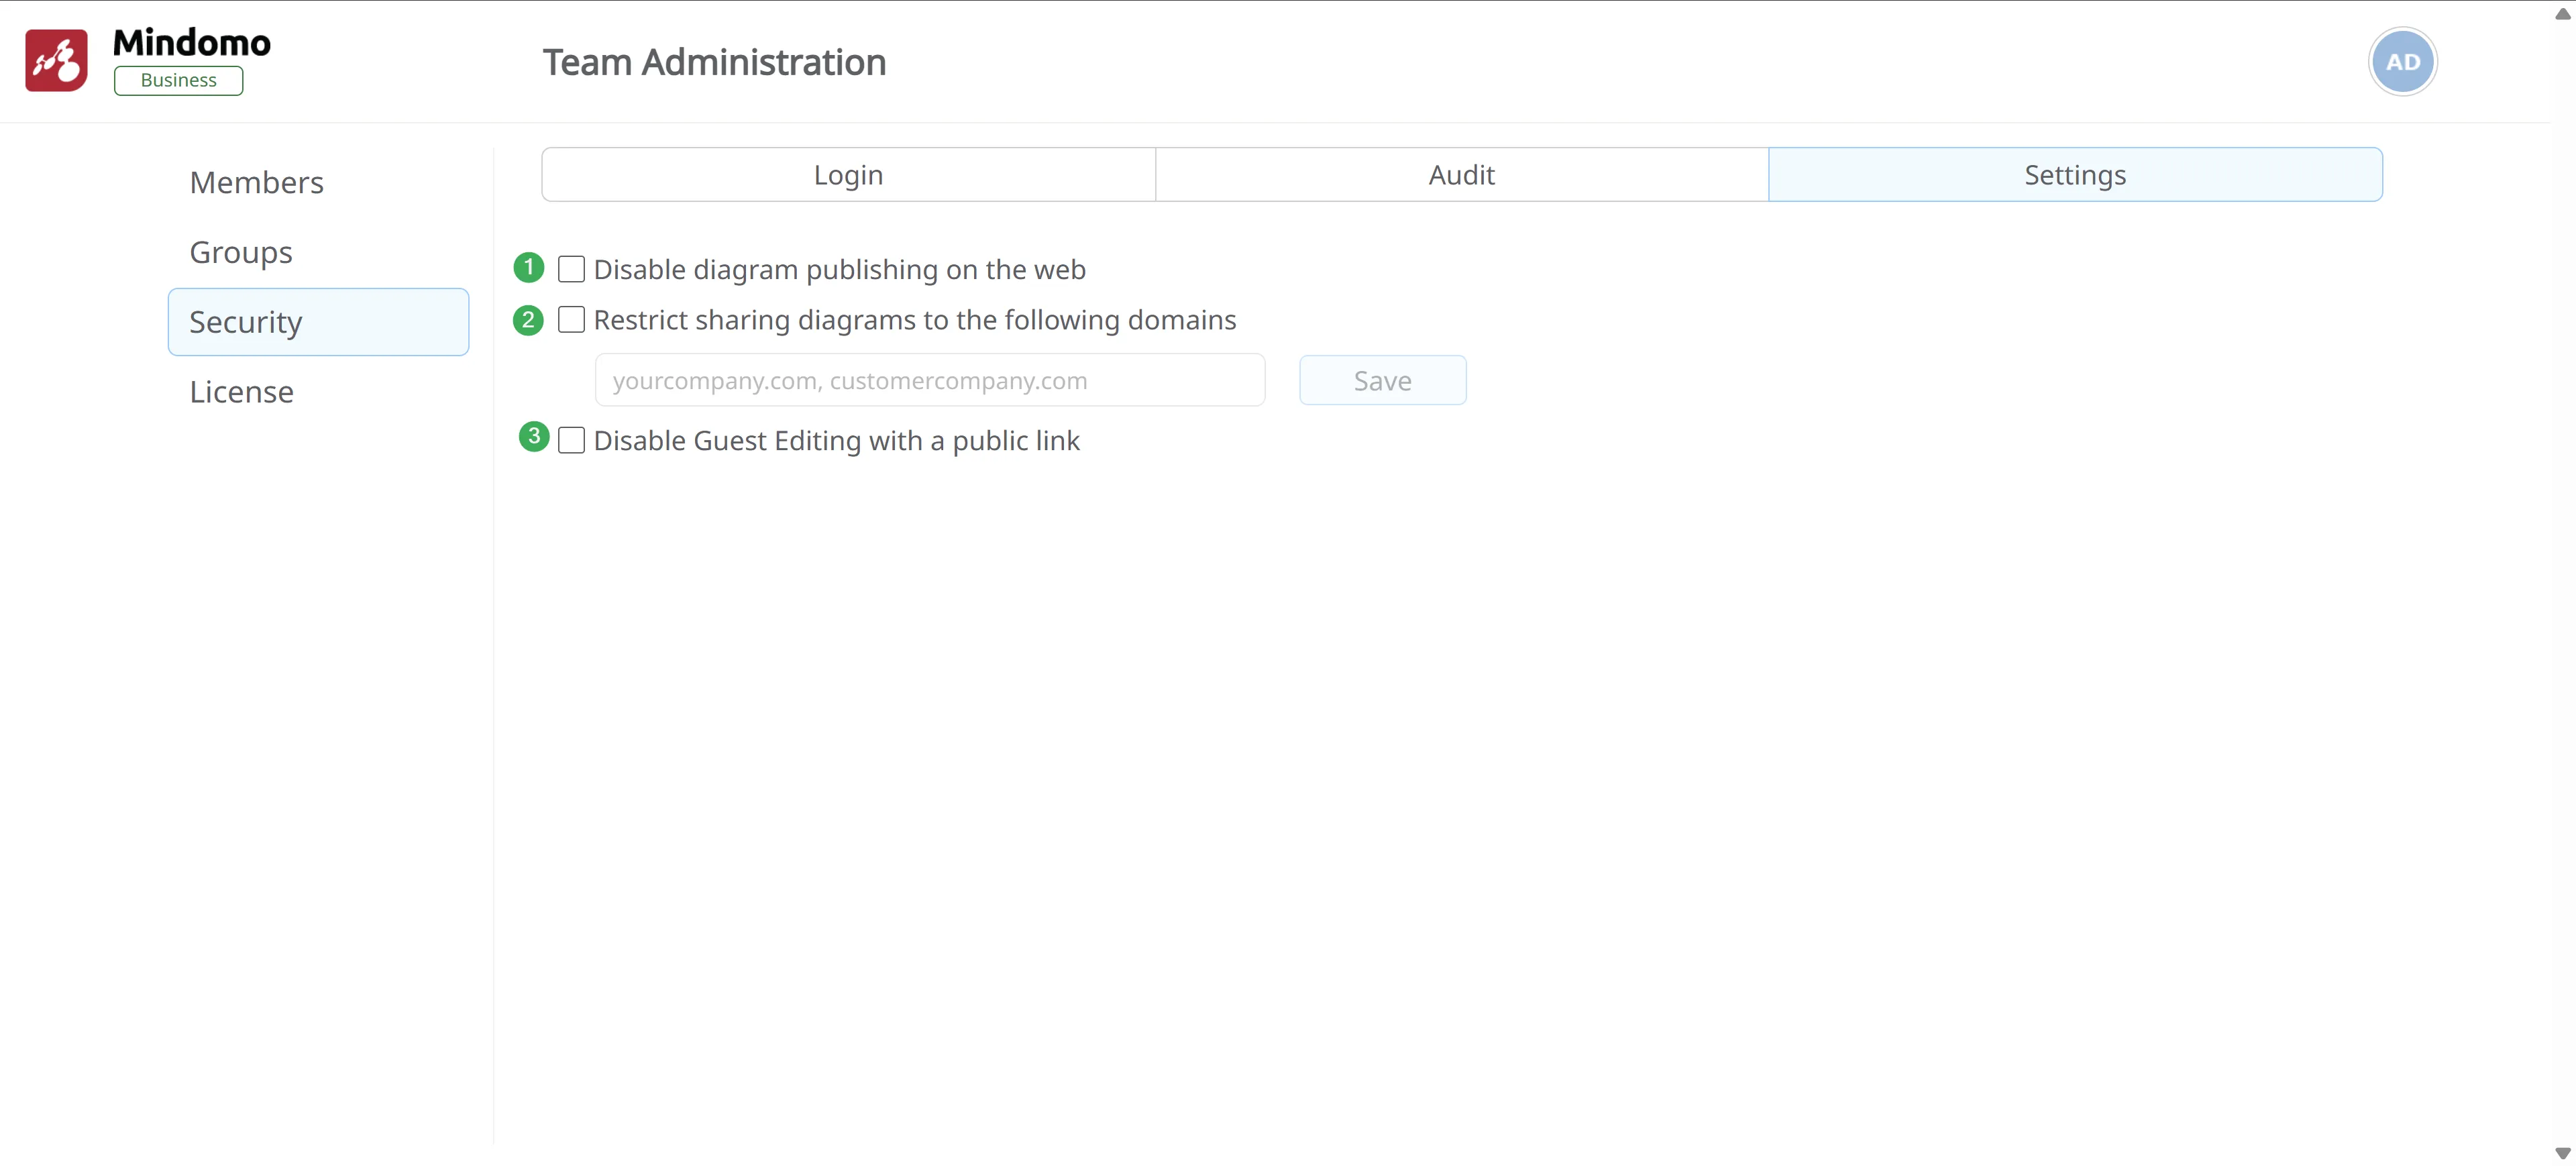
Section titled “Security Controls”The Settings section provides additional privacy and security options.
You can configure the following:
-
Disable diagram publishing on the web
Prevents diagrams from being publicly accessible. -
Restrict diagram sharing to specific domains
Limits sharing to defined email domains (e.g.,@yourcompany.com). -
Disable Guest Editing with a public link
Prevents public links from allowing edit access.
Enabling SAML
Section titled “Enabling SAML”SAML-based single sign-on (SSO) allows access through your preferred identity provider (IDP).
To enable SAML SSO, go to Team Administration → Security, then click Setup next to SAML.
For further setup instructions, see this Help Page.