

Sharing mind maps
Who you can share a mind map with depends on your plan:
- Every account can share mind maps with others. Recipients are notified on their Dashboard (and by email, if enabled), and the map appears in their Shared with me folder.
- Team and Business accounts can also share with groups.
- Professional and Business accounts can also let guests edit a mind map through its link.
- Teachers can also share assignments with their students.
Share Dialog
Section titled “Share Dialog”You can open the Share dialog in two ways. Both open the same dialog, so everything below applies whichever one you use.
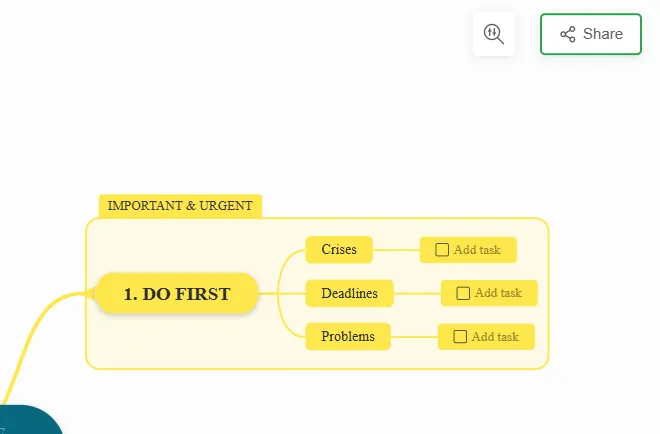
From within the map: click Share in the top-right corner of the editor.
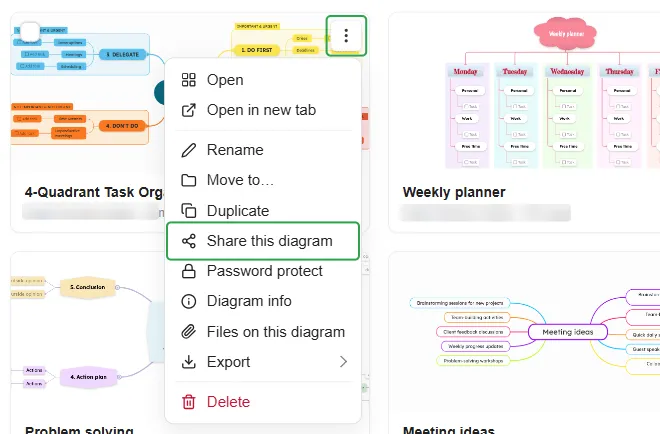
From the Dashboard, without opening the map: hover over the mind map’s card, click its ⋮ menu and choose Share this diagram.
From the Share dialog you can:
- choose who can open the mind map’s link, under General access (1)
- protect the mind map with a password, with Add password (2)
- copy a link to the mind map, with Copy link (3)
- decide what editors are allowed to do, with the gear icon, Editors’ rights (4)
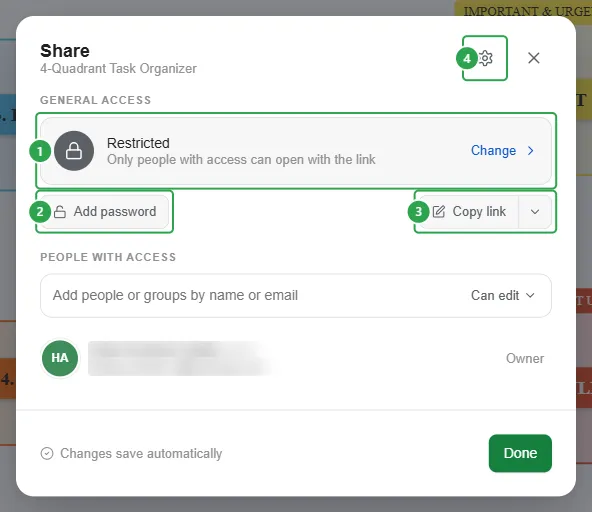
People with access lists every person the mind map is shared with directly, and their permission. Changes save automatically; click Done when you’re finished.
Private Sharing
Section titled “Private Sharing”To share your mind map with specific people:
- Open the Share dialog.
- Type an email address in the field under People with access and press Enter. Repeat for each person you want to add, or paste several email addresses at once, separated by commas, semicolons, spaces or line breaks.
- Use the drop-down next to the field (1) to choose what they can do with the mind map:
- Can edit: they can make changes to the mind map.
- Can view: they can open and read the mind map, but not change it.
- Can view & copy: they can view the mind map and save a copy of their own, while your original stays unchanged.
- Choose how to notify them (2): Send email invitations and Notify people by email when this map changes are both on by default. Click Add a message to include a note with the invitation.
- Click Send invite (3).
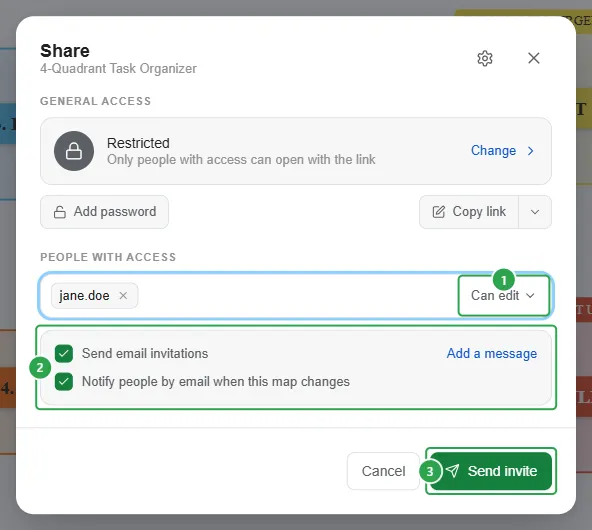
If you turn off Send email invitations, no email is sent, but the person still gets a notification on their Dashboard and the mind map appears in their Shared with me folder.
Shared with Me
Section titled “Shared with Me”Every mind map shared with you, individually or through a group, is listed in the Shared with me folder in the left panel of your Dashboard, including mind maps shared by people outside your organization. Mind maps in this folder are not visible to the rest of your team.
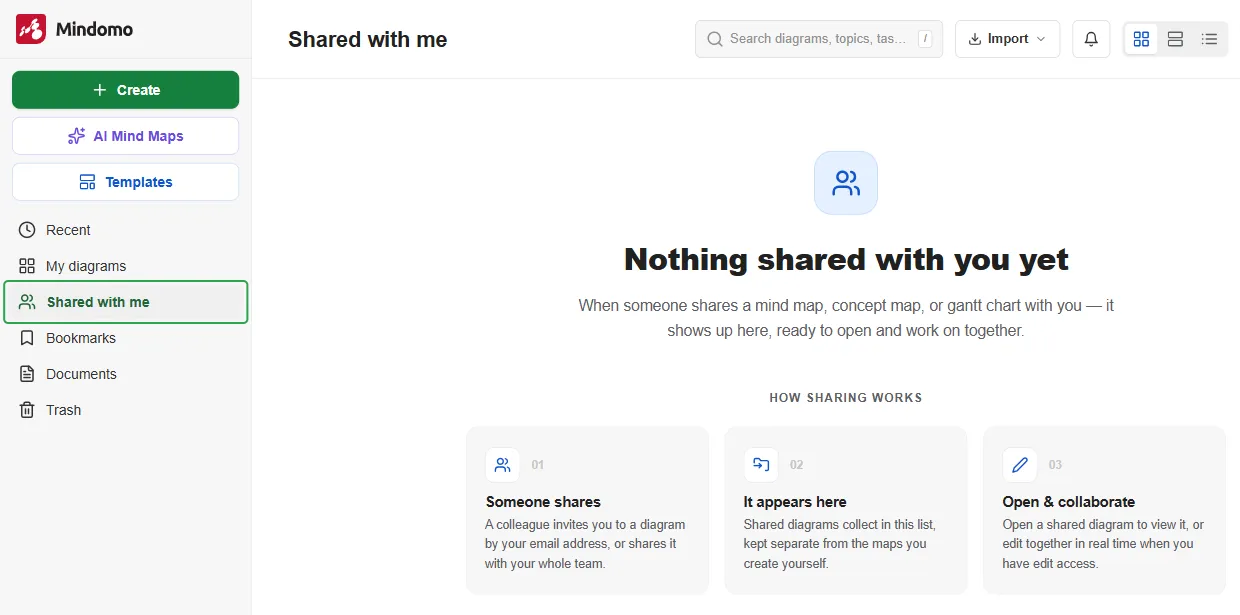
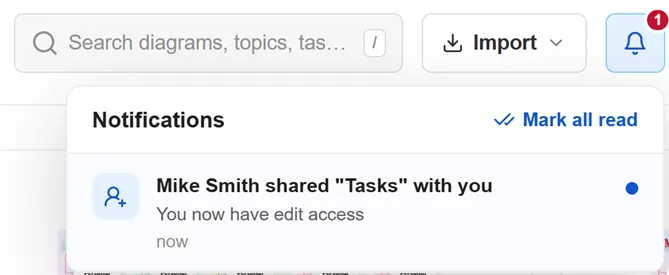
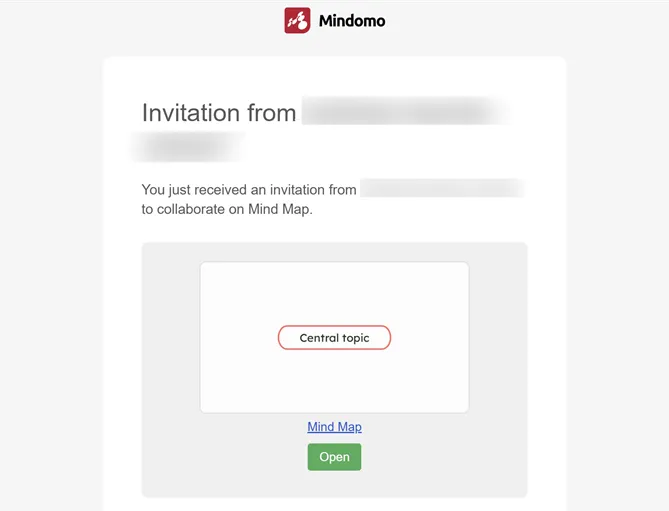
When someone shares a mind map with you, you find out in two ways:
-
You see a notification on your Dashboard. Click the bell icon at the top to see who shared which mind map with you, and what access you have.
-
You get an email inviting you to collaborate on the mind map, unless the person who shared it turned off Send email invitations. Click Open in the email to go to the mind map.
Public Sharing
Section titled “Public Sharing”By default, every mind map is private (Restricted). The only exception is a mind map created in a team folder, which everyone the folder is shared with can open.
To make a mind map public:
- Open the Share dialog.
- Click Change under General access.
- Choose one of the public options:
- Public on the web: makes your mind map publicly available in the Mindomo gallery, where anyone can view it.
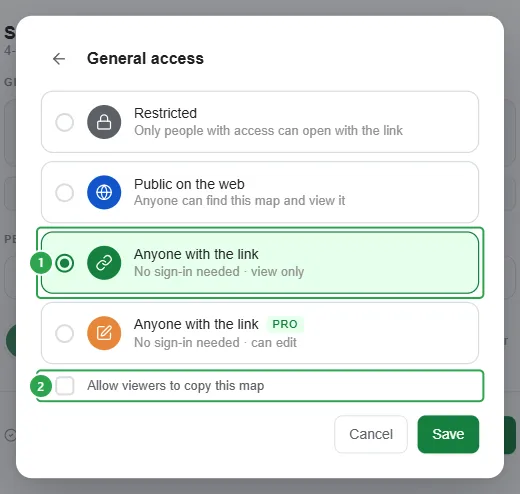
- Anyone with the link can view: anyone who has the link can view the diagram, but can’t make any changes. No Mindomo account needed.
- Anyone with the link can edit (
PRO): anyone who has the link can open and edit the diagram. No Mindomo account needed. This is called guest editing and is only available with Professional and Business licenses. Read more in Guest Sharing.
- Click Save.
If you choose Public on the web or Anyone with the link can view (1), you can also tick Allow viewers to copy this map (2). Viewers can then save their own copy, while your original stays unchanged.
 To make a public mind map private again, click Change under General access, choose Restricted and click Save. From then on, only the people listed under People with access can open it. Anyone else who has the link can no longer open the mind map.
Guest Sharing
Section titled “Guest Sharing”Guest editing lets people edit your diagram just by opening its link. Guests:
- don’t need a license of their own, or even a Mindomo account
- can use premium features while they edit it
- on a free account don’t have the diagram counted toward their 3-map limit
To turn it on:
- Open the Share dialog.
- Click Change under General access.
- Choose Anyone with the link
PRO(No sign-in needed · can edit) and click Save. - Click Copy link and send the link to the people you want to edit it with.
Anyone who has the link can edit the mind map, so share it only with people you trust.
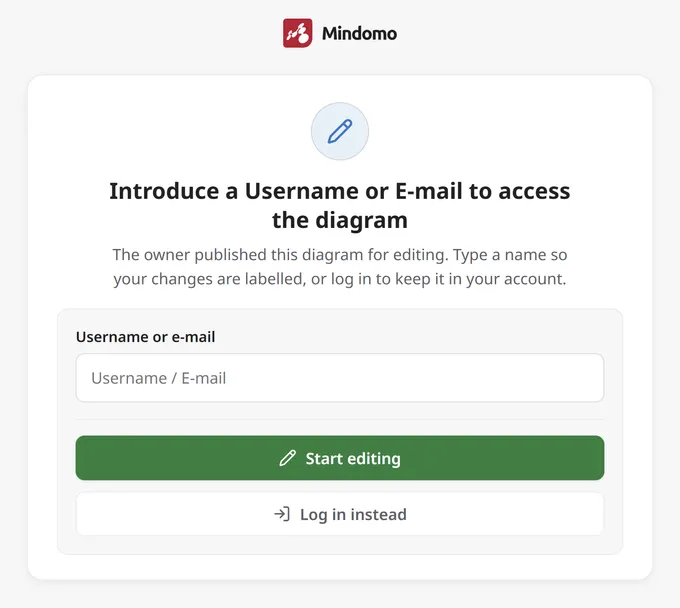
When guests open the link, they’re asked for a name. They type it under Username or e-mail and click Start editing, and their changes are labelled with that name. Guests who already have a Mindomo account can click Log in instead.
On a Business license, team admins can turn guest editing off for the whole team with the Disable guest editing with a public link setting. Members then can’t allow guest editing, and links that already allowed it become view-only. See Security controls.
Team Sharing
Section titled “Team Sharing”Shared team folders are available with Team and Business licenses.
Team members see them on their Dashboard, both in the left panel under Team folders and at the top of My diagrams.
A Team Admin shares each team folder with the whole team or a group and sets its access rights. Every diagram you create in, or move to, the folder is instantly available to that group.

Team folders have a different icon from your own folders, so you can tell them apart at a glance.
Group Sharing
Section titled “Group Sharing”On Team and Business accounts, you can share a mind map with a whole group. Type the group’s name in the field under People with access, in the share panel.
Read more about it in Team sharing. To create and manage groups, see Team groups.
Class Sharing
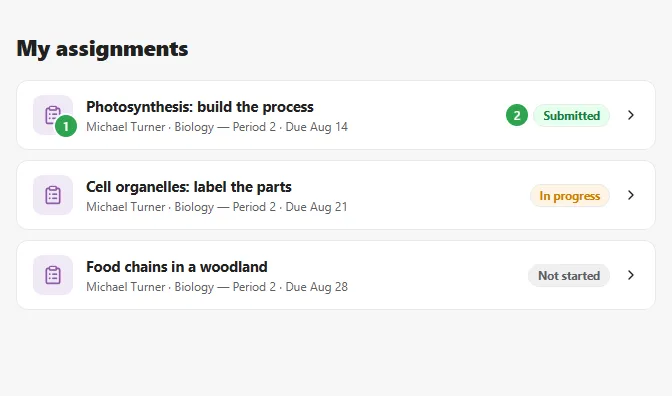
Section titled “Class Sharing”Teachers can share diagrams with students by setting them up as assignments, instead of inviting each student from the Share dialog. Students find each assignment (1) in their My assignments list, with its teacher, class, due date and status (2).
See Assignments for an overview and Create an assignment for the steps.
Editors’ Rights
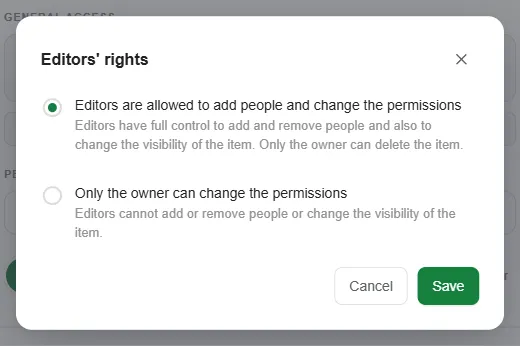
Section titled “Editors’ Rights”By default, anyone who can edit your mind map can also share it with others. To keep control of who has access, click the gear icon in the Share dialog, choose one of the following options and click Save:
- Editors are allowed to add people and change the permissions (default): editors can add and remove people, change their permissions and change General access.
- Only the owner can change the permissions: only you can manage who has access. Editors can still edit the mind map.
In both cases, only the owner can delete the mind map.
Viewer Privacy
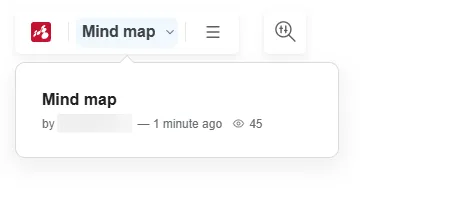
Section titled “Viewer Privacy”When someone opens a mind map with view-only access, they can click its name at the top left to see its author, when it was last edited and its number of views. From the ☰ menu, they can also share it on Pinterest, X, LinkedIn and Facebook.
You can choose what viewers see. With the mind map open, click the ☰ menu, choose Properties and open the Advanced tab. Under Viewer privacy you can turn on:
- Hide Modification Date for Viewers: hides when the diagram was last edited.
- Hide Diagram views for Viewers: hides the view count.
- Hide Diagram Metadata for Viewers: hides the details panel entirely, so viewers can’t see the author, when the diagram was last edited or how many views it has.
- Hide Share on Social Media: removes the social sharing buttons from shared links.
Click OK to apply your changes.
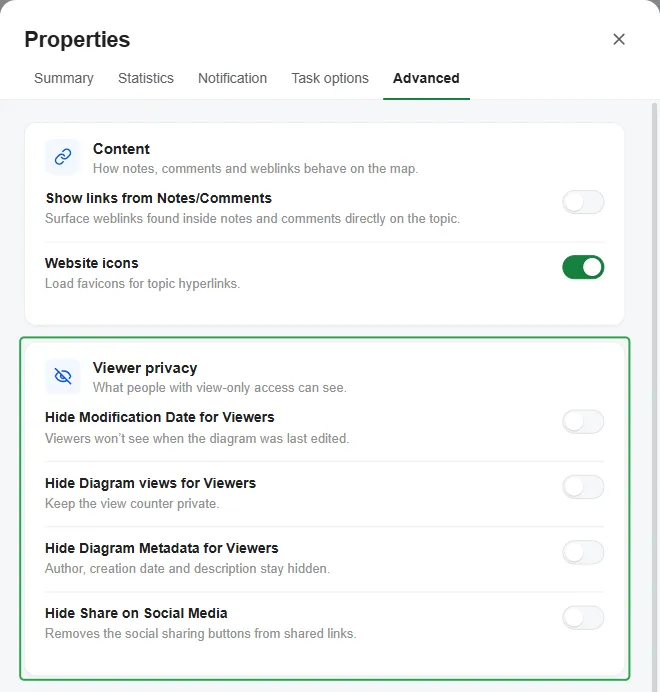
These settings are only available from inside the map. On the Dashboard, Diagram info opens Properties without the Advanced tab.
Links & Embedding
Section titled “Links & Embedding”To copy the mind map’s link, click Copy link in the Share dialog. To copy a different type of link, click the arrow next to Copy link (1) and select one of the following options (2):
- Link to edit: opens the mind map in the editor, for people who have permission to edit it.
- Link to view: opens the mind map in view mode, even for people who are allowed to edit it. They can see its topics, notes, comments and attachments, but cannot make changes.
- Embed in a page: provides a code snippet you can paste into a website or blog to display a live, view-only version of the mind map.
- RSS feed: opens the mind map’s RSS feed, which lists the changes made to it each day, such as added topics and who added them. Add the feed’s address to an RSS reader to follow these changes.
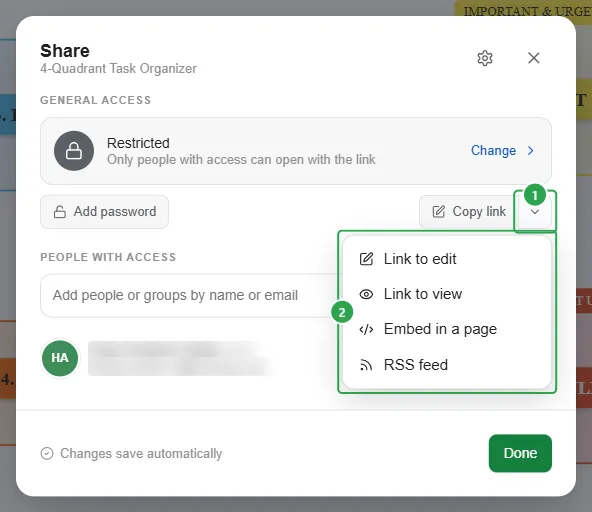
Copying a link never grants more access than your share settings allow.
Password Protection
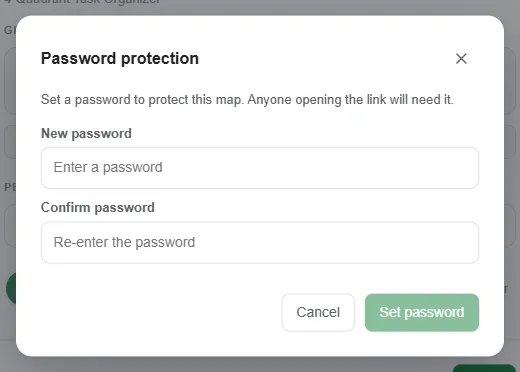
Section titled “Password Protection”For extra safety, you can protect a mind map with a password. Anyone opening its link will need it. To set one, either:
- click Add password in the Share dialog, or
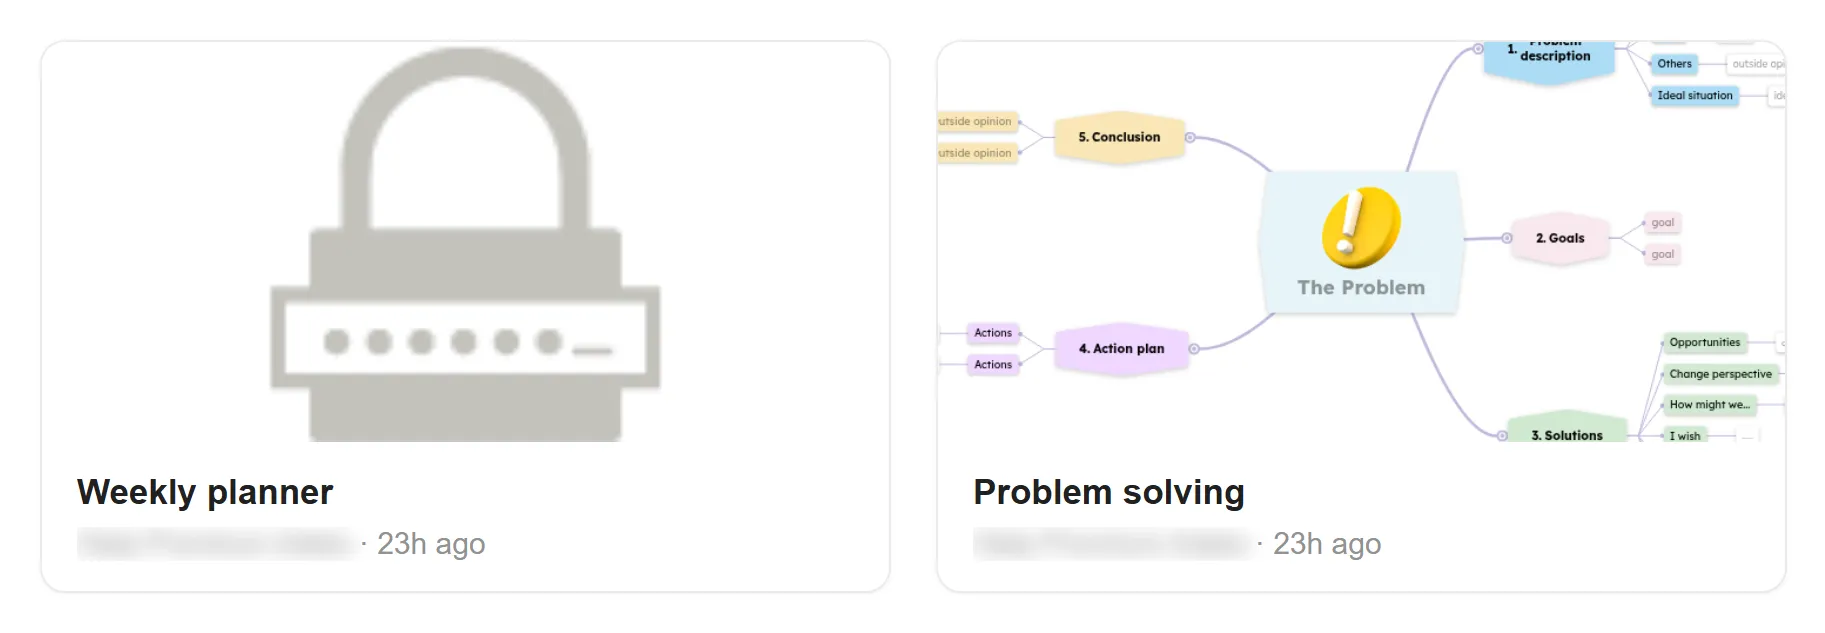
- choose Password protect from the mind map’s ⋮ menu on your Dashboard.
Type the password twice, then click Set password.
On the Dashboard, a password-protected mind map shows a lock instead of its preview.
If you forget a mind map’s password, contact support@mindomo.com to have it reset.