Getting started with Mindomo
Getting started with Mindomo is quick and intuitive, whether you’re creating your first mind map or exploring more advanced features. This guide will walk you through the basics of building, customizing, navigating, saving, and sharing your mind maps to help you make the most of your Mindomo experience.
Creating mind maps
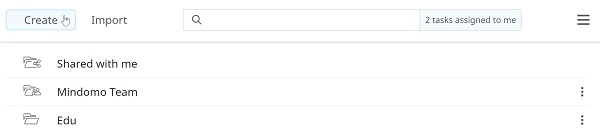
Section titled “Creating mind maps”Click the Create button on the top-left corner of your Dashboard. A panel will appear where you can choose to create mind maps, concept maps, folders, etc., as well as browse several mind map templates.
Click the Create button under Blank mind map to create a mind map from scratch.
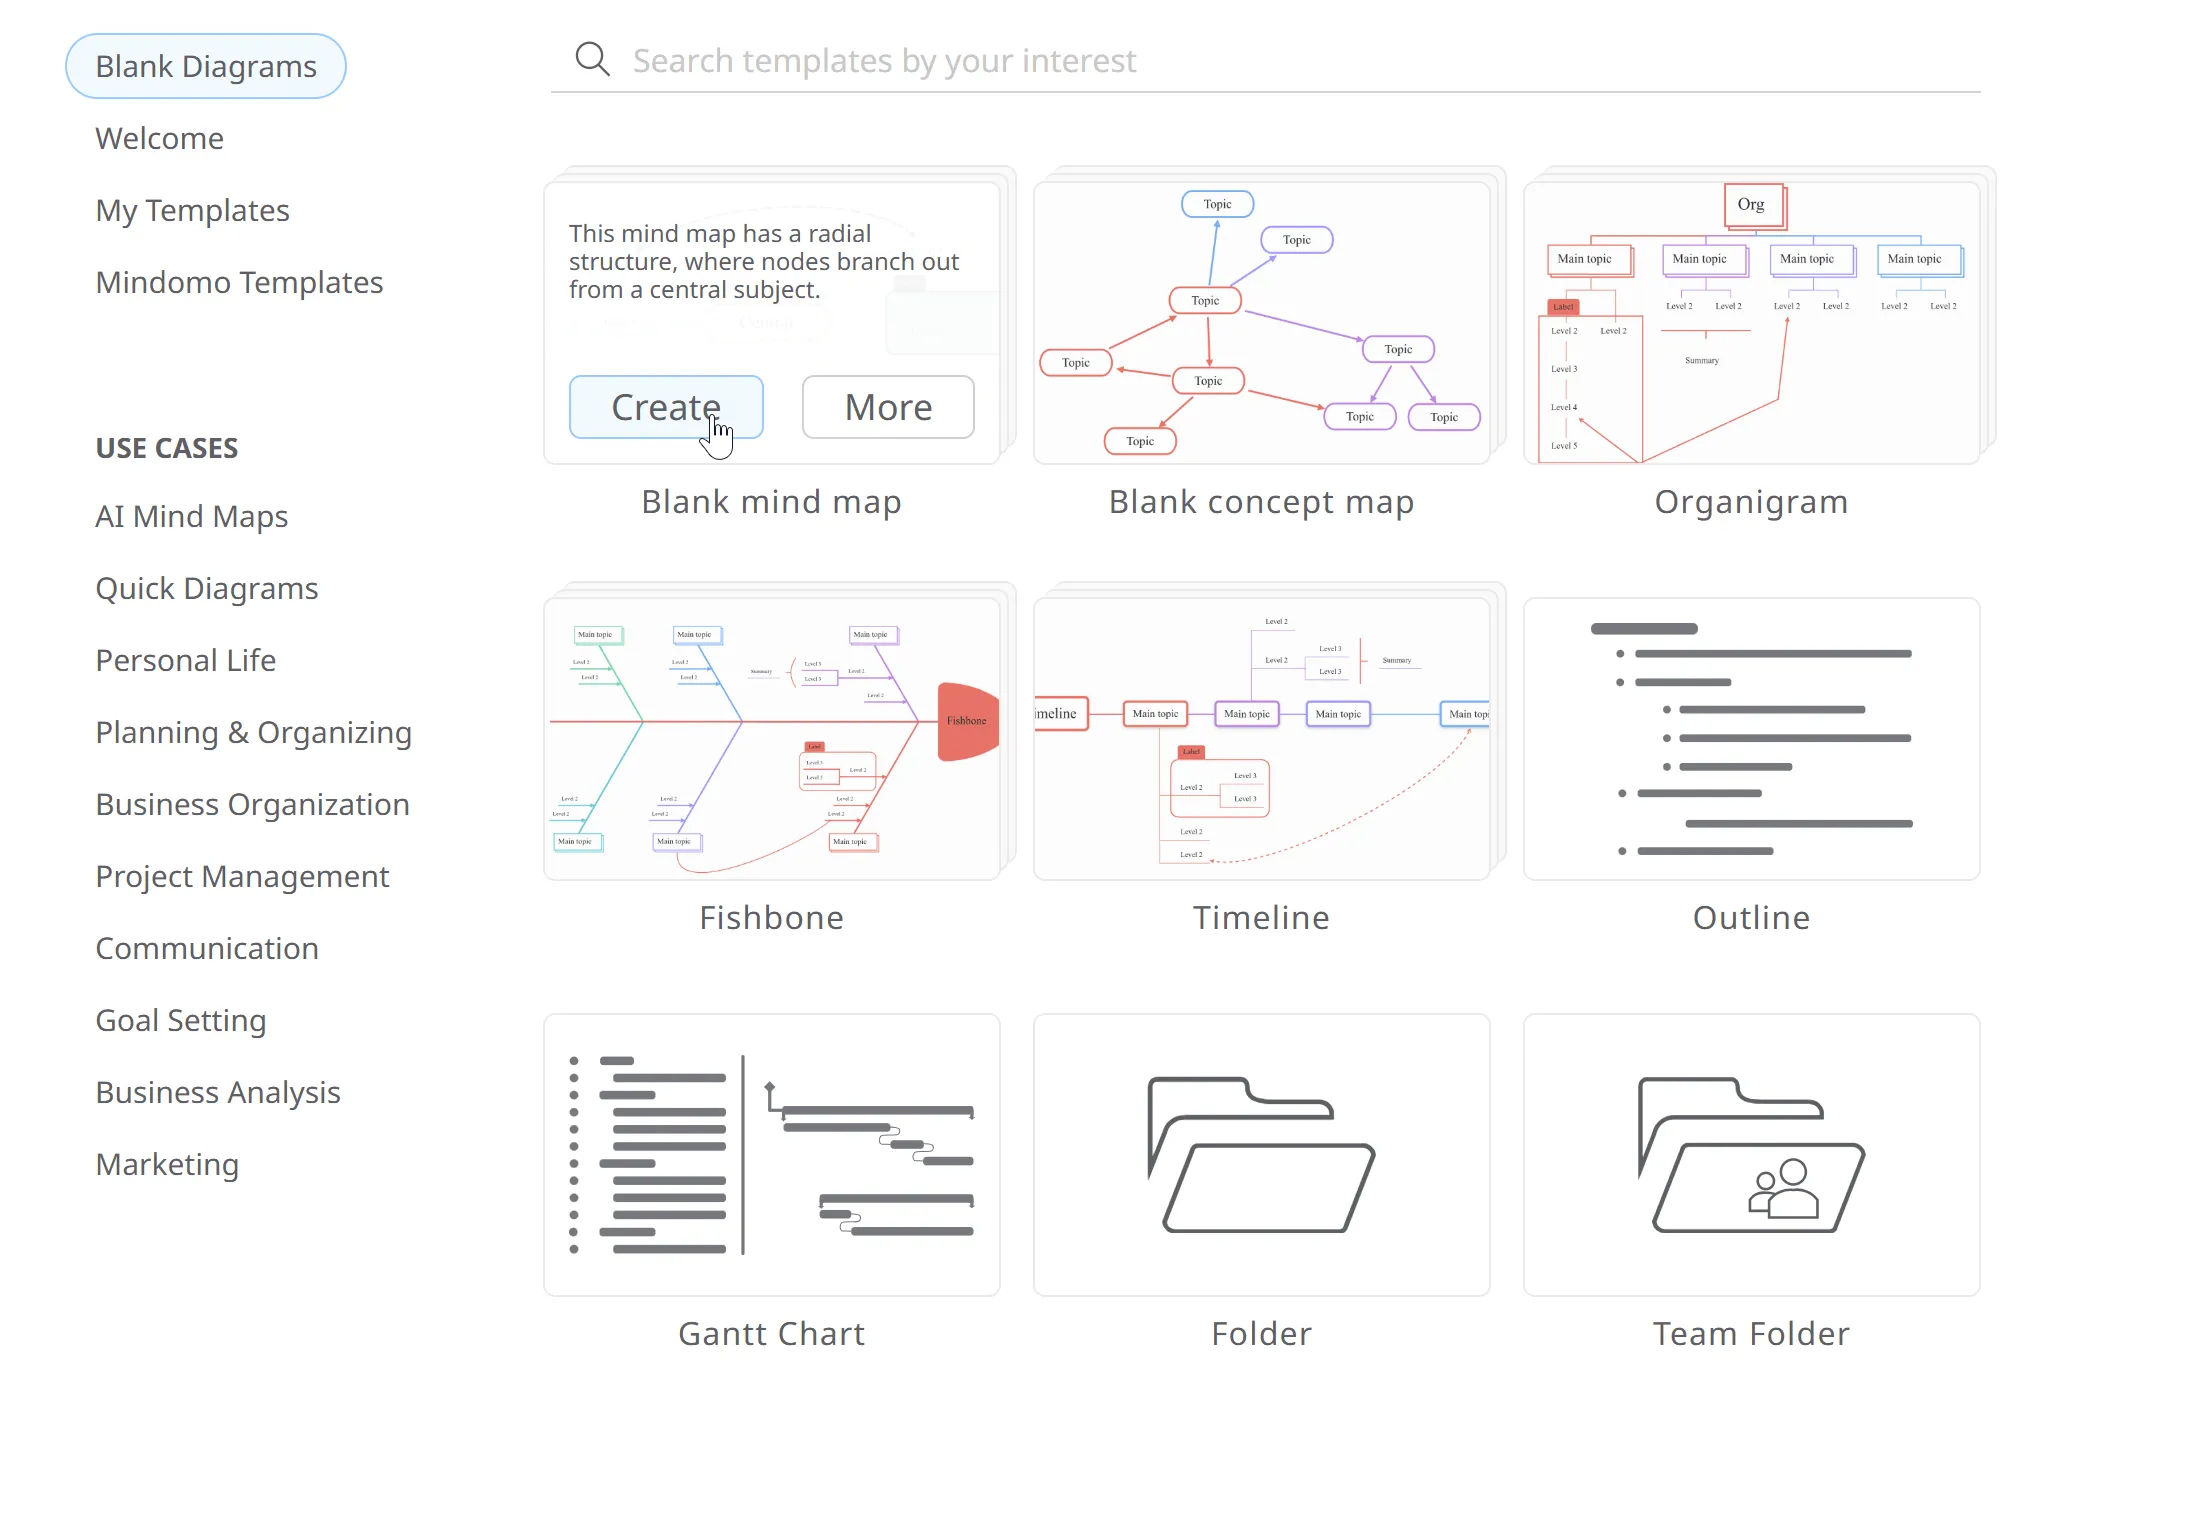
Click the More button to select the theme of the mind map before creating it.

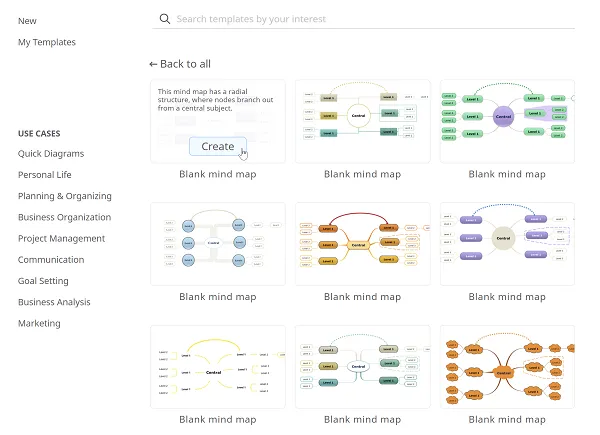
You will see all available themes: the ones you created and the predefined themes from Mindomo.
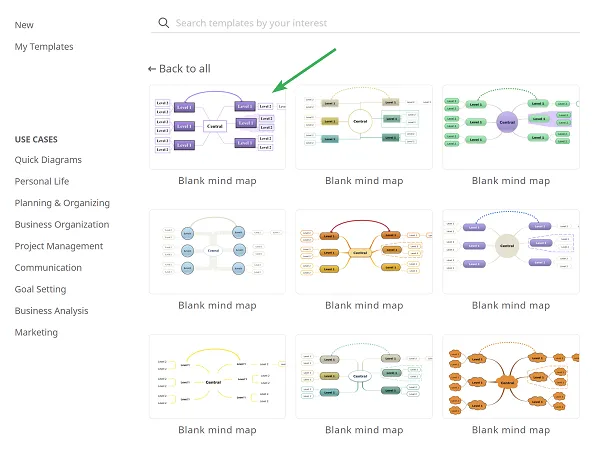
Choose a theme and click Create to start working on your mind map.
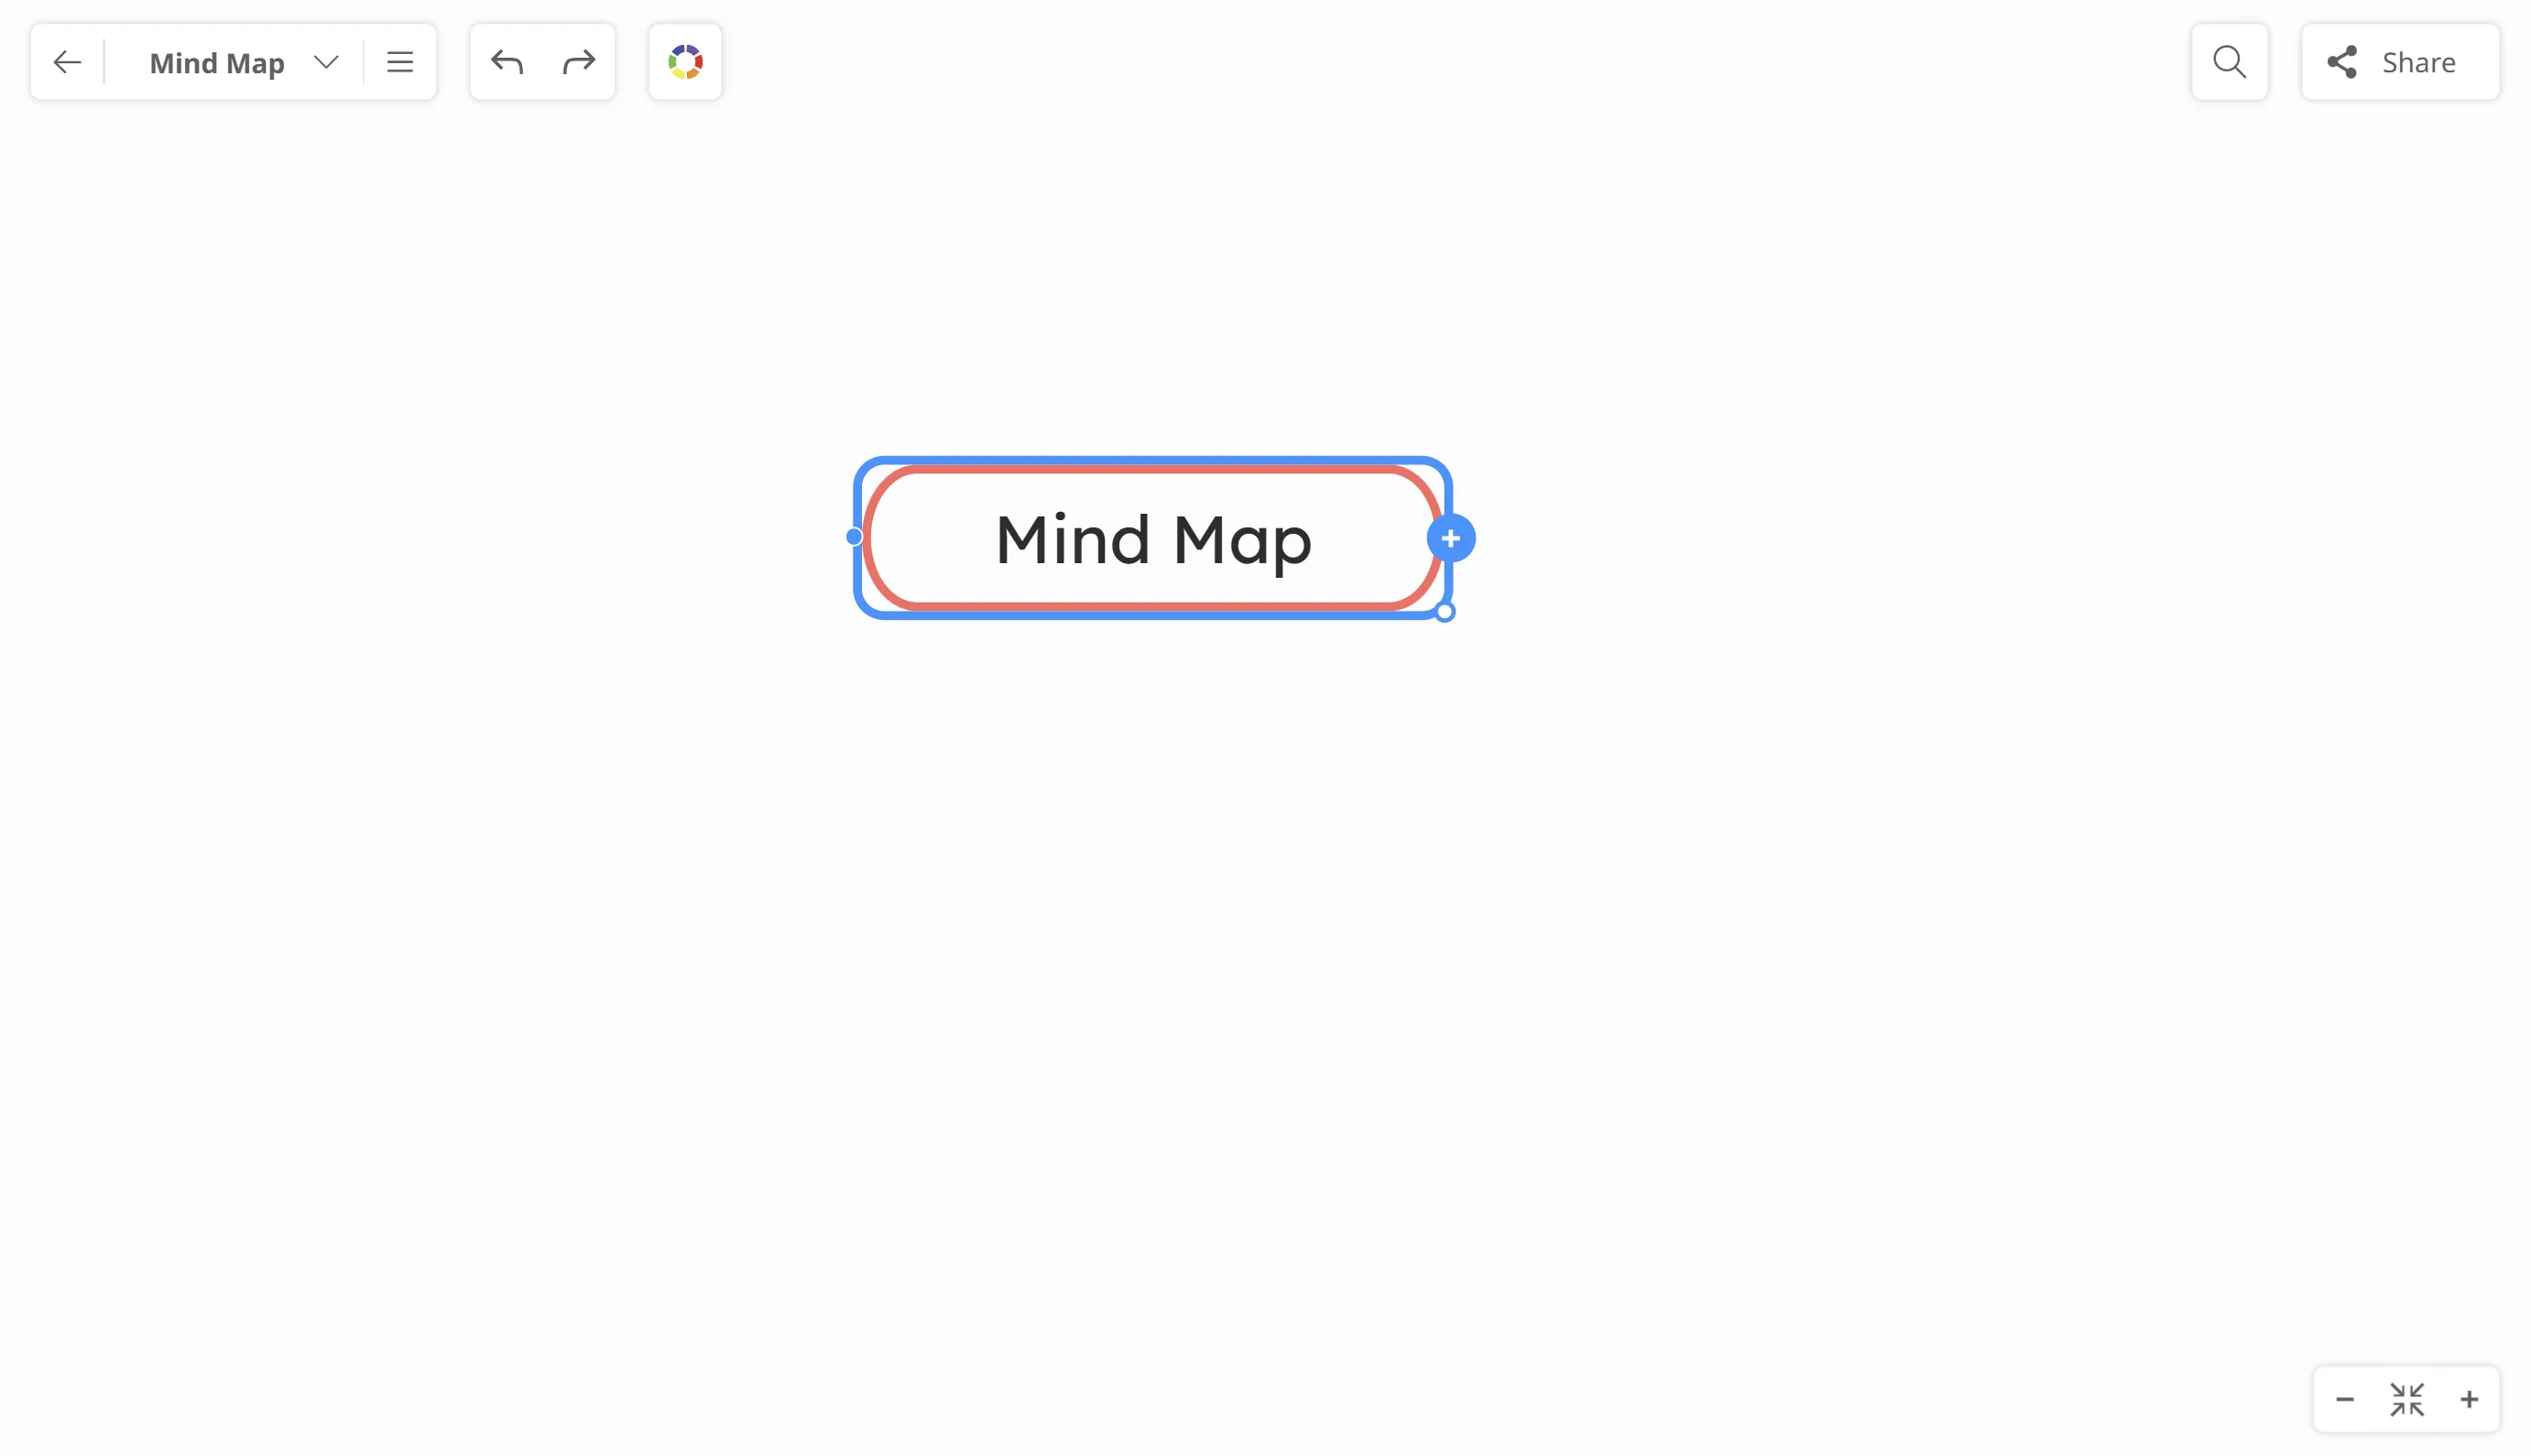
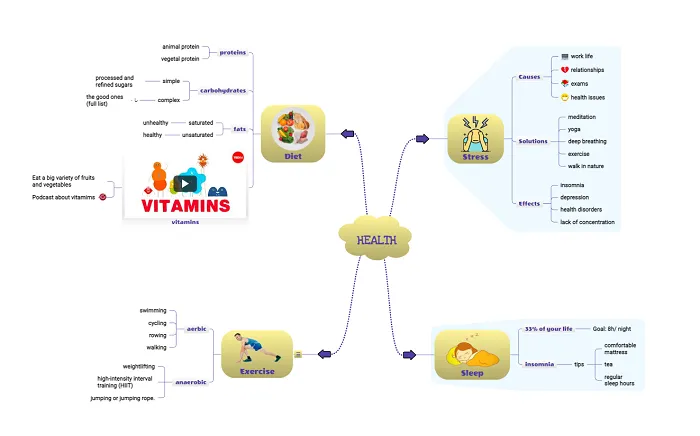
After creating the mind map, you’ll be presented with Mindomo’s tidy and easy-to-use interface.
Topic types
There are four topic types:
- Central topic
- Main topic
- Subtopic
- Floating topic

Naming topics
-
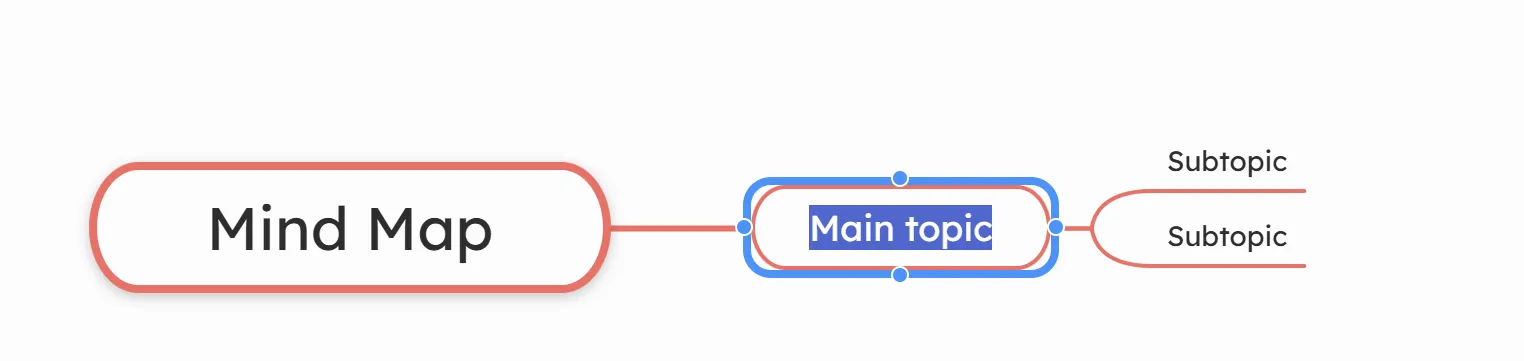
To name a topic, click the topic to select it. The topic shape will turn blue. Click again to highlight the text, then type your text.
-
To insert a new text line into a topic, place the cursor at the end of the line, hold SHIFT, and press ENTER.

Creating a topic or subtopic
1. To insert a new topic select an existing topic:
-
Central topic - once the topic is selected, two bullets will appear. Clicking the left bullet will insert a subtopic on the left side, while clicking the right bullet will insert a subtopic on the right side.
-
Subtopic - once a subtopic is selected, four bullets will appear: left to insert a parent topic, right to add a subtopic on the right, top to insert a sibling before, and bottom to insert a sibling after.
2. Use the keyboard shortcuts for a quicker topic creation: press the TAB key to insert subtopic and ENTER to insert a sibling topic.
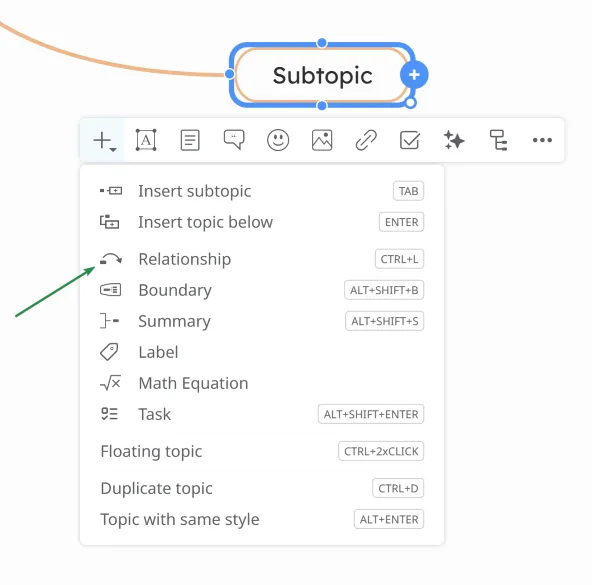
3. Select a topic and click on the ” + ” button from the toolbar to insert a subtopic , subtopic as task , floating topic , duplicate the topic or add a new topic with current topic’s style.
To delete a topic, select it, click the “More” button on the toolbar, and choose “Delete.” Alternatively, you can press the Delete key on your keyboard.
Repositioning a topic
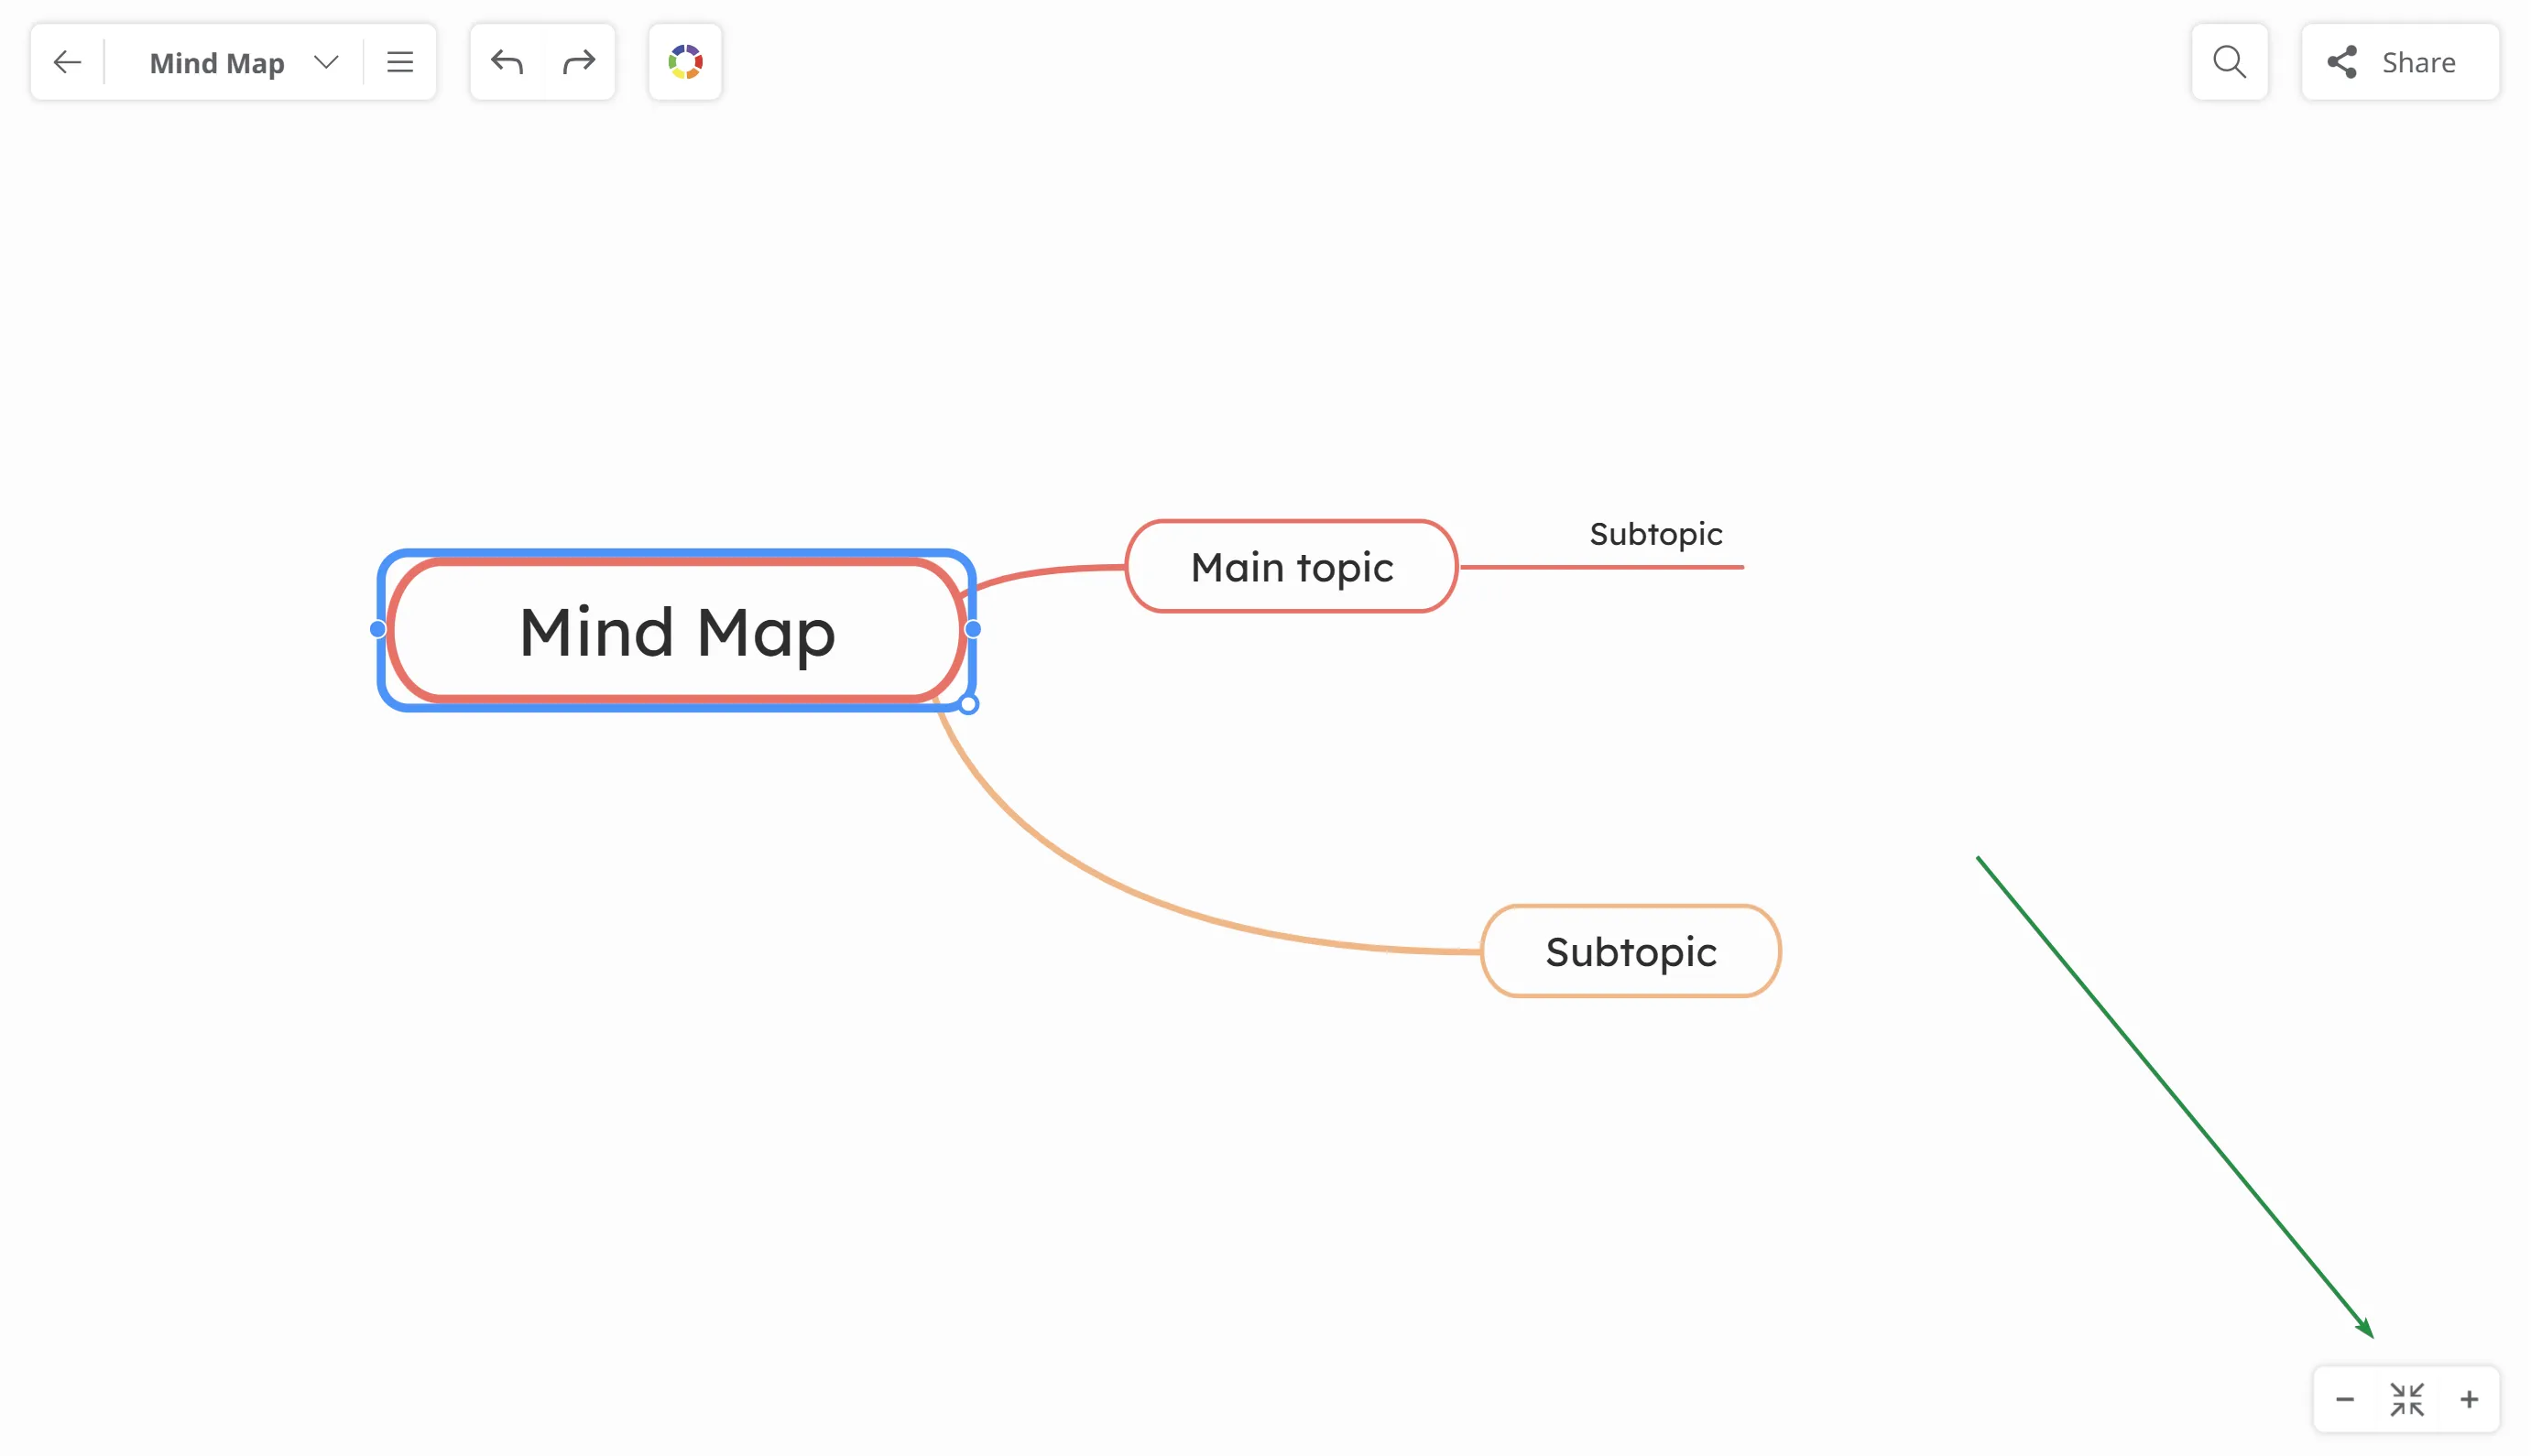
Drag and drop topics to reposition them or move them under other topics.
Now that you’ve created your first map, learn how to save and share your mind map, or open one of the many maps created by other Mindomo users.
Navigating
Section titled “Navigating”Zoom
-
Use the ”-” and ”+” buttons in the bottom right corner of the map to change the zoom level.
-
You can also use the mouse scroll to adjust the zoom level.
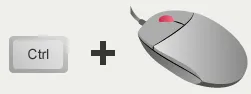
To zoom in and out just by using the keyboard, press the ”+” and ”-” keys while pressing the CTRL key.
![]()
To pan with the mouse, click and drag the mind map canvas.
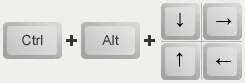
To pan using the keyboard, press “CTRL + ALT” with the arrow keys.
Opening mind maps
Section titled “Opening mind maps”The Dashboard allows you to access your maps, folders, projects, and/or assignments. Just click on the map (1) to access it.
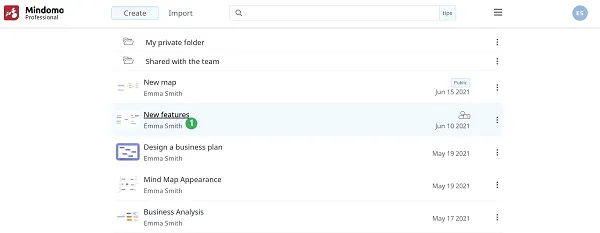
If you’ve accessed a folder and you want to return to the Dashboard, click on the Mindomo logo (2) or the Home icon (3).

Saving mind maps
Section titled “Saving mind maps”-
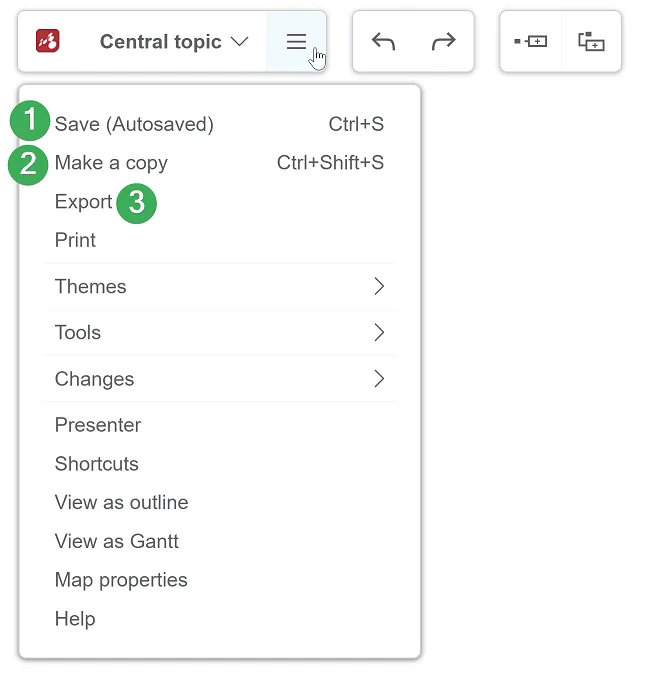
Save - you can find the “Autosave” function in the top toolbar. This function is enabled, so you don’t have to click “Save” every time you want to backup your work.
-
Make a copy - this function is also accessible from the top toolbar by tapping on the first icon. In order to make a copy of the map, you will be asked to name the copy and add other options. Once the information is complete, click “Ok”.
-
Export - you can easily export the map on your computer/Dropbox/OneDrive/Google Drive in a variety of formats: PDF, RTF, PNG, mind map formats, Microsoft Excel formats, and other types of formats.
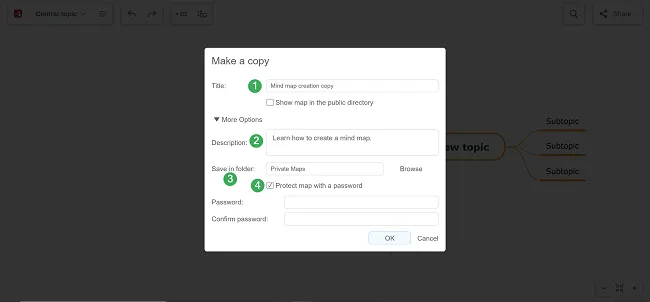
Make a copy
This is the tab that appears when you choose to make a copy of a map. To save that copy, you will have to follow these steps:
-
Fill in the map’s title.
-
Add a description.
-
Specify the target folder.
-
Choose if you want to protect your map with a password.
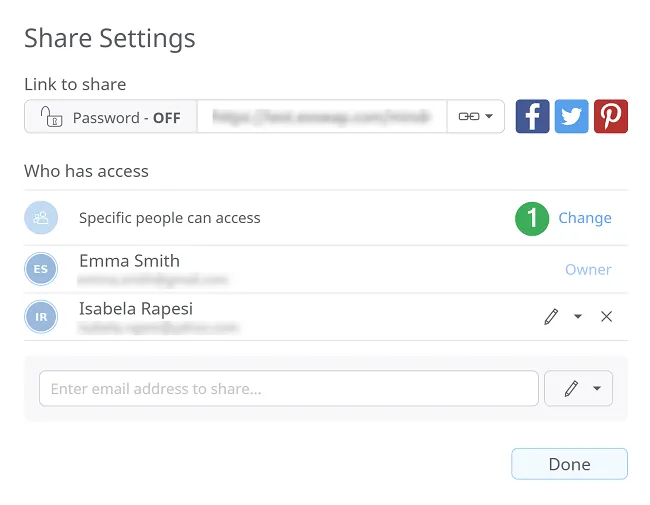
Sharing mind maps
Section titled “Sharing mind maps”-
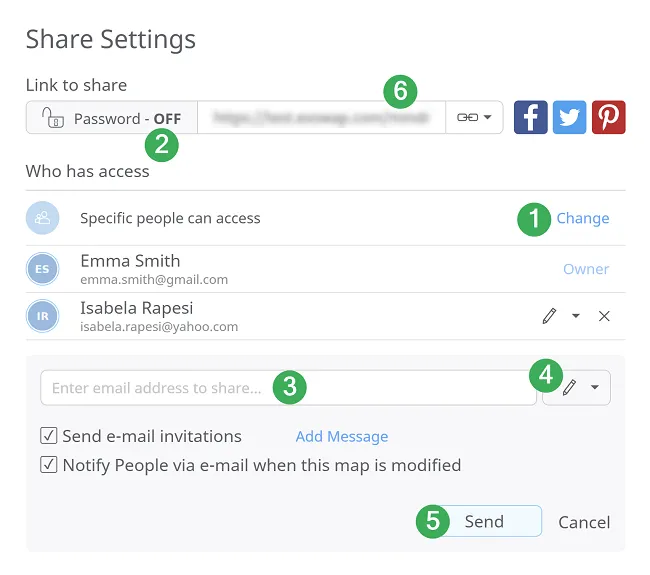
By default, the map is private but you can change its settings to make it public.
-
You can choose to password-protect the map if you are a premium user.
-
Share the map via e-mail.
-
Set editing rights.
-
Save changes and send an invitation to collaborate.
-
You can also use the share link – it will be copied in your clipboard. When a user accesses this link, the map will open in view mode if you made it public or it will open in the editor if you shared it with that specific user via email.
-
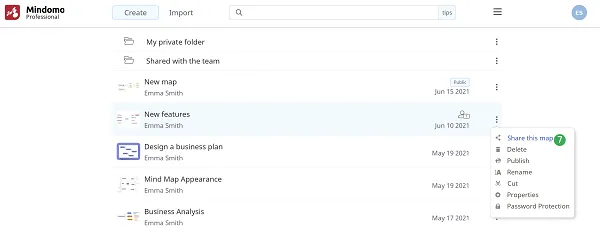
You can also share your maps from the Dashboard.
Publishing mind maps
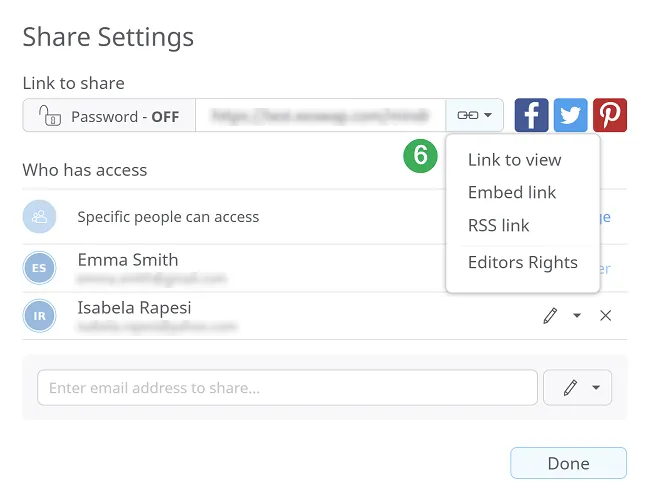
Section titled “Publishing mind maps”-
Change the map access from private to public.
-
The mind map will be public in the Mindomo Gallery so that anyone can view it.
-
The mind map will be accessible for anyone who has the map link.
-
Anyone who has the map link can both view and edit the map using fully premium features.
-
Click on ‘Save’.
-
Use direct links to give view access over the mind map, embed it, view it as RSS and HTML.

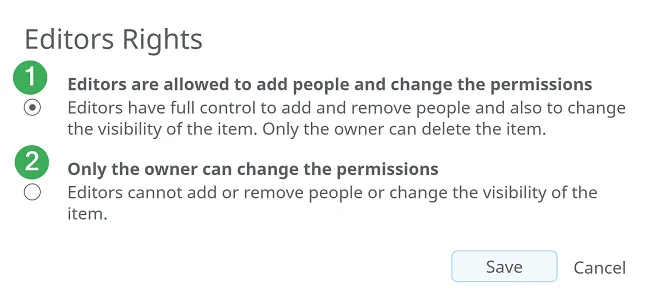
Editors Rights
-
Editors are allowed to add people and change the permissions.
-
Only the owner can change the permissions.
Styling mind maps
Section titled “Styling mind maps”Customize the look of your mind maps by changing colors, shapes, fonts, and line styles. Use themes and layouts to make your maps more visually appealing and easier to read, helping highlight key ideas and improve overall organization.
Formatting and Styling your Mind Maps
Section titled “Formatting and Styling your Mind Maps”You can change the look and style of your mind maps to help you organize or even present your data.
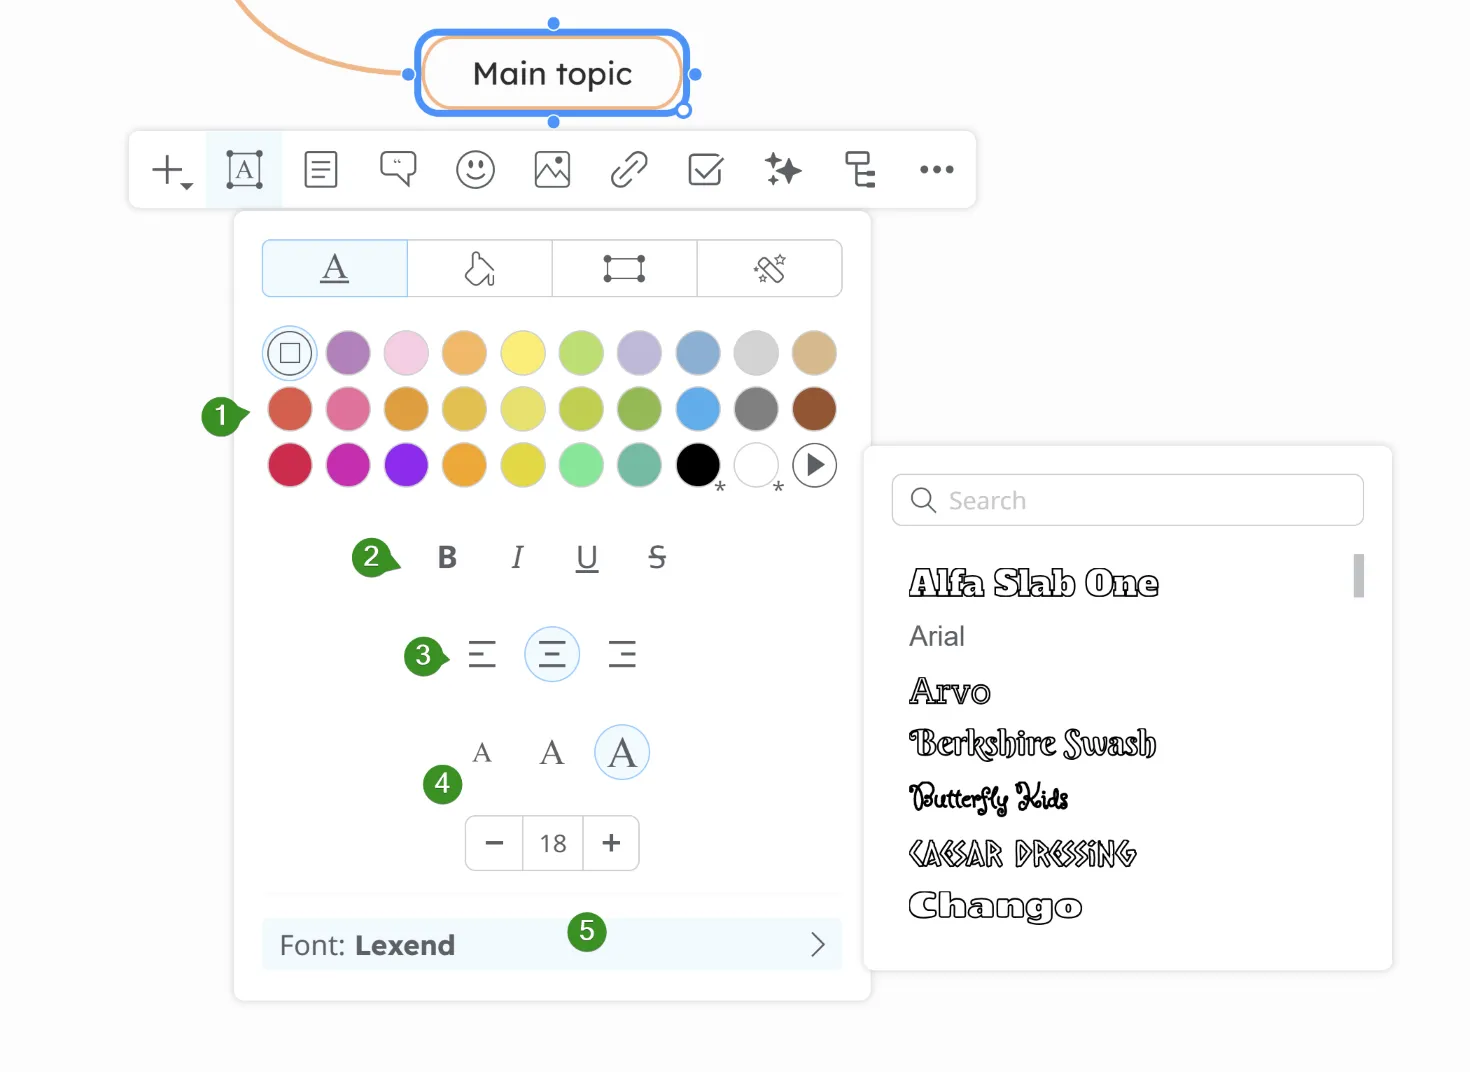
Text Style
Section titled “Text Style”This panel provides tools to customize the visual style of your topic text, including formatting, alignment, font, and color options.
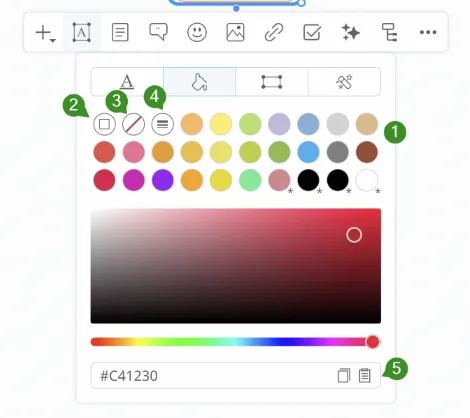
Topic Background
Section titled “Topic Background”This panel allows for the customization of the topic’s color.
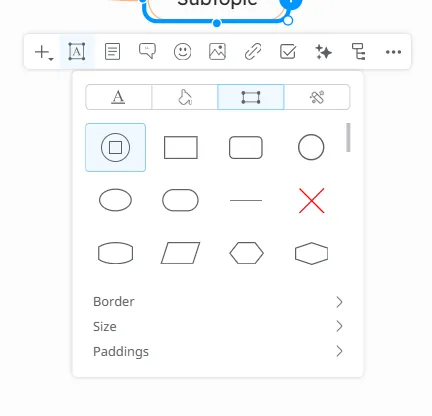
Topic shape
Section titled “Topic shape”This panel lets you choose the shape of the topic and customize it.
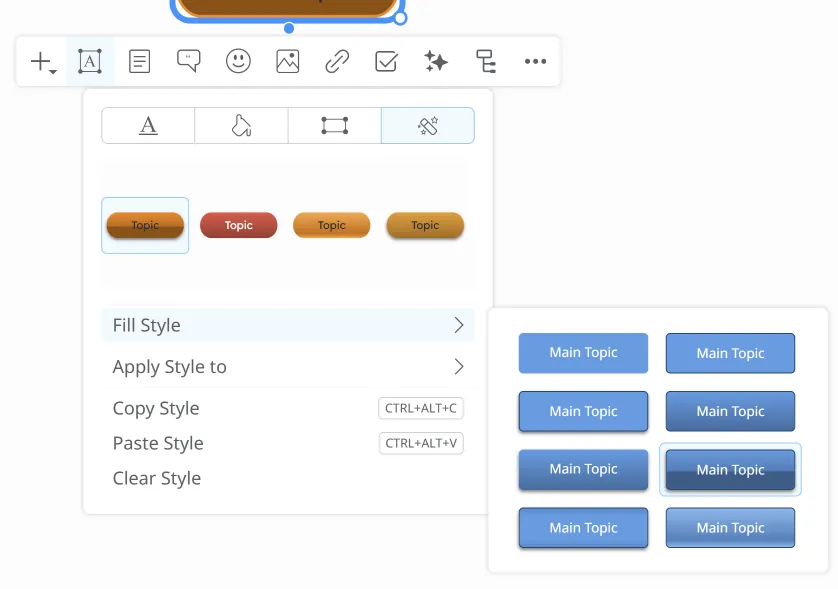
Topic Style
Section titled “Topic Style”You can choose from a variety of styles - with or without gradients or borders and apply them to other topics.
Boundaries
Section titled “Boundaries”The Boundary functionality will help you mark and determine the limits of an area on your map. You can apply boundaries to any topic but the central one.

Summaries
Section titled “Summaries”To insert a summary, select a topic, click the ” + ” button on the toolbar, and then choose the Summary option from the menu. You can add summary to any topic but the central one.

Relationship
Section titled “Relationship”The option to add a relationship between topics will be available when you select a topic and click the ” + ” button from the toolbar.
Map styles
Section titled “Map styles”-
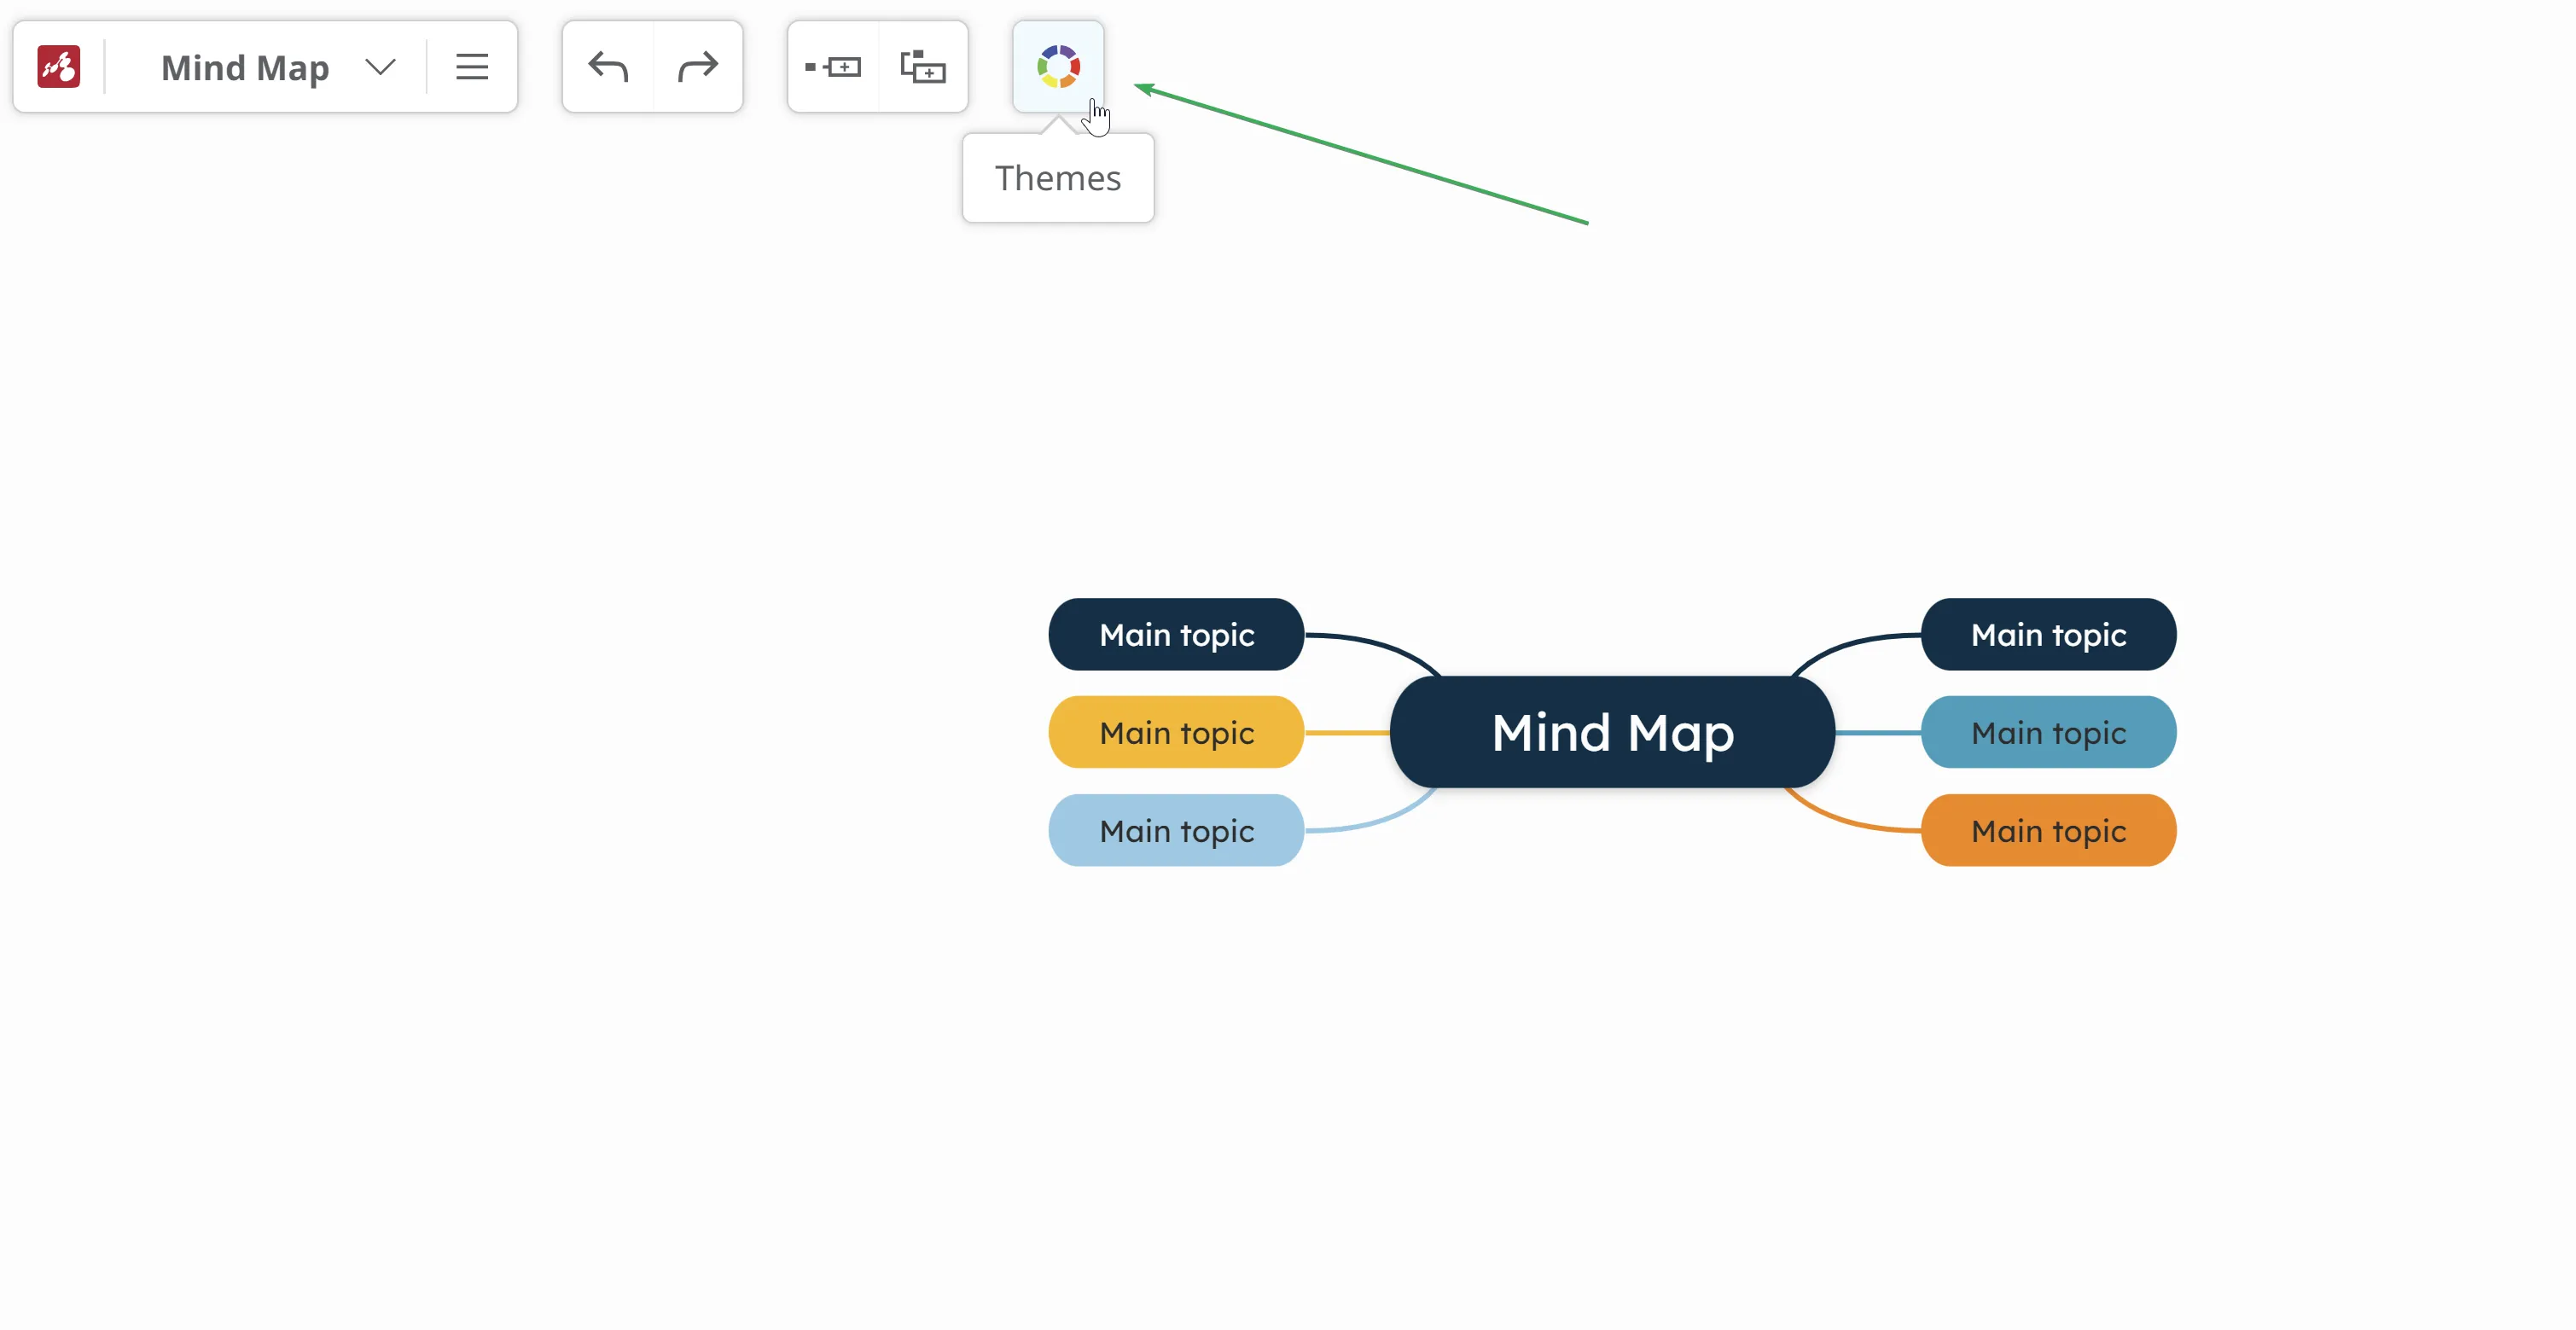
Themes Style - choose the appearance of your current mind map from the predefined layouts (1), color palettes (2) and sizes (3).
-
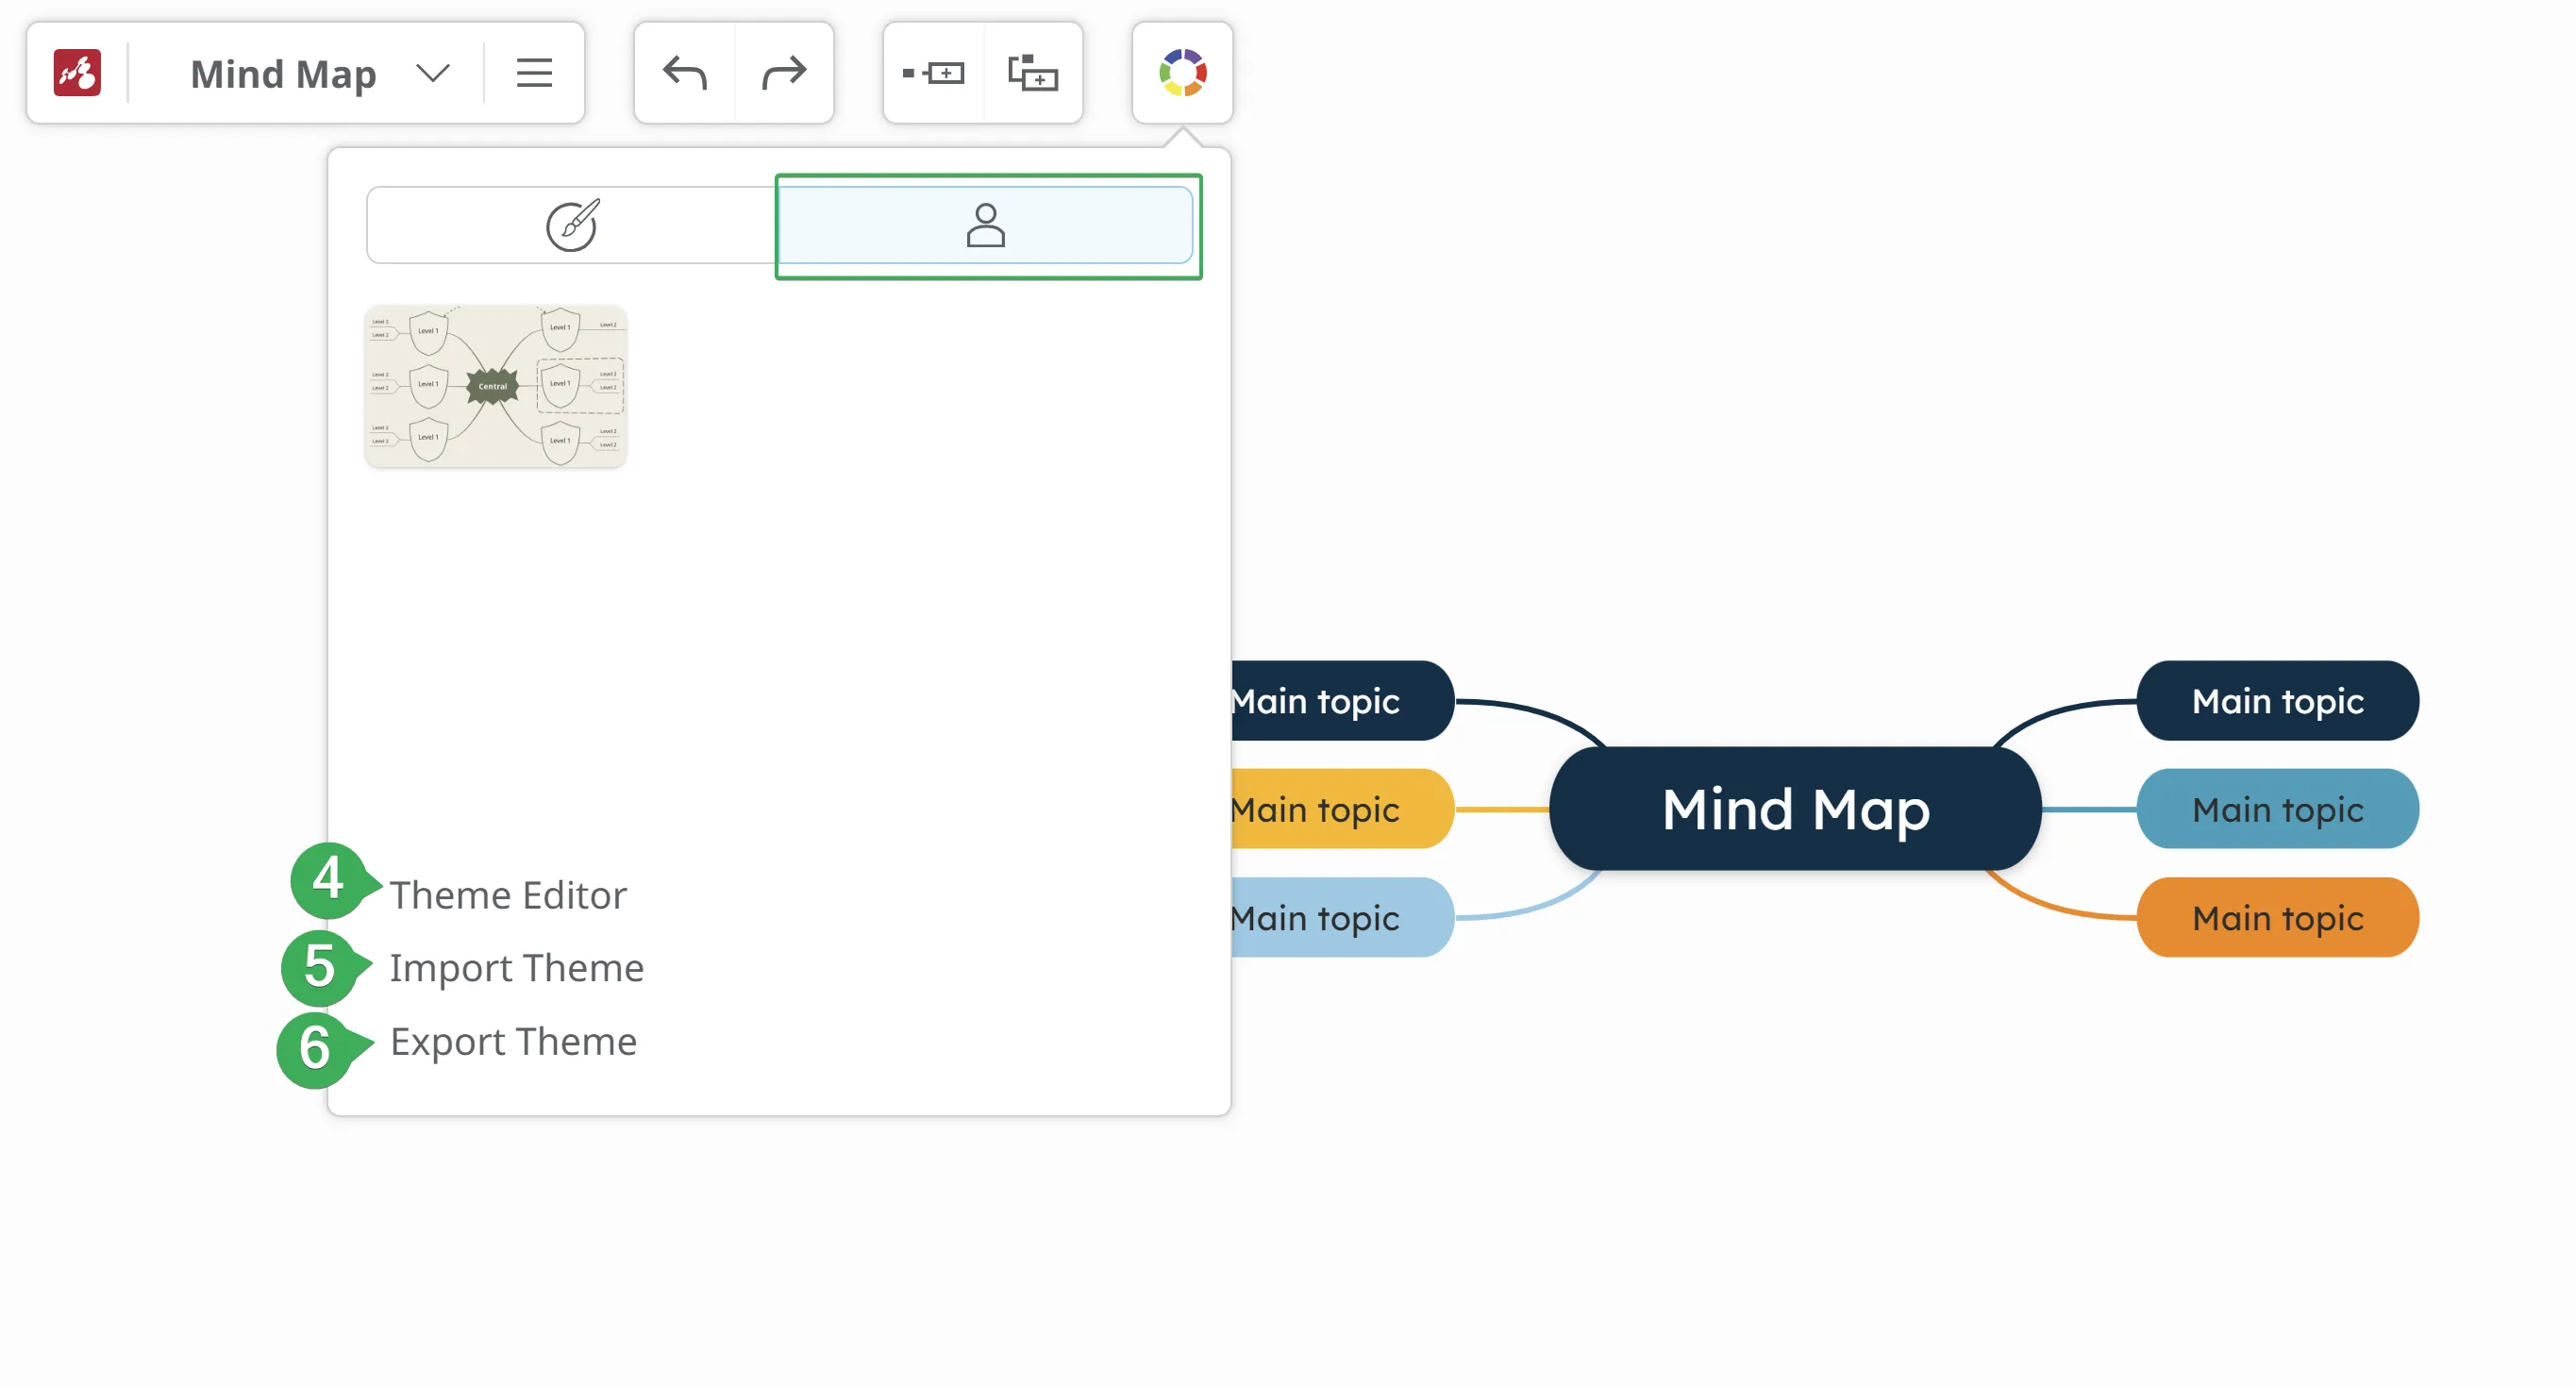
Theme Editor - create your own personalized theme (4).
-
Import Theme - import previously saved themes (5).
-
Export Theme - export your themes (6).
-
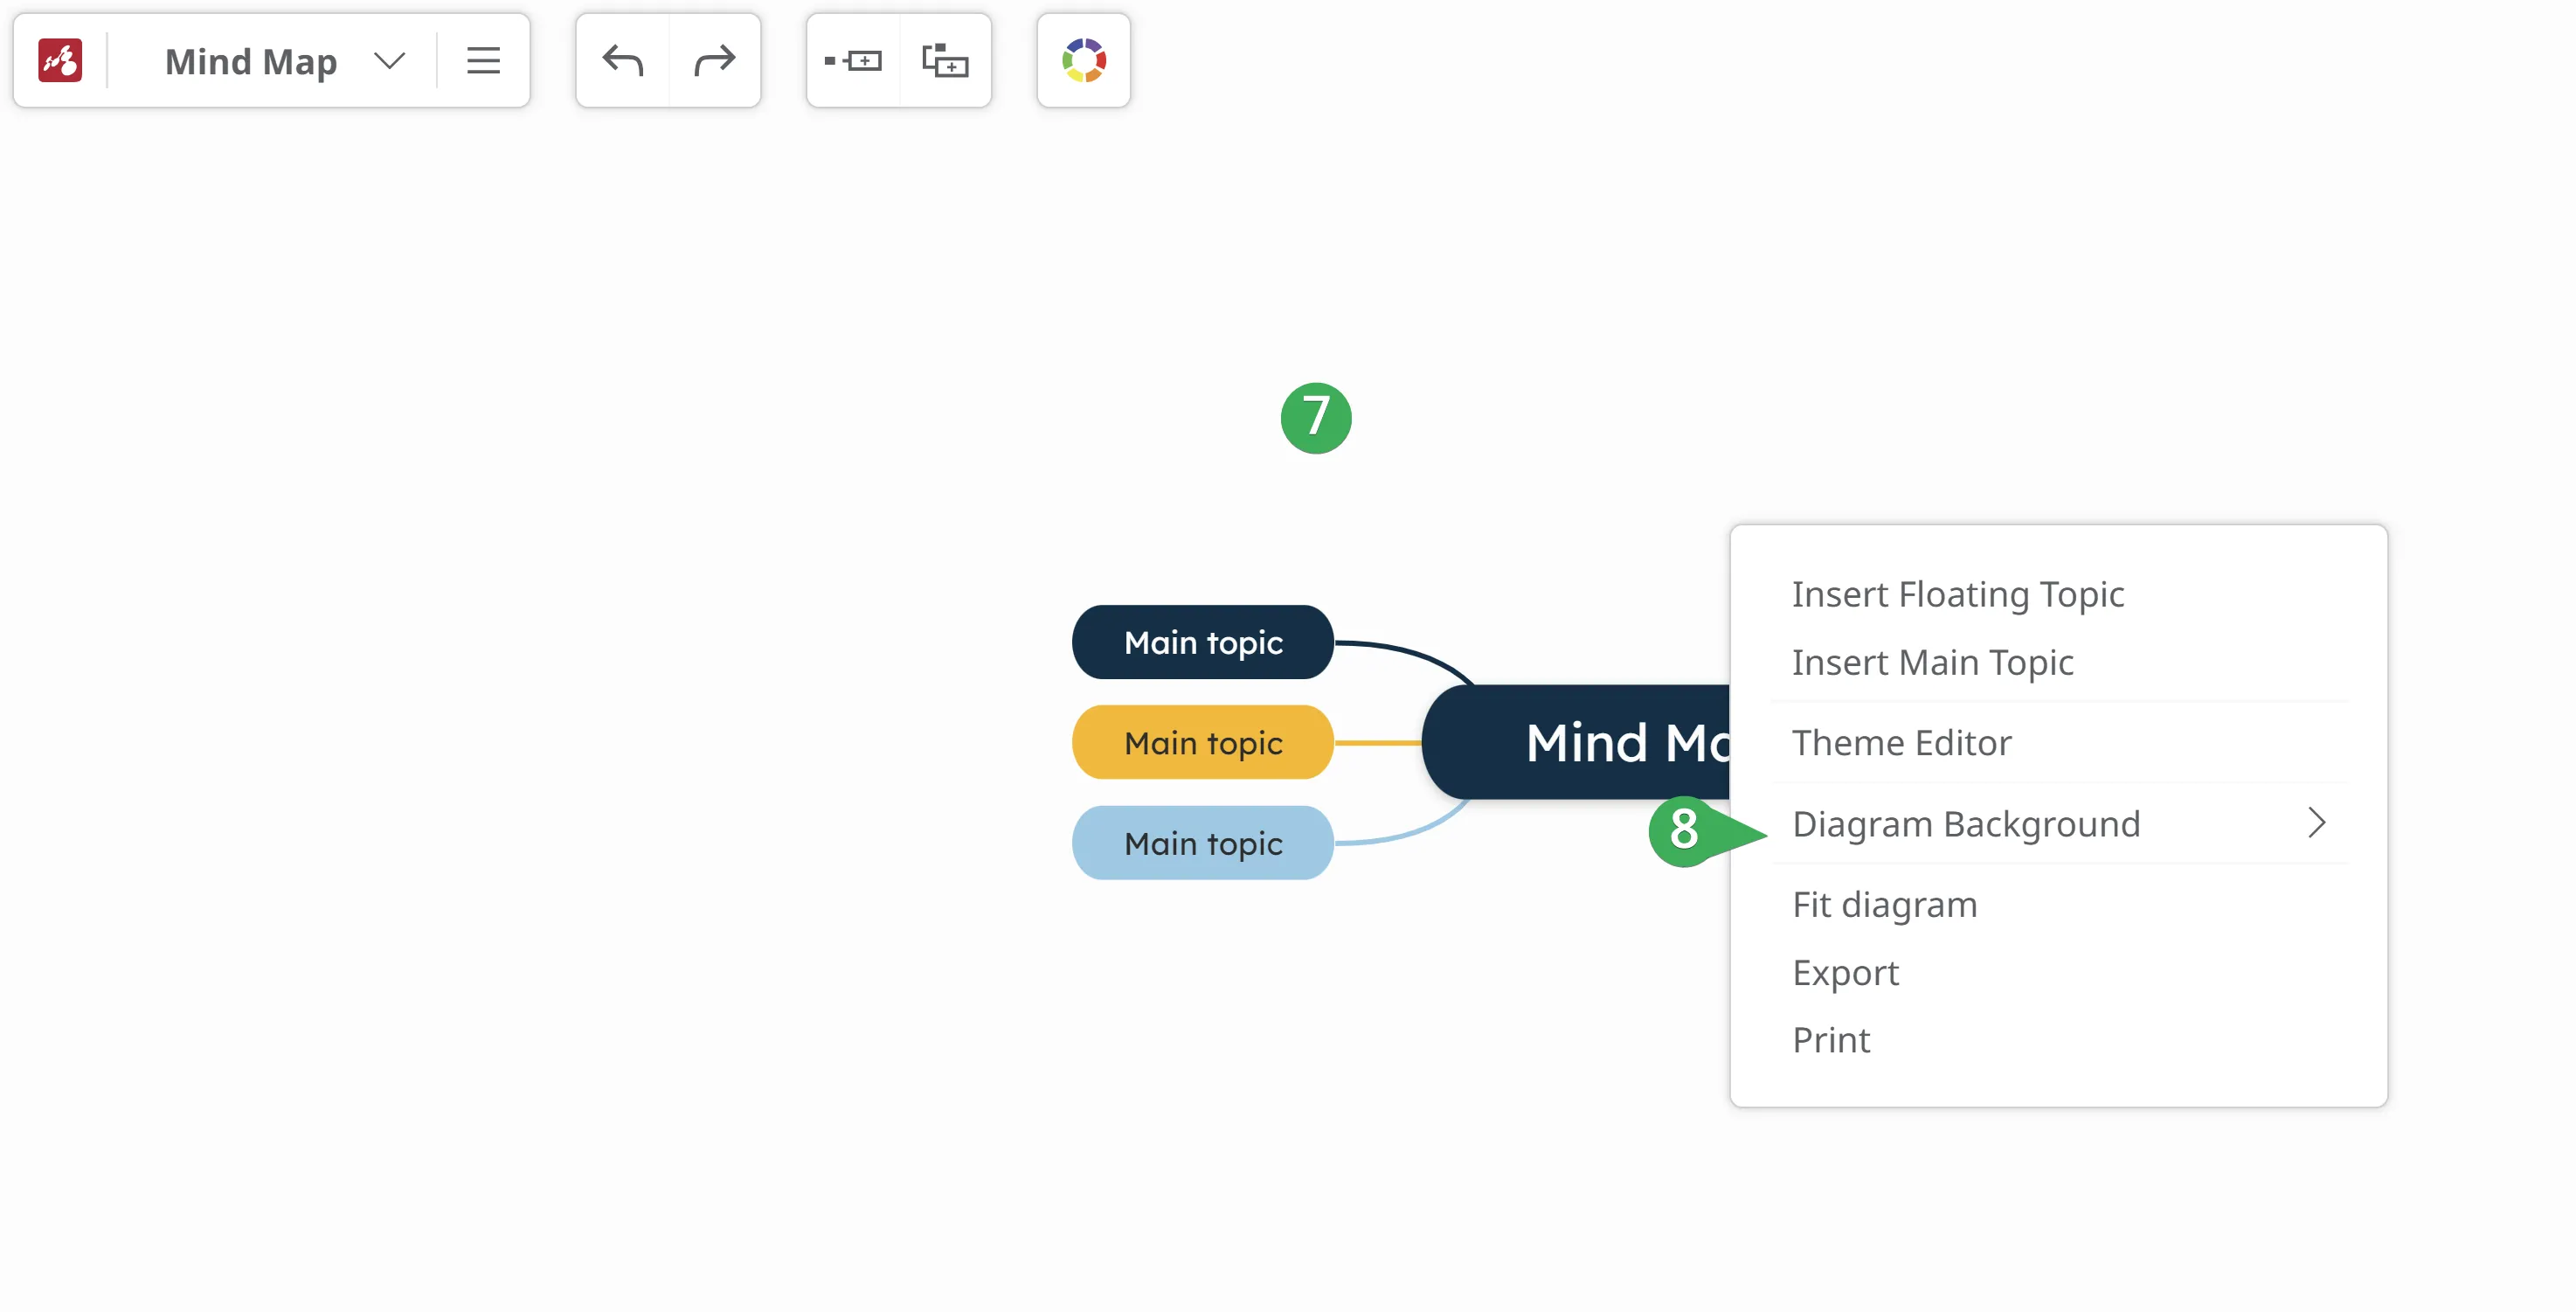
Diagram Background - right-click on the canvas (7), then click on Diagram Background (8) and choose a color/pattern/picture.

Adding information to the topics
Section titled “Adding information to the topics”To add details and customize a topic, select it and use the toolbar to access different features:
- Topic Style
- Add Notes
- Add Comments
- Add Icons
- Add Multimedia
- Add Links/Attachments
- Set as Task
- Use Smart Tools
- Customize Layout
![]()
Organizing mind maps
Section titled “Organizing mind maps”Create a private folder – Go to the Dashboard, right-click, and select Create Folder. A private folder will be created and appear in the Dashboard. You can then drag your maps into the newly created folder.