

Managing a published assignment
Once an assignment is published, its overview page is where you live for the rest of the term. It answers the question you actually have (who is getting on with it and who is stuck) and it carries every action you need afterwards: a note to the whole class, a lock at the deadline, a copy for next year’s group.
You get there by clicking the assignment anywhere it appears: in the Assignments category, or on a class’s Assignments tab. Publishing one drops you straight onto it. The address is stable, so it is worth bookmarking the assignment you are marking this week.
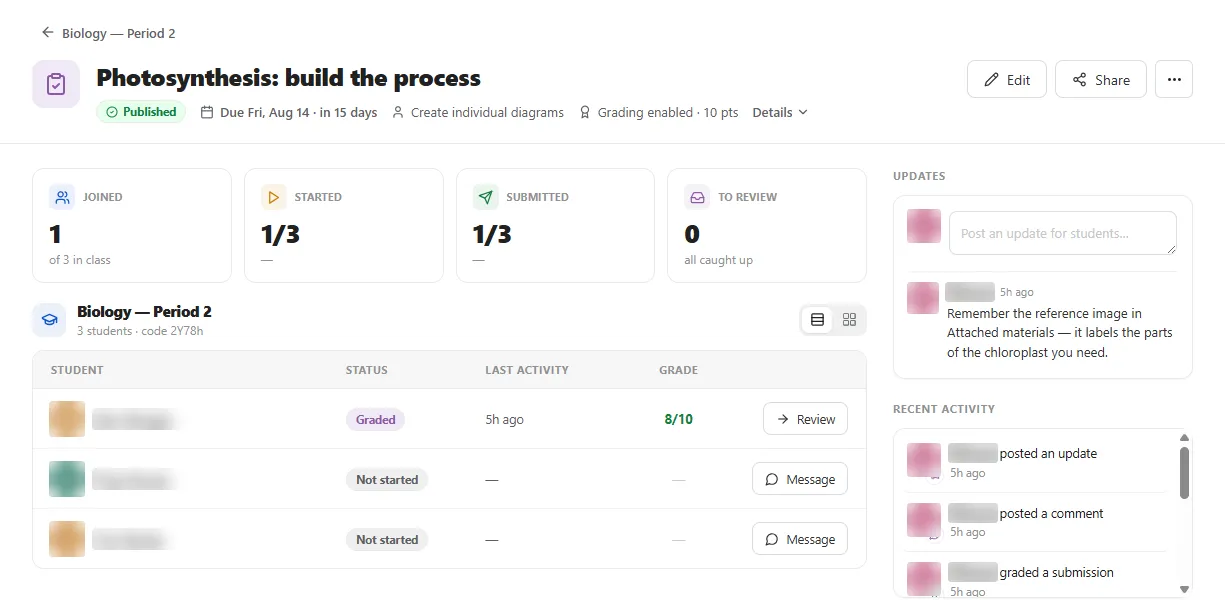
The header
Section titled “The header”The line above the title is a back link carrying the class name (Biology, Period 2 in these screenshots) and it takes you to that class. To the right sit Edit, Share and the ⋯ (three dots) menu.
Under the title is a row of pills that describes the assignment at a glance:
- Published: the normal state. Locked and Archived appear alongside it when you have used those actions.
- The due date, with the countdown attached: Due Fri, Aug 14 · in 15 days.
- The work type: Create individual diagrams, Individual diagrams from a template or Work collaboratively on a shared diagram.
- The grading chip, Grading enabled · 10 pts, on an assignment you are marking out of points. Assignments with grading switched off simply have no chip.
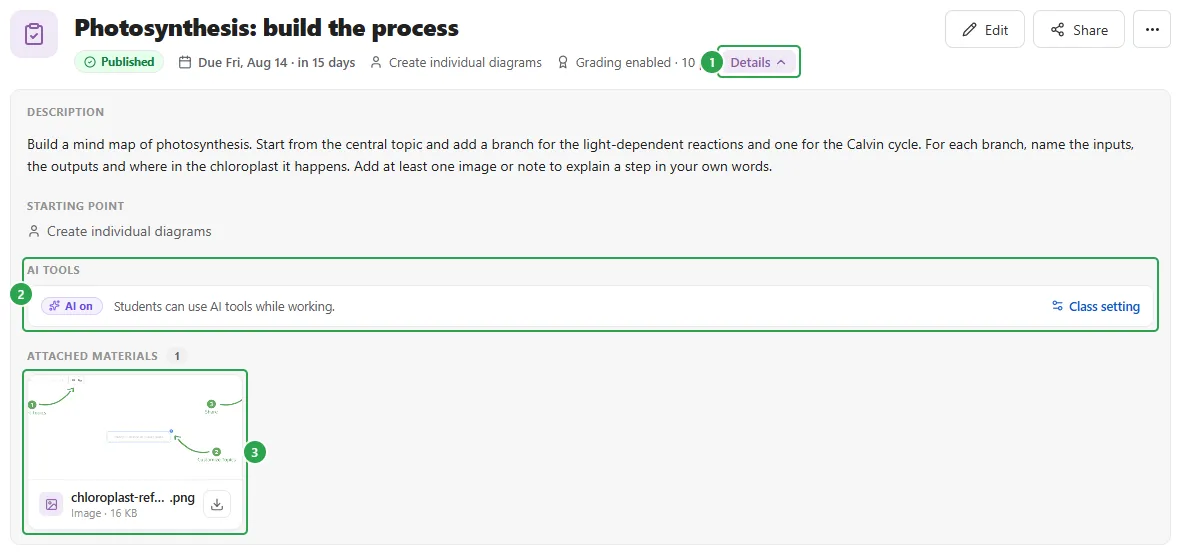
Details
Section titled “Details”Details (1) is a disclosure rather than a link: it expands in place and shows what you wrote when you set the assignment up.
- DESCRIPTION: shows the instructions your students read.
- STARTING POINT: repeats the work type.
- AI TOOLS (2): reports whether students may use AI while working, and says where that came from: Class setting, with a Class setting link to change it for everyone.
- ATTACHED MATERIALS (3): lists the files you attached, each with its type and size and its own download button.
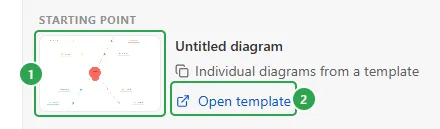
When the assignment starts from a template, STARTING POINT shows the template itself: a thumbnail (1) and its name, with Open template (2) to look at the copy every student receives.
The four statistics
Section titled “The four statistics”The numbers along the top of the main column are four different questions, and it is worth being precise about which is which.

- JOINED (1): counts students who have actually accepted the class, against the size of the class roster: 1 of 3 in class. Until anyone has, it reads 0 and Waiting for students.
- STARTED (2): counts students who have opened the assignment and have a diagram.
- SUBMITTED (3): counts those who have handed it in. Both STARTED and SUBMITTED are shown as a fraction of the class.
- TO REVIEW (4): counts submissions that are in but not yet graded, the one to watch. It is your marking queue, and when it is empty it says so: all caught up.
The roster
Section titled “The roster”Below the statistics is a row identifying the class (1): its name, how many students are in it, and the join code, and then one row per student.
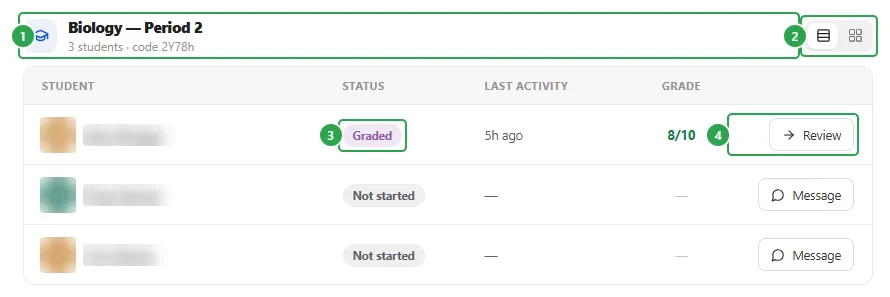
The layout toggle (2) switches between Table view and Card view, and your choice is remembered in the browser, so the roster comes back the way you left it.
Each row carries a status pill (3): Not started, In progress, Submitted or Graded. LAST ACTIVITY is a relative time, an em dash for a student who has not touched it. GRADE fills in once you have marked the work.
The button at the end of the row (4) changes with the state, which makes it a fast way to do the next useful thing:
- Review: there is a submission waiting. This opens the review page.
- View work: the student has a diagram in progress; you can look without marking it.
- Message: nothing to look at yet. It opens the same review page with the message composer ready, so you can nudge a student who has not begun.
Card view
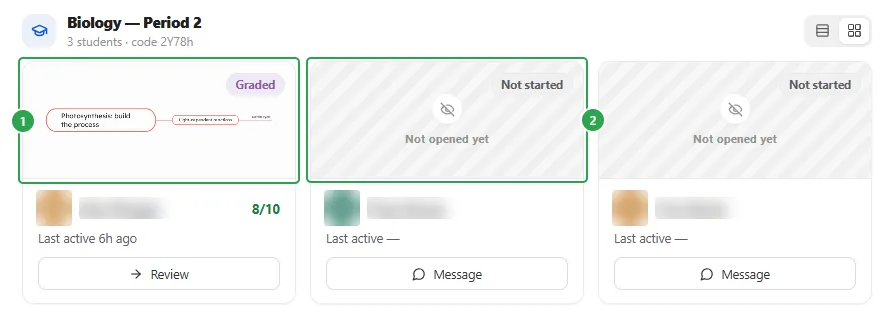
Section titled “Card view”Card view trades the columns for a thumbnail of each diagram (1), which is the quickest way to see whether a class has understood the task at all. A student who has not opened the assignment gets a hatched placeholder reading Not opened yet (2) instead.
Groups instead of students
Section titled “Groups instead of students”On a collaborative assignment the roster is one row per group, not per student. The column header reads GROUP, the class row counts 2 groups rather than students, and each row names the group with its members listed underneath (1).
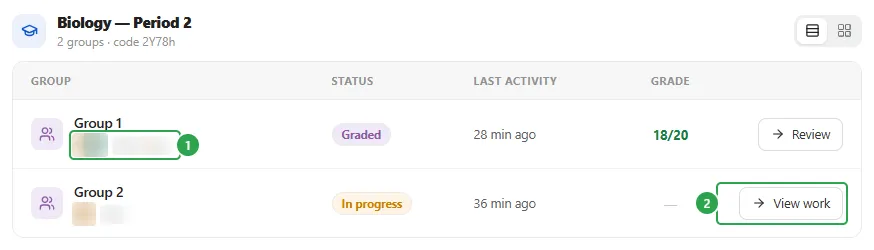
Everything else behaves the same way: the status pill, the grade and the action button (2) all belong to the group as a whole, because the group shares one diagram.
Before anyone joins
Section titled “Before anyone joins”An assignment nobody has joined yet replaces the roster with the thing you need in that first minute: the class JOIN CODE (1) and its join link, both with a copy button. Show QR code (2) is for projecting to the room, and More ways to add (3) leads to the rest of the options: email invites, generated PIN accounts, a CSV import. Adding students to a class covers those.
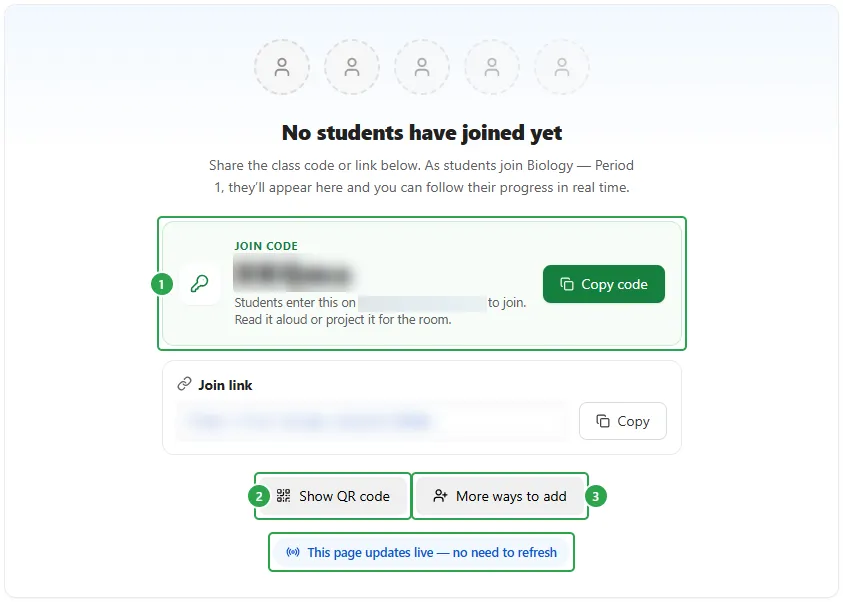
Students appear here as they join, without a refresh.
Posting an update
Section titled “Posting an update”The UPDATES card at the top of the right column is an announcement board for this one assignment. Click the field (1), type, and it expands.
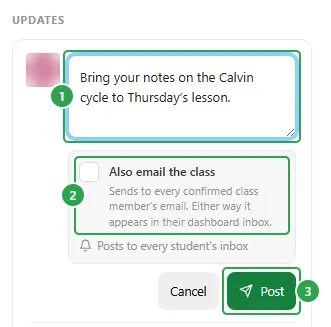
An update always reaches every student two ways: it lands in their dashboard inbox and appears on their copy of the assignment page. Ticking Also email the class (2) adds an email on top of that, to every confirmed class member, which is the distinction the checkbox’s own note draws. Then Post (3).
Posted updates stack up under the composer with your name and how long ago you wrote them, so the class can catch up on anything they missed.
Recent activity
Section titled “Recent activity”RECENT ACTIVITY underneath is a live feed of everything that has happened, newest first.
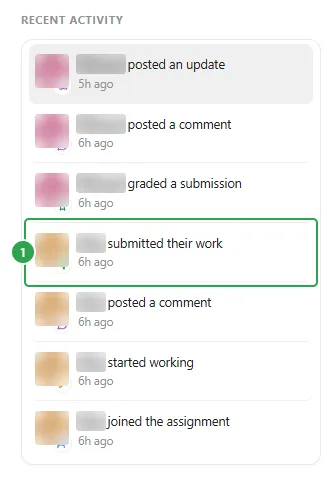
Student events read joined the assignment, started working, submitted their work, reopened their work and posted a comment. Your own show up too (posted an update, graded a submission) and so do things that happened to the assignment itself, such as archived the assignment or restored the assignment.
Rows about a student’s work or a comment are links (1): clicking one jumps straight to that student’s review page, which makes the feed a serviceable to-do list.
The ⋯ (three dots) menu
Section titled “The ⋯ (three dots) menu”Everything else lives behind ⋯ (1) in the header, grouped by what it is for.
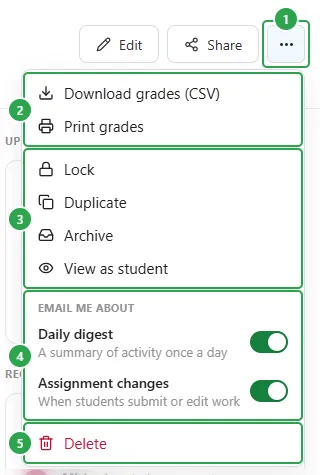
Download grades (CSV) and Print grades (2) only appear when the assignment is graded; on an ungraded one the menu starts at Lock.
The middle group (3) is the assignment’s state:
- Lock stops the class editing without hiding anything.
- Duplicate makes a copy.
- Archive retires the assignment at the end of term.
- View as student previews what the class sees. See Create an assignment.
EMAIL ME ABOUT (4) is two switches for your own inbox: Daily digest (A summary of activity once a day) and Assignment changes (When students submit or edit work).
Delete (5) sits on its own at the bottom.
Lock is the deadline tool. A Locked pill (1) joins Published, and a banner (2) states the rule for you and for them: Students can view the assignment but cannot edit their work while it is locked. Nothing is hidden and nothing is lost: reading, and your marking, both carry on.

Unlock is on the banner itself, so reopening the work for a student who missed the deadline is one click.
Duplicate
Section titled “Duplicate”Duplicate creates a copy immediately (no dialog), named after the original with (copy) appended, and opens it. From there use Edit to retitle it, change the due date and assign it to a different class. The copy starts empty: no students, no submissions.
Archive
Section titled “Archive”Archive takes the assignment out of circulation without destroying it. The pill reads Archived (1), the due date loses its countdown, Edit and Share disappear from the header, and a banner (2) explains the state: It is hidden from students and read-only. Restore it to make it active again.

Archived assignments move to the Archived tab of the Assignments category. Restore (on the banner, or from the ⋯ menu, which collapses to just Restore and Delete while archived) brings it back as it was.
Delete
Section titled “Delete”Delete asks first. The confirmation is blunt about the scope: The assignment is removed for you and your students. Student diagrams are not deleted. That second sentence matters: the work your students made is theirs and stays in their account.
The assignment then moves to the Trash tab of the Assignments category, where its ⋯ menu offers Restore and Delete forever, and where items in Trash are permanently deleted after 30 days.
Where to go next
Section titled “Where to go next”- Reviewing & grading: where every Review button on the roster leads.
- Adding students to a class: filling the roster this page is reporting on.
- Collaborative assignments: how groups form, and why the roster counts them instead of students.
- Create an assignment: includes View as student, previewing what the class sees.
- Assignments for students: the page View as student is imitating, for real.
- Classes: the class this assignment belongs to, and its archive.
- Assignments: how assignments and classes fit together.