

Working with Outlines
Create an outline whenever you want to work on the blueprint of your plans, ideas, or projects, and have a clear overview of their key points.
The outline allows you to organize your ideas before starting a project. Use it in the prewriting process of your papers, or if you simply want to illustrate the connections between concepts (cause, effect, example, etc.). Support your research by creating an outline with the information you found.
Structure of an outline
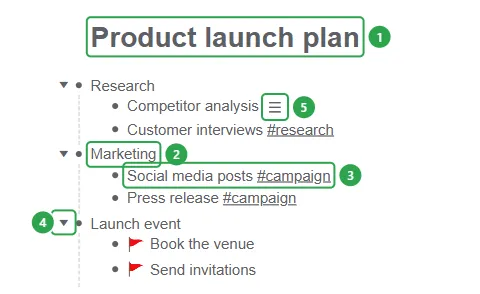
Section titled “Structure of an outline”The title (1) of your outline has the largest font size and is bold.
The main topics (2) look like a bulleted list, all on the same indentation level.
Subtopics (3) are indented under their parent topic, and a dotted guide line shows which topic they belong to.
A parent topic has a ▼ triangle (4) to its left. Click it to collapse the branch, and click it again to expand it.
A topic that has a note shows the ☰ Notes indicator (5) after its text.
Creating an outline
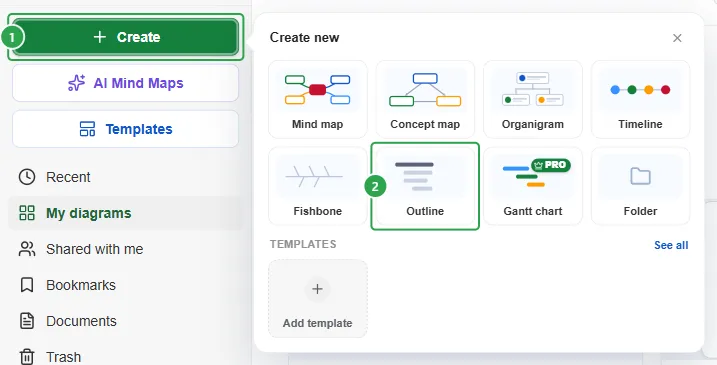
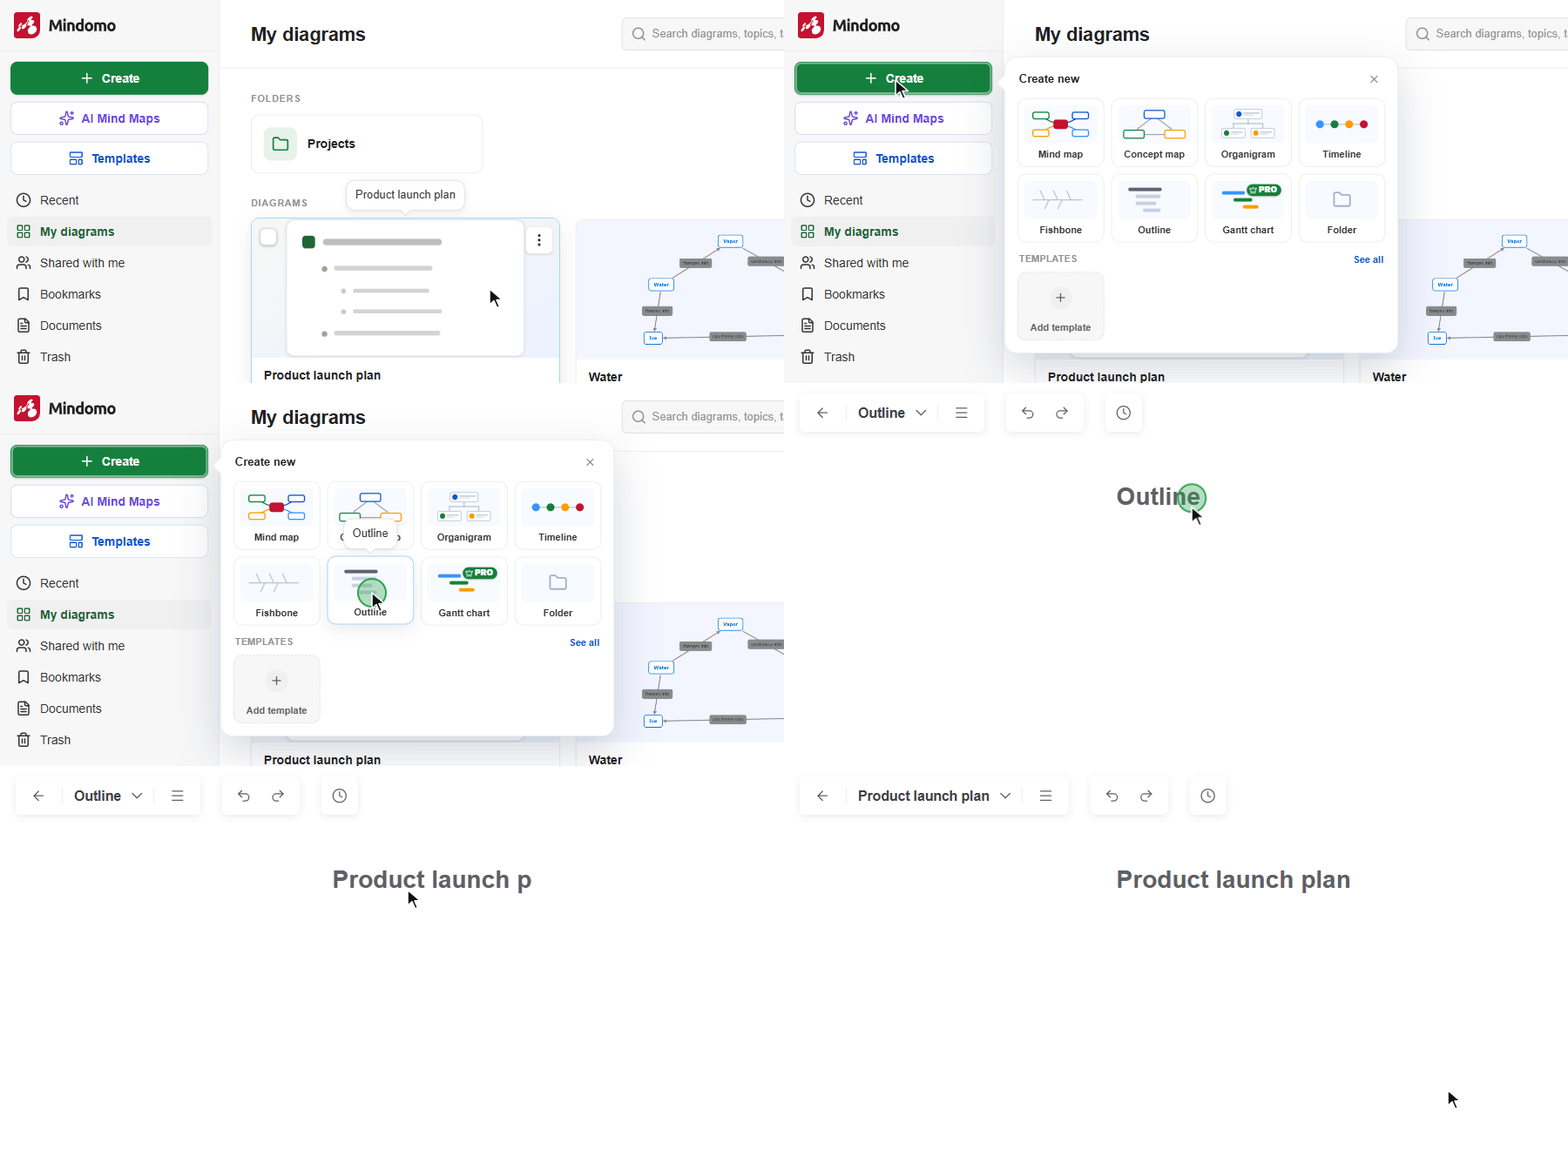
Section titled “Creating an outline”Click Create in the top-left corner of your Dashboard (1), then click the Outline tile in the Create new popup (2).
The outline opens right away, with the default title Outline. Click the title to rename it.
Editing and reorganizing topics
Section titled “Editing and reorganizing topics”You can build and reorganize the whole outline from the keyboard. Type a topic, press Enter to start the next one, and use Tab and Shift+Tab to move it down or up a level in the hierarchy.
| Action | Shortcut |
|---|---|
| Add another topic | Enter |
| Indent a topic | Tab |
| Outdent a topic | Shift+Tab |
| Insert a subtopic | Alt+Enter |
| Insert a task | Alt+Shift+Enter |
| Duplicate a topic | Ctrl+D |
| Search & Filter | Ctrl+F |
| Open the Command Palette | Ctrl+K |
| Drill Down | F6 |
Select a topic
Section titled “Select a topic”Press Escape to deselect the topic.
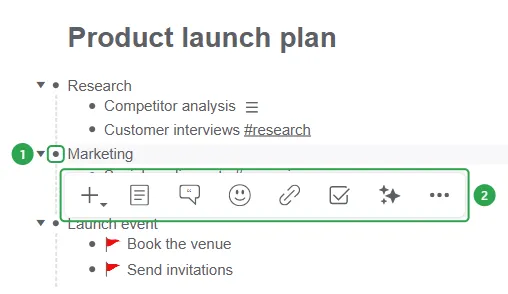
The toolbar holds the actions you can apply to the selected topic. Insert and More are described below. The others have their own sections: Notes, Comments, Icons, Links / Attachments, Task, and Generate content with AI.
Insert topics
Section titled “Insert topics”Click Insert on the toolbar to add a topic after the selected one (Enter), a subtopic (Alt+Enter), or a task subtopic (Alt+Shift+Enter). It can also add a label or duplicate the topic (Ctrl+D).
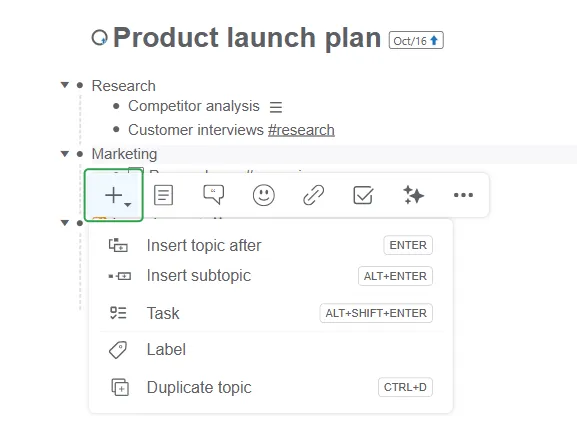
Drag and drop topics
Section titled “Drag and drop topics”To reorganize the outline with the mouse, drag a topic by its bullet. A line shows where the topic will land; drop it at the position and indentation level you want.
More actions
Section titled “More actions”Click More (•••) on the toolbar for Indent, Outdent, Cut, Copy, Paste, Copy link, the Tools submenu, and Delete (Shift+Delete).
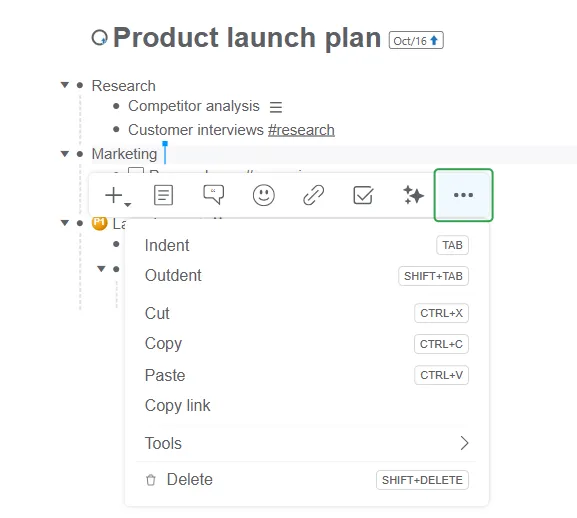
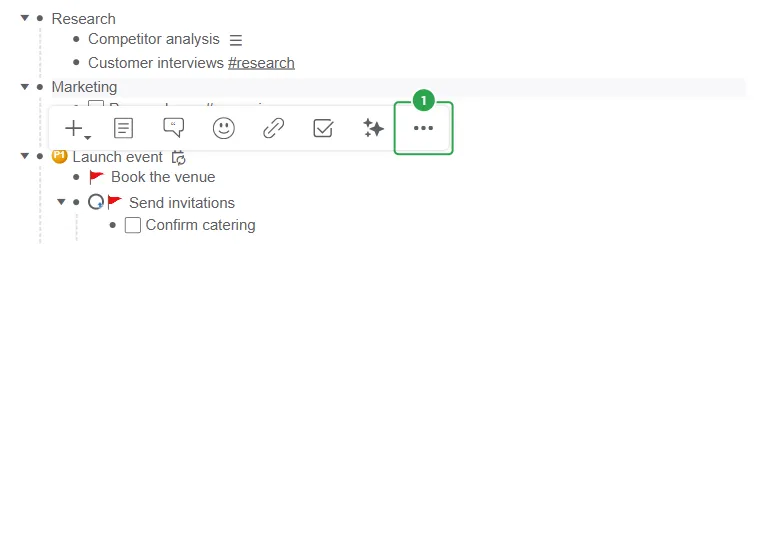
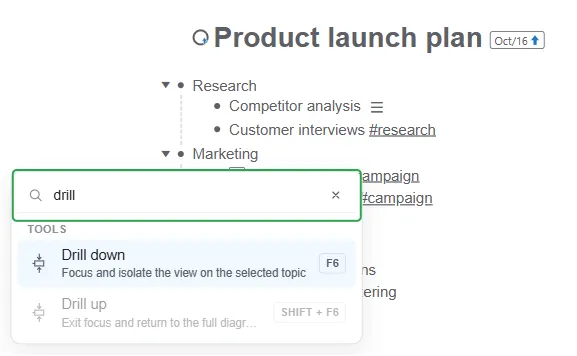
To focus on one branch, use Drill Down. Select the topic and click More (1) on the toolbar, or press F6.
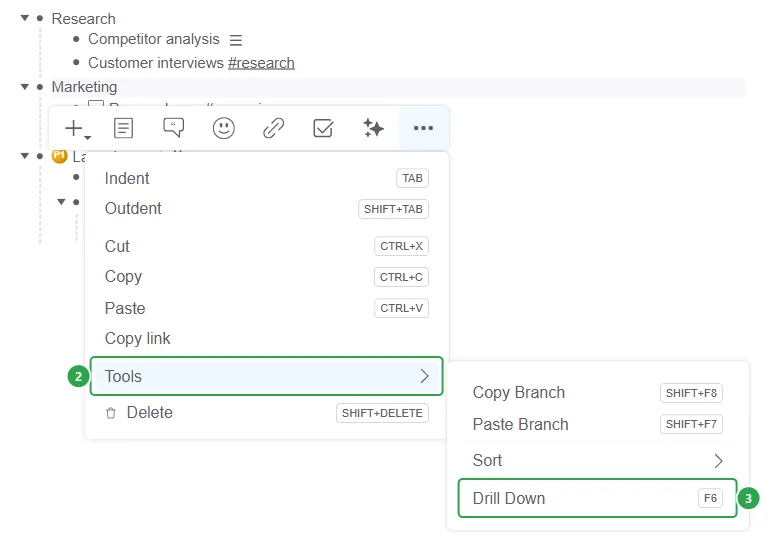
Then go to Tools (2) and choose Drill Down (3).
The outline then shows only that topic and its subtopics, under a breadcrumb that reads Home › followed by the topic name. To return to the full outline, click Home in the breadcrumb or press Shift+F6 (Drill Up in the Command Palette).
The same Tools submenu also has Copy Branch, Paste Branch, and Sort.
Command Palette
Section titled “Command Palette”Press Ctrl+K, or open the ≡ menu in the top bar and choose Command Palette, to search for a command by name instead of looking for it in the menus. The commands apply to the selected topic.
Adding notes
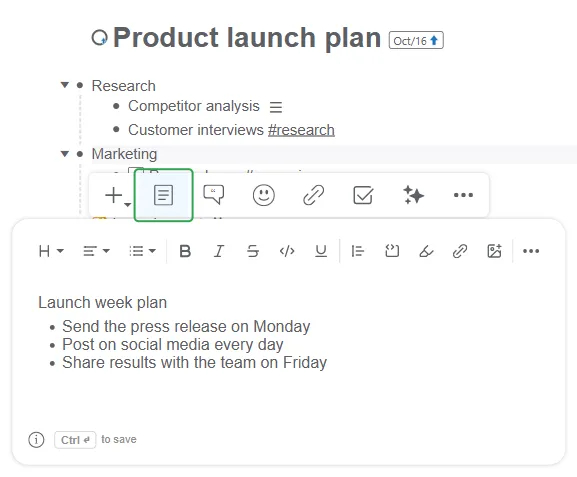
Section titled “Adding notes”Select a topic and click Notes on the toolbar. An editor opens below the topic, where you can write and format a note. Press Ctrl+Enter to save it; the ☰ Notes indicator then appears after the topic’s text.
Adding comments
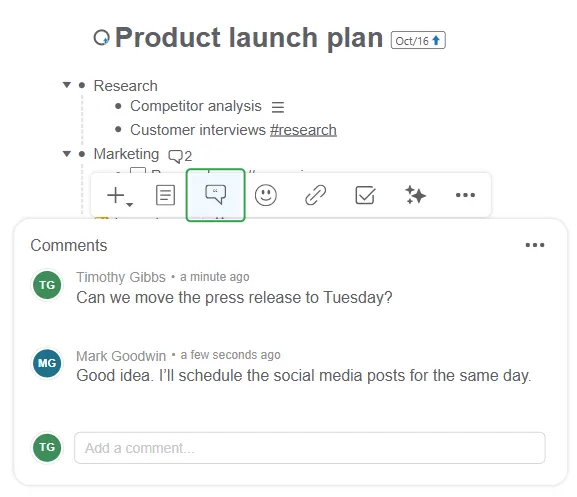
Section titled “Adding comments”Select a topic and click Comments on the toolbar to start a discussion on it. See Add Comments.
Adding icons
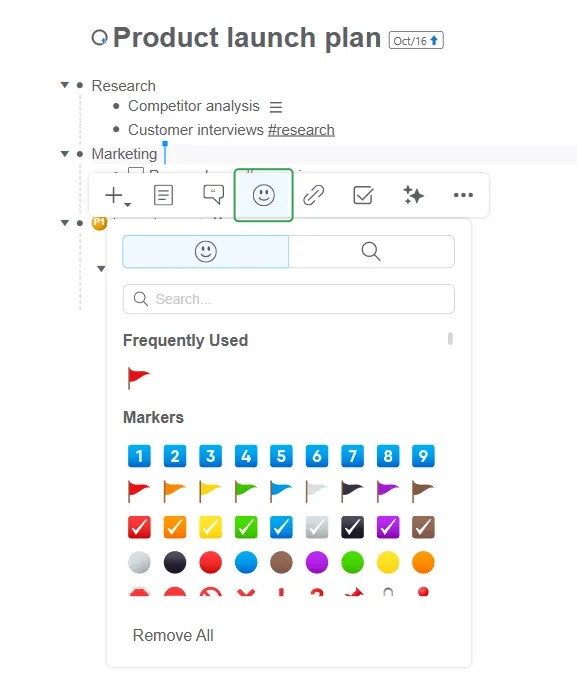
Section titled “Adding icons”Select a topic and click Icons on the toolbar to add an icon or emoji in front of the topic’s text. See Add Icons and Emojis.
Adding links and attachments
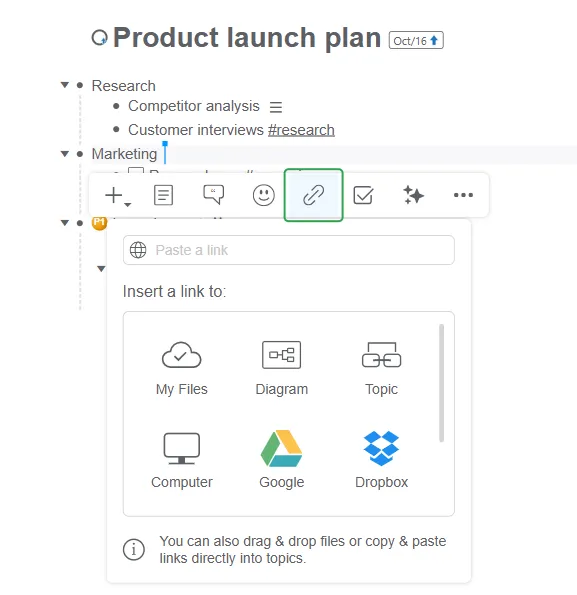
Section titled “Adding links and attachments”Select a topic and click Links / Attachments on the toolbar to link the topic to a web page or another topic, or to attach a file. See Links and Attachments.
Managing tasks in an outline
Section titled “Managing tasks in an outline”Any topic can become a task. Select the topic and click Task on the toolbar (1) to open the task panel, where you can set:
- Priority (P0 to P4)
- Progress
- Start date, Duration, and End date
The second tab of the panel (the person icon) is where you assign the task to someone.
Open More (2) to turn on Task (3) (Ctrl+Alt+T). A checkbox appears in front of the topic, and you can tick it to mark the task as complete.
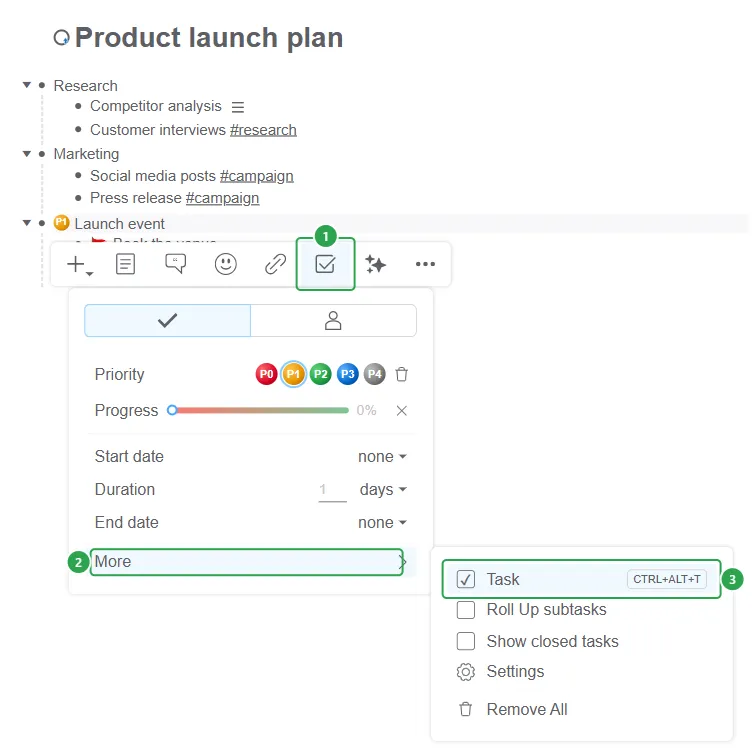
The More menu of the task panel also contains:
- Roll Up subtasks — calculates the progress of a parent task from its subtasks.
- Show closed tasks
- Settings
- Remove All
To add a new task directly under a topic, select the topic and choose Insert → Task, or press Alt+Shift+Enter. The new subtopic already has a checkbox, and its parent shows a progress circle.
For assigning tasks, notifications, and the full task management workflow, see Task management. To follow your tasks in a calendar app, use the iCal task feed.
Recurring tasks
Section titled “Recurring tasks”To make a task repeat, open the task panel and click the End date (1). Pick a date in the calendar, then click Doesn’t repeat (2) and choose how often the task repeats (3):
- every day;
- on working days;
- weekly, on the same day of the week;
- monthly, on the same date;
- yearly, on the same date.
The labels include the day or date of the selected end date. Use the counter under the list to set how many times the task repeats.
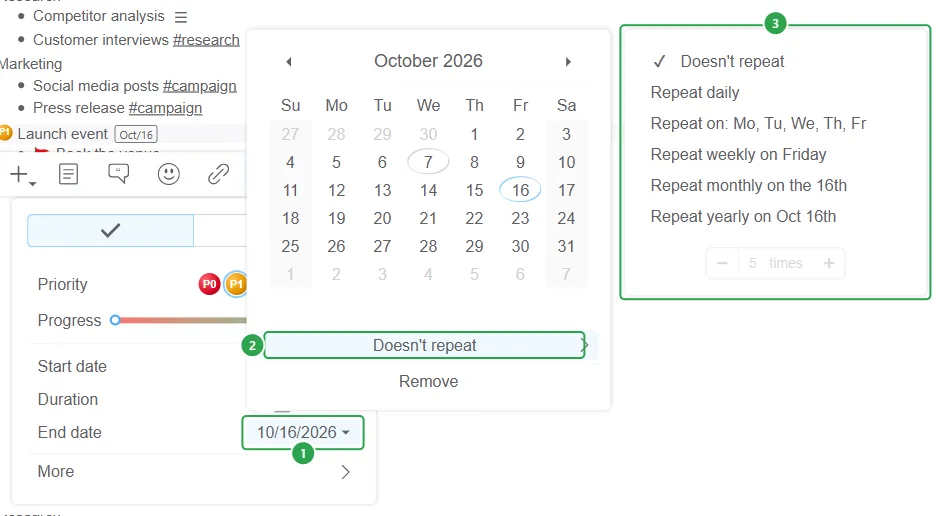
A recurring task shows a repeat icon instead of a checkbox. Hover over it to see how often the task repeats and until when.
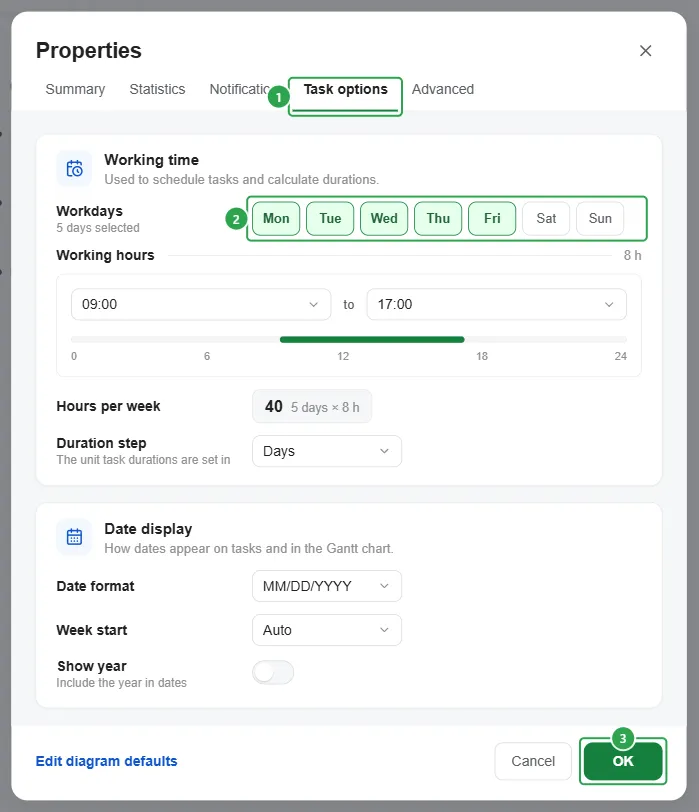
To change which days count as working days, open the ≡ menu in the top bar and choose Properties. On the Task options tab (1), under Working time, toggle the days you want in Workdays (2), then click OK (3).
Generating content with AI
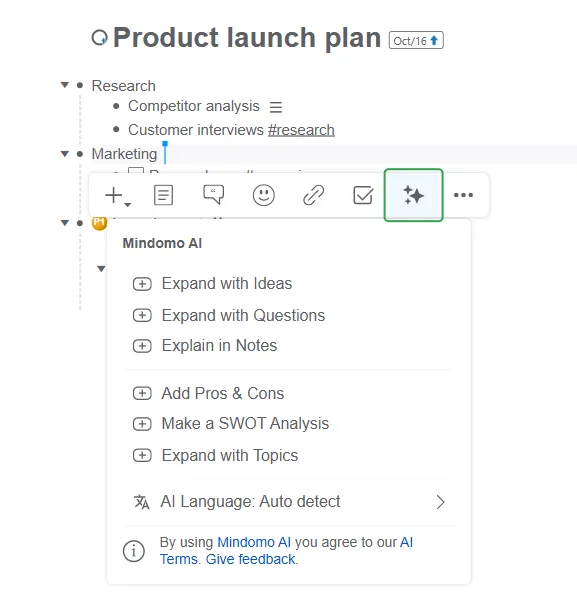
Section titled “Generating content with AI”Select a topic and click Generate content with AI on the toolbar. Mindomo AI opens, and can add ideas, questions, subtopics, pros and cons, or a SWOT analysis to the topic, or explains it in a note. See Mindomo AI.
Searching and filtering an outline
Section titled “Searching and filtering an outline”Click the Search & Filter button in the top-right corner, or press Ctrl+F. The field is labeled Search or filter topics. As you type, it offers to Search for or Filter by your term, and shows how many topics there are in the diagram.
Search for text
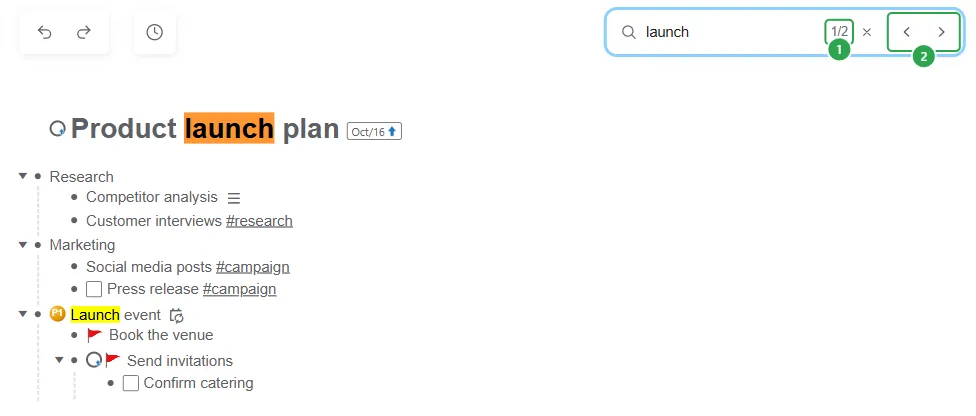
Section titled “Search for text”Choose Search for to highlight every match in the outline. The current match is highlighted in orange and the other matches in yellow. The counter (1) shows which match you are on, and the arrows (2) move to the previous or next match.
When you close the field, the highlights stay in place and the Search & Filter button shows a red badge while the search is active. To clear the search, open the field again and click ×.
For advanced search options, see Searching.
Filter by labels, hashtags, and icons
Section titled “Filter by labels, hashtags, and icons”To tag a topic, type # followed by a word in its text, for example #campaign. The hashtag is underlined, and hovering over it shows Ctrl+Click to filter.
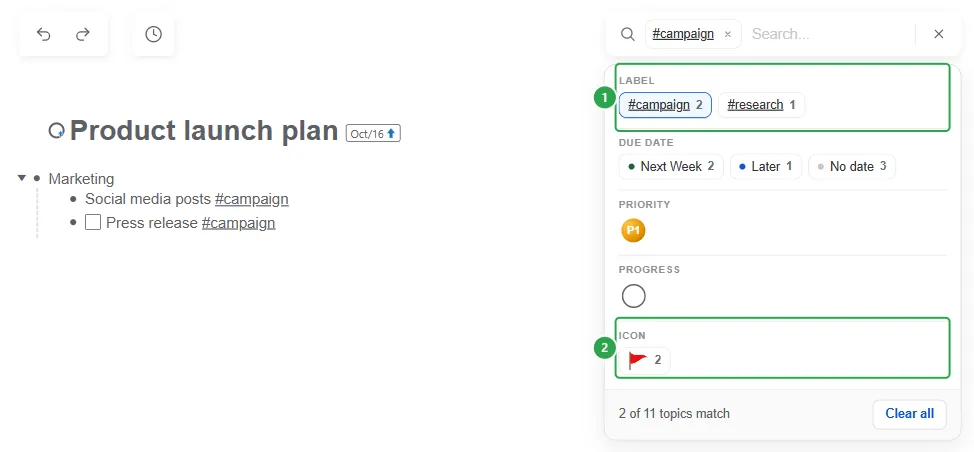
Open Search & Filter with an empty field to see everything you can filter by. Hashtags are listed under LABEL (1) and icons under ICON (2), each with the number of topics that use it. You can also filter by DUE DATE, PRIORITY, and PROGRESS.
Click an item to filter the outline. Only the matching topics remain visible, together with their parent topics, and the panel shows how many topics match. Click Clear all to show the whole outline again.
Switching to a Mind Map or Gantt view
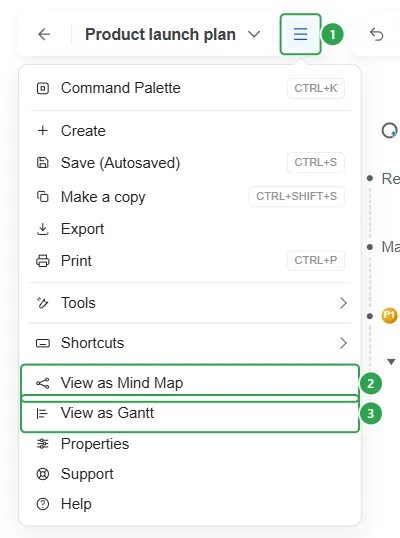
Section titled “Switching to a Mind Map or Gantt view”Open the ≡ menu in the top bar (1) and choose View as Mind Map (2) or View as Gantt (3).
Switching views changes only how the content is displayed. It is still the same file, not a copy, so changes you make in one view show up in the others. To go back, open the ≡ menu and choose View as Outline. For more on the Gantt view, see Gantt charts.
Default view
Section titled “Default view”To make the file always open as a mind map, switch to the Mind Map view first. Then open the ≡ menu (1), go to Tools (2) and choose Keep as mind map (3).
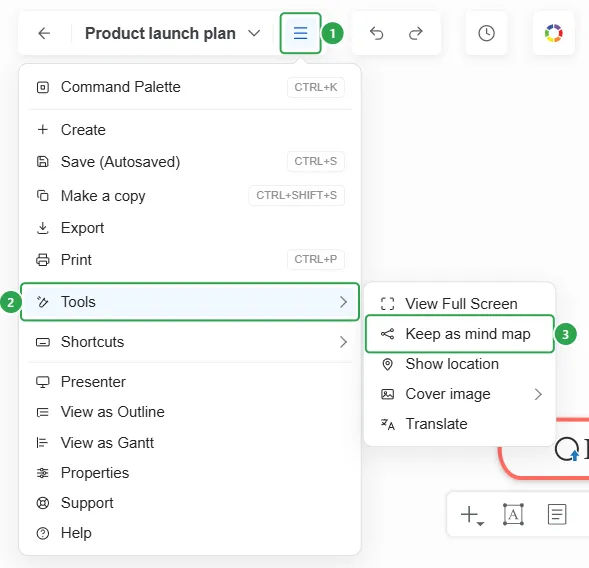
This option appears only in the Mind Map view. In the Outline view, the Tools menu contains View Full Screen, Show location, and Translate.