
Working with Concept Maps
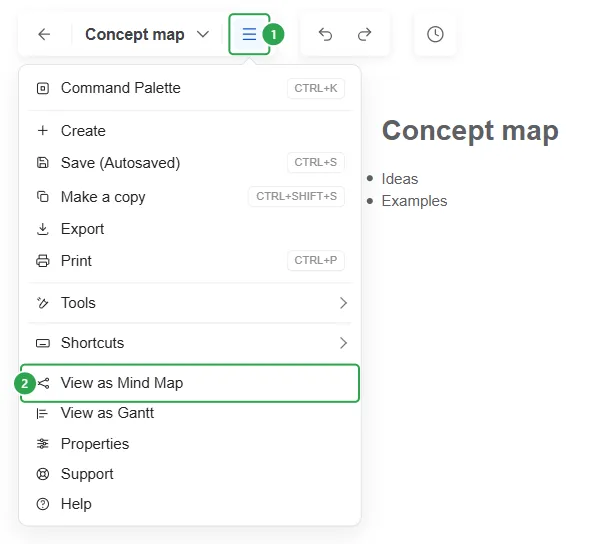
A concept map organizes concepts and shows how they relate to one another through labeled connections. In contrast with the rigid structure of the mind map, the concept map maintains a flexible layout: you can move your topics anywhere on the map canvas by dragging them and organize your map as you see best.
Whenever you add a new topic in your concept map, you can instantly explain how it’s linked to the previous one by labeling their connecting lines. As you add more topics, you may even see new connections between your ideas.
Create a concept map
Section titled “Create a concept map”From the Dashboard
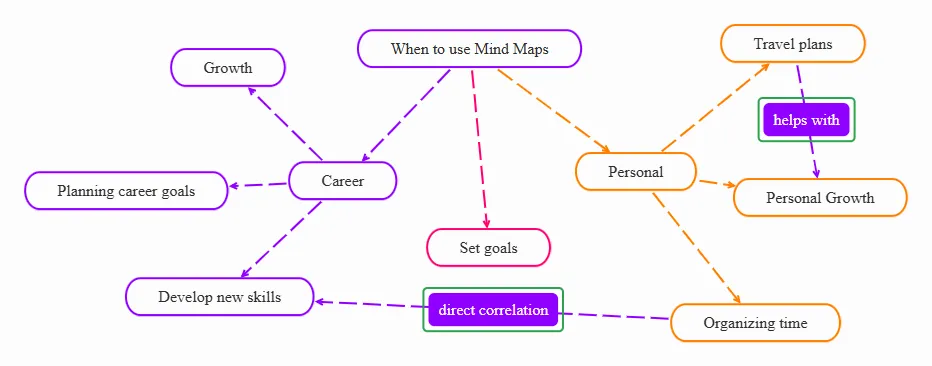
Section titled “From the Dashboard”Click the Create button (1) at the top of the Dashboard’s left panel. The Create new panel opens. Click Concept map (2).
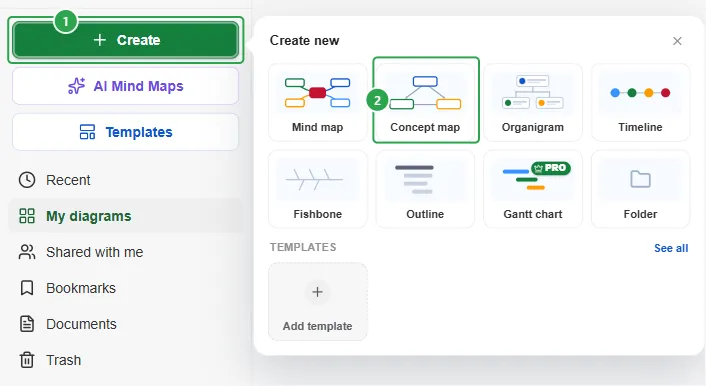
The concept map is created right away and opens in the editor, with a central topic named “Concept map”.
From an existing map
Section titled “From an existing map”You can turn any existing map into a concept map. Open the map, select its central topic, click Layout on the topic toolbar, and choose Concept Map.
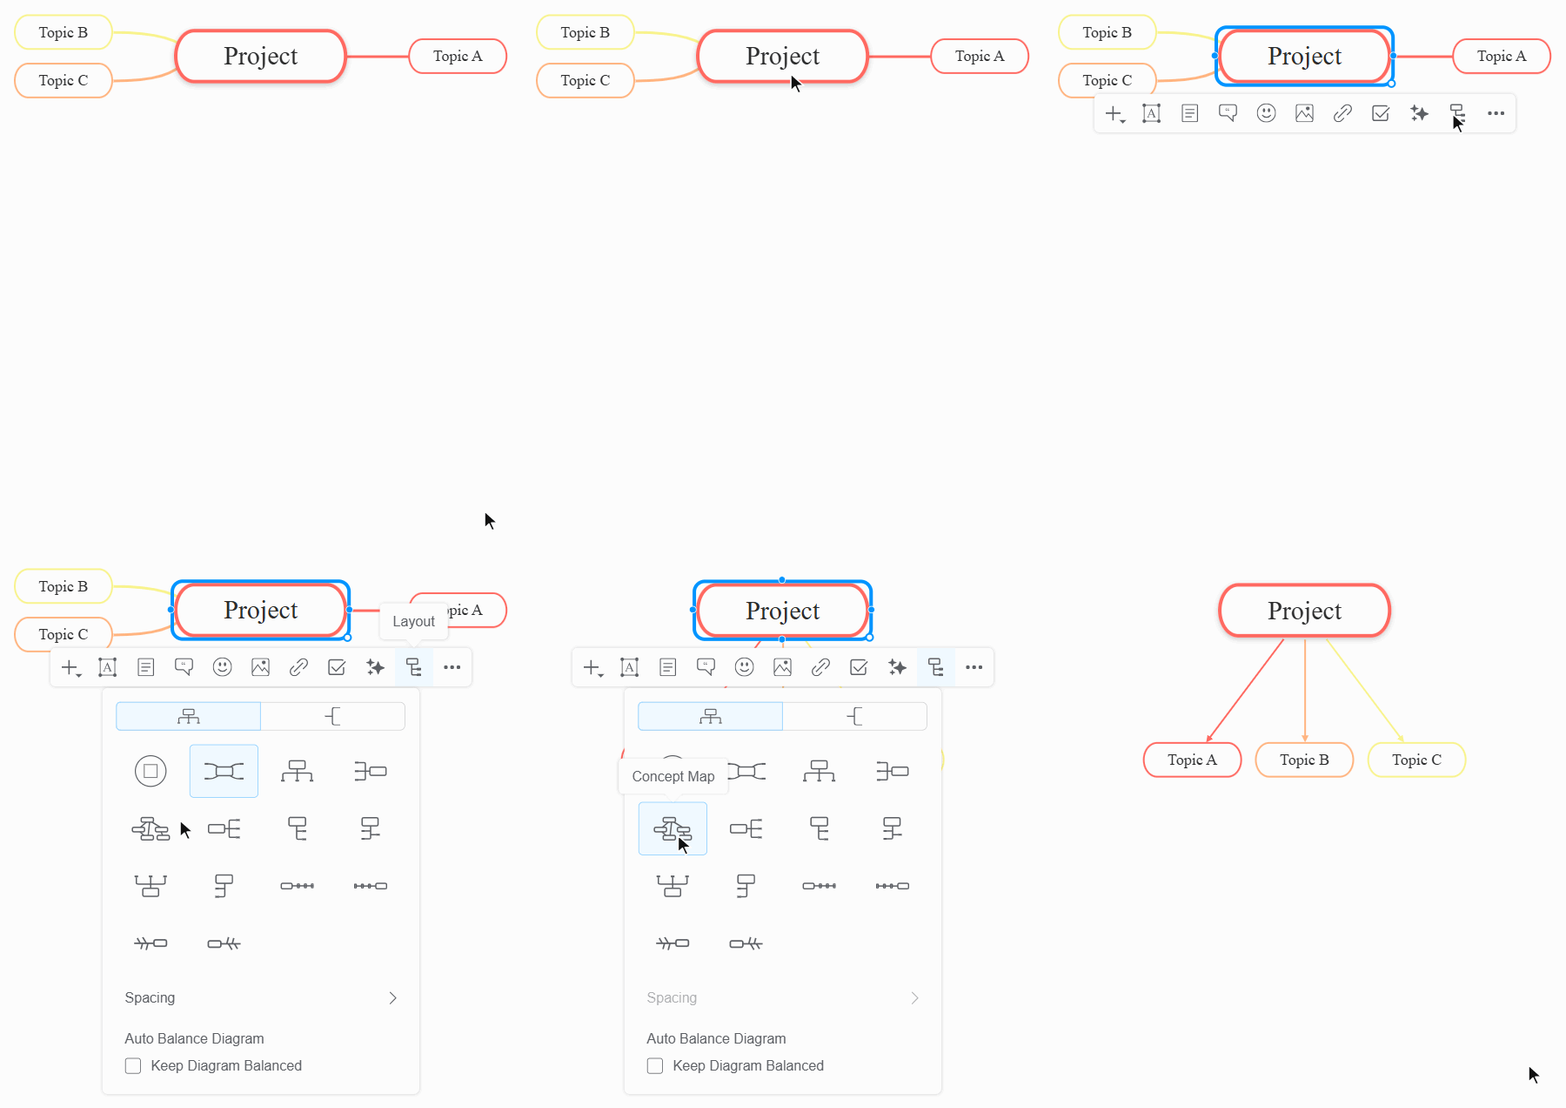
The subtopics are rearranged below the central topic and joined to it by arrows. From then on, you can label the connecting lines and move the topics freely, as described below.
Build your concept map
Section titled “Build your concept map”Add topics
Section titled “Add topics”Add the main concepts related to your central idea, then expand them with more specific topics.
- Press TAB to add a subtopic, or ENTER to add a topic at the same level. In a concept map, a new subtopic appears below its parent, connected to it by an arrow.
- You can also click the Insert (+) button on the topic toolbar and choose Insert subtopic.
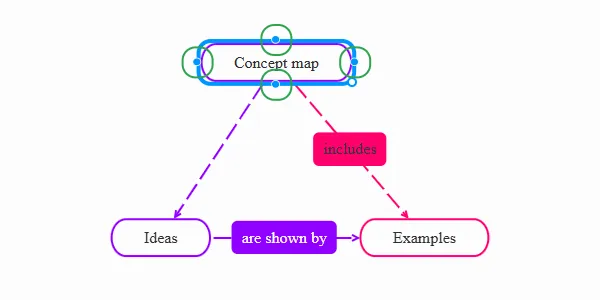
- When you select a topic, four Insert subtopic bullets appear around it. Click a bullet to add a subtopic on that side, or drag it to an empty spot on the canvas to place the new subtopic there.
Connect topics
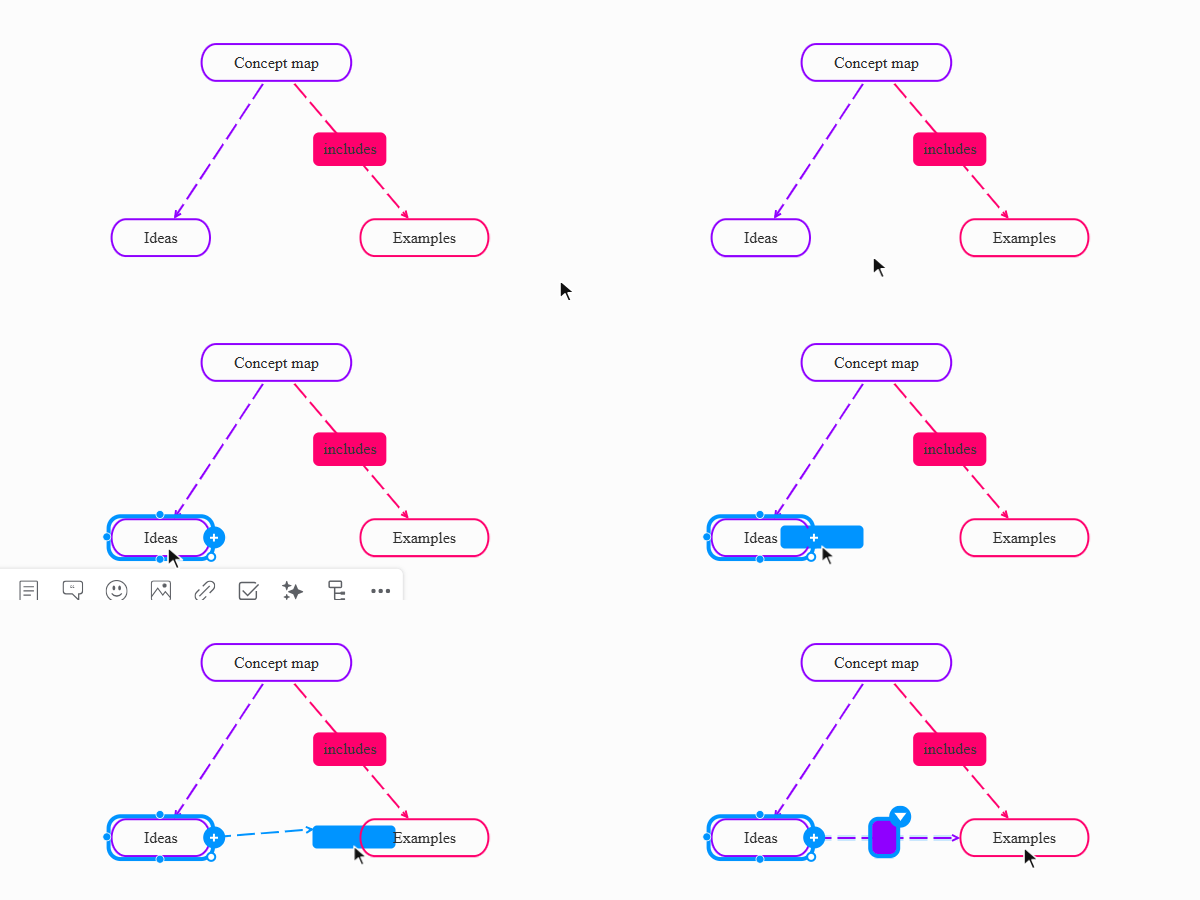
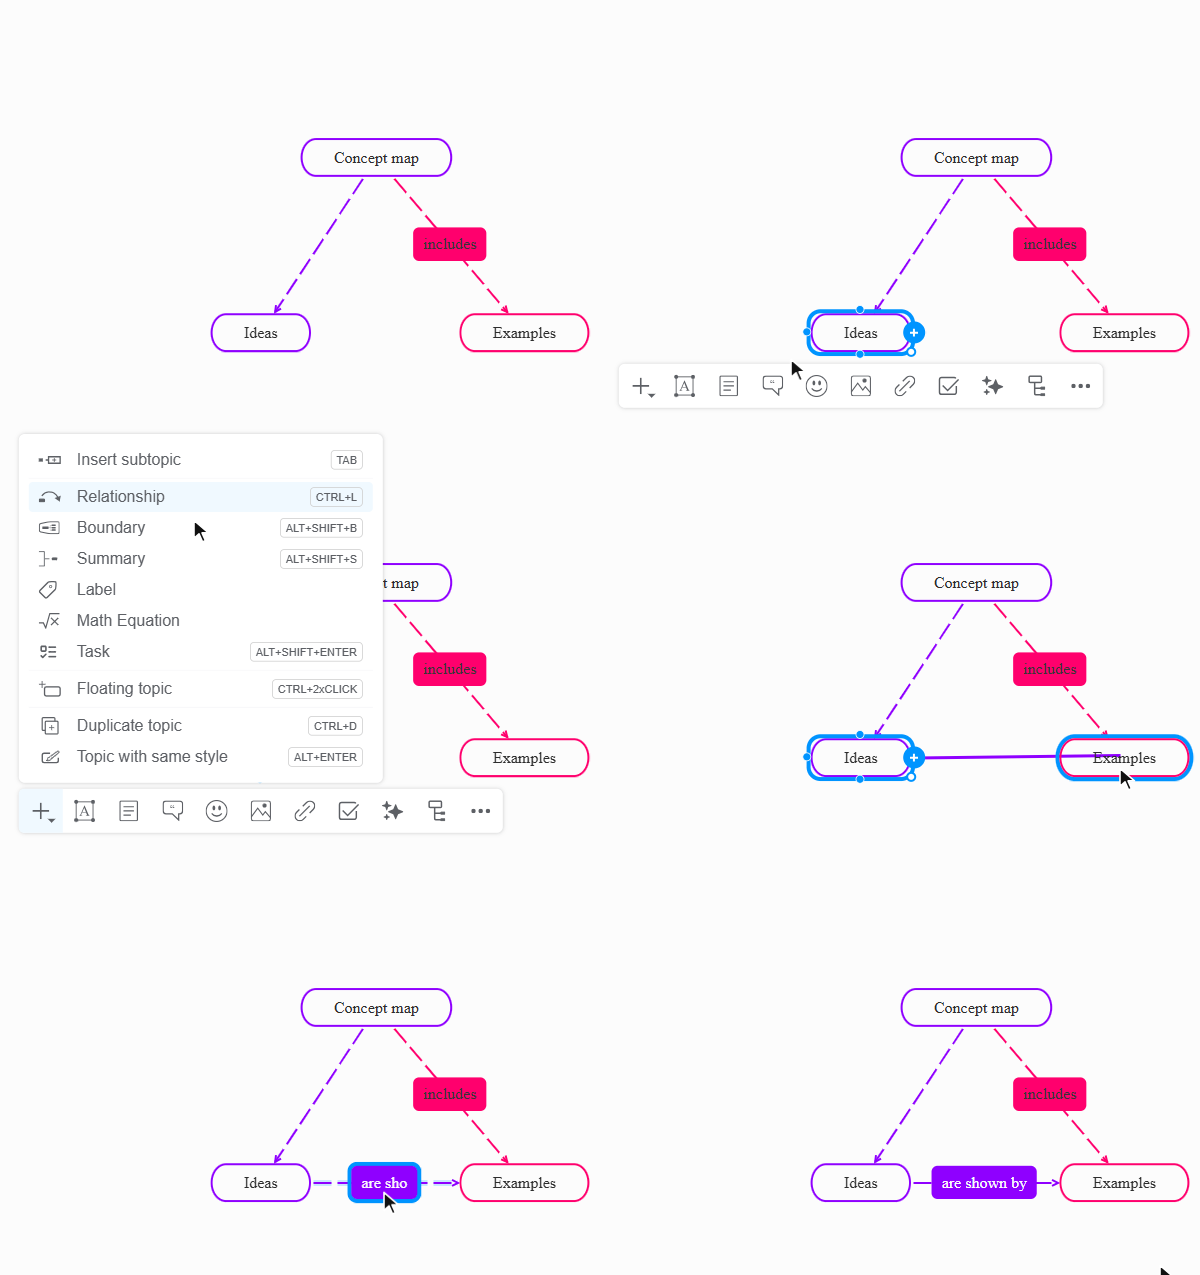
Section titled “Connect topics”Create a relationship to connect two topics that are not already linked:
- Click a topic to display the four bullets
- Drag one of the bullets onto the topic you want to connect
- Drop the bullet to create the relationship
- Alternatively, click the Insert (+) button and select Relationship from the menu, or press CTRL+L
Describe relationships with labels
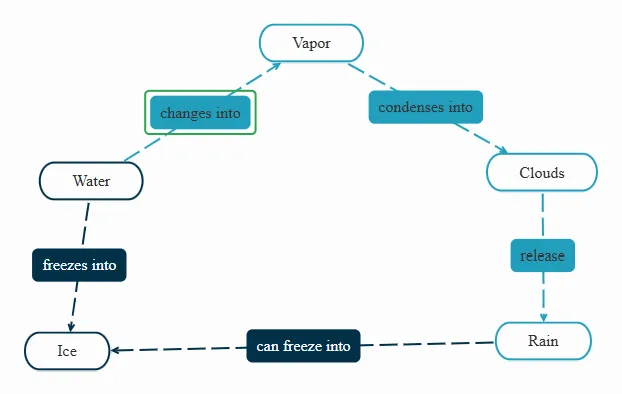
Section titled “Describe relationships with labels”A label says how two topics are related. Any connecting line can have one, whether it joins a topic to its subtopic or is a relationship. Aim for a short phrase that makes the two topics read as a meaningful statement, for example:
- Water changes into vapor
- Exercise improves cardiovascular health
- Deforestation contributes to habitat loss
To add a label:
- Click the line.
- Click the grey label box that appears and type the label.
- Press ENTER.
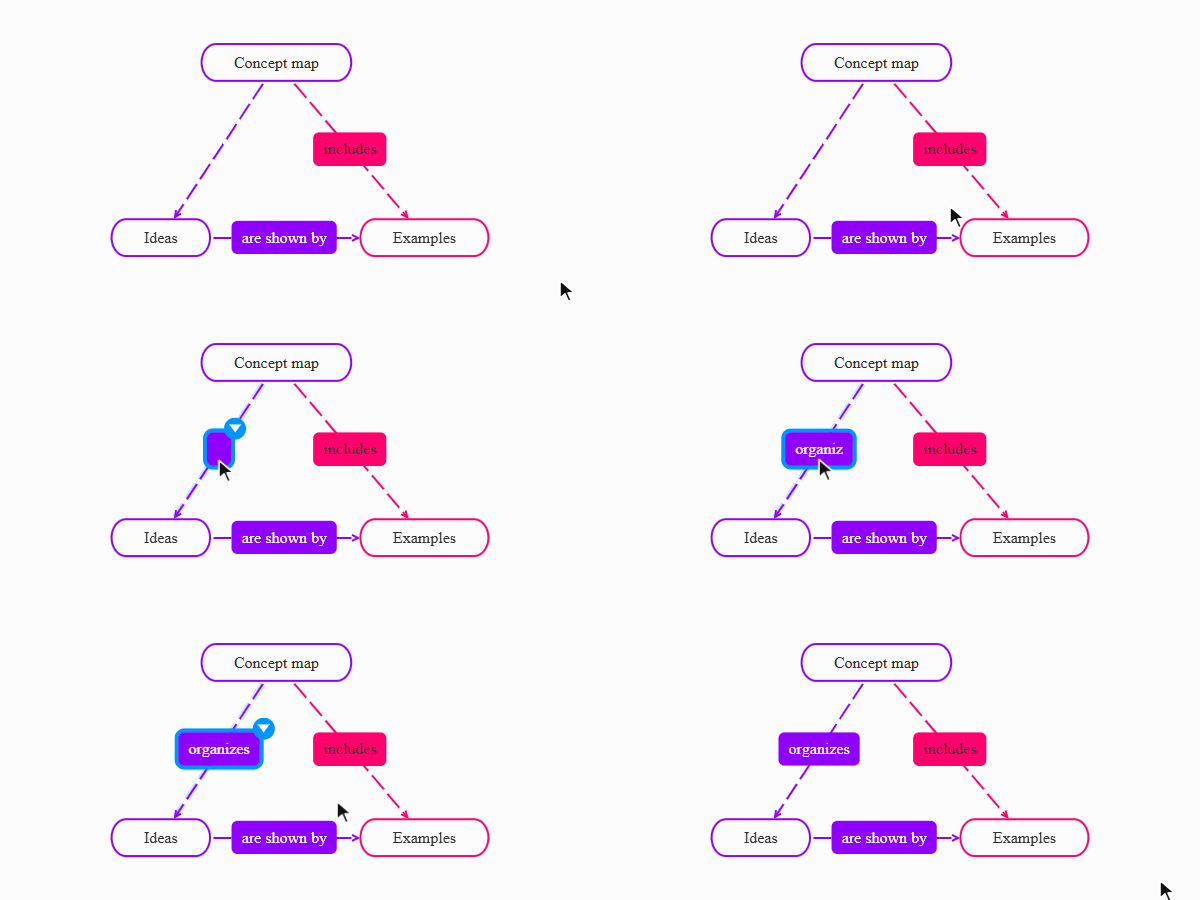
When you add a relationship from the Insert (+) menu, its label box is already selected once you click the second topic. Click the box, type the label, and press ENTER.
Move topics freely
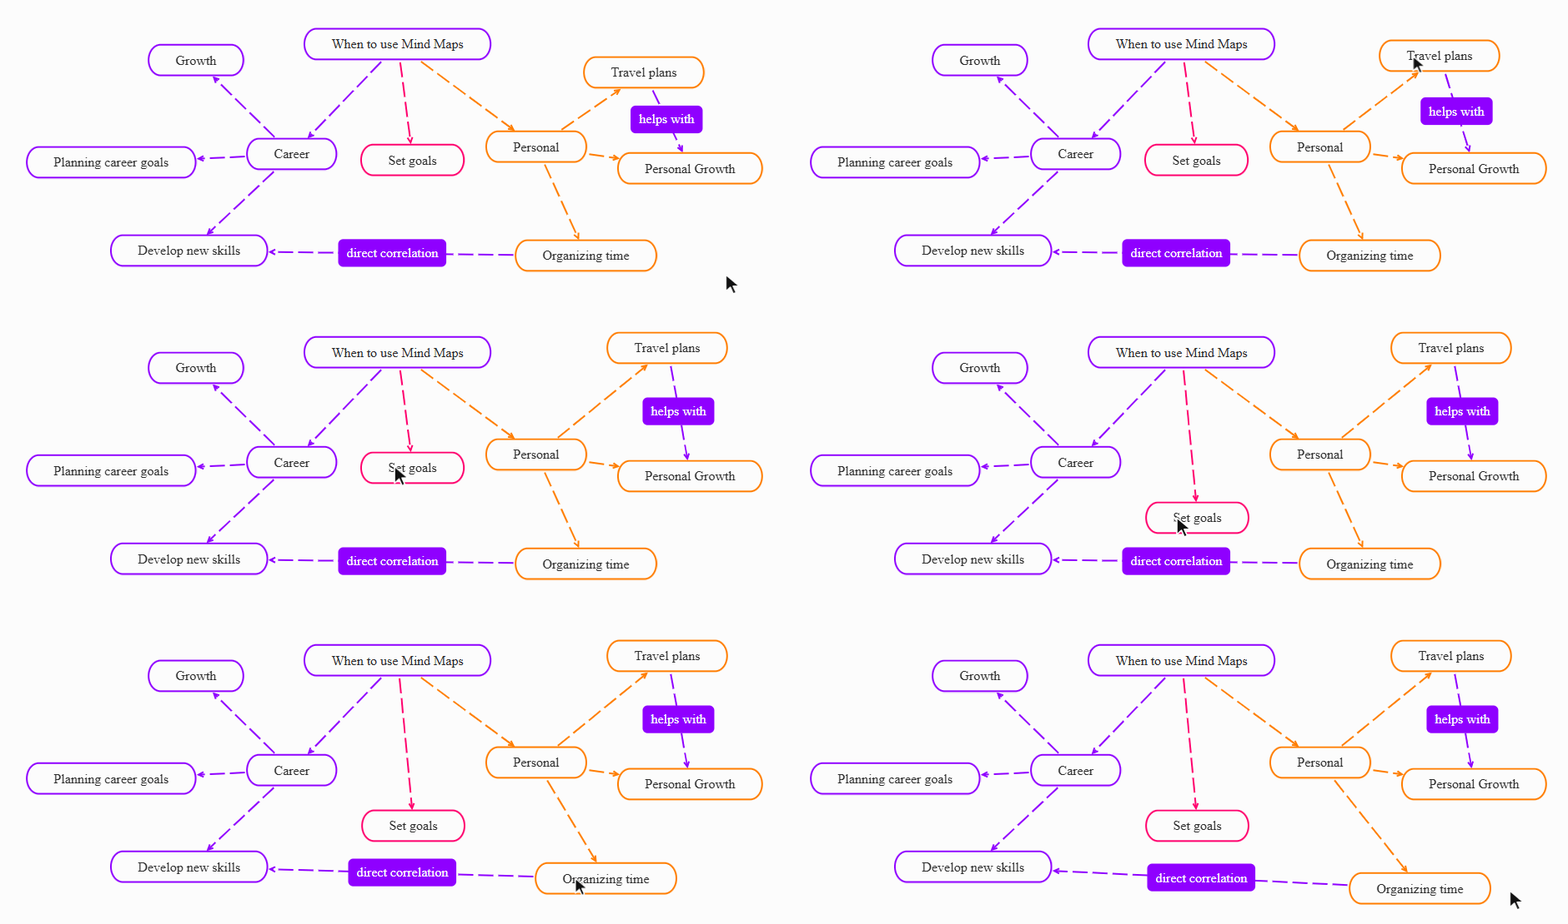
Section titled “Move topics freely”Drag topics anywhere on the canvas to reorganize your concept map. Relationships stay connected as you move the topics, so you can arrange ideas in the way that best represents their connections.
Customize lines and labels
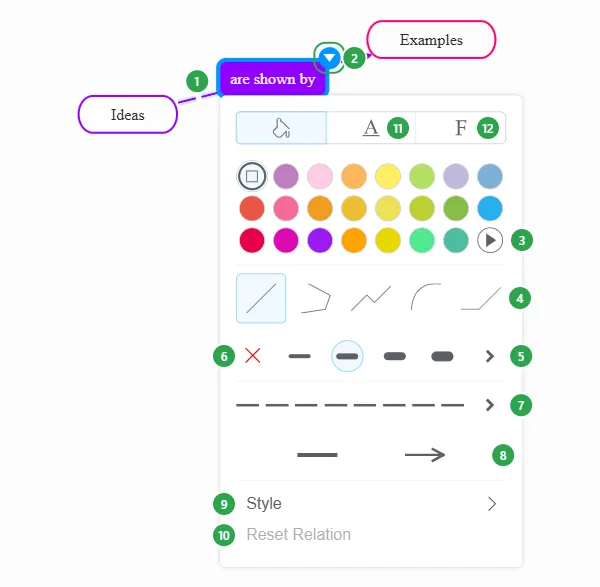
Section titled “Customize lines and labels”Relationships and the lines between a topic and its subtopics are customized from the same panel. Select the relationship or line (1), then click the round button on its label (2) to open the panel.
Line appearance
Section titled “Line appearance”- Color (3) - use the arrow at the end of the last row for more colors.
- Shape (4) - Straight Line, Arc, Zigzag, Angle, or Single Angle.
- Weight (5)
- Remove (6) - delete the relationship.
- Pattern (7)
Direction and endpoints
Section titled “Direction and endpoints”- Left Ending and Right Ending (8) - set how each end of the line looks, for example with or without an arrow.
Style management
Section titled “Style management”- Copy and Paste style (9) - from the Style menu, copy the style of one line and apply it to another.
- Set as default (9) - also in the Style menu.
- Reset Relation (10) - reset the relationship to its default values. For a line between a topic and its subtopic, this option is called Reset Connection.
Label style
Section titled “Label style”- Label Style (11) - set the label’s color, bold, italic, underline, strikethrough, alignment, and size.
- Label Font (12) - search for and choose the label’s font.
- Edit Label or Delete Label - available on both tabs, to change or remove the label.
Switch to another layout
Section titled “Switch to another layout”- Select the central topic.
- Click Layout (1) on the topic toolbar. A list of predefined layouts appears. The Concept Map layout (2) is selected.
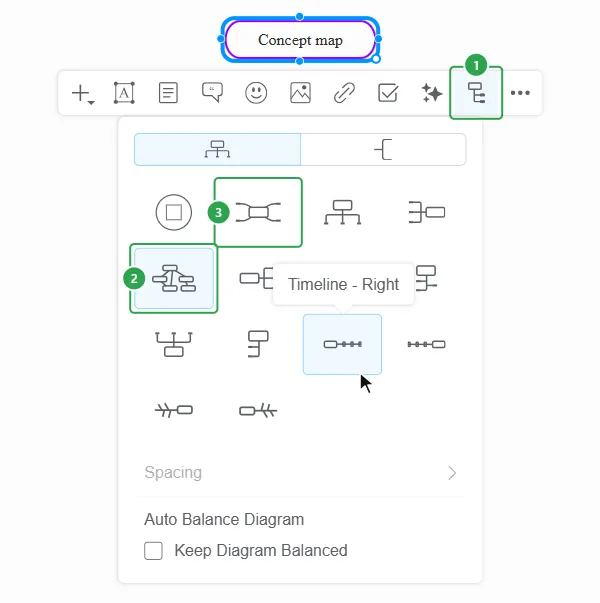
- Choose another layout, for example Mind Map (3), Org Chart, Logic Chart, Tree Chart, Timeline, or Fishbone. Hover over a layout to see its name.
- The topics are rearranged automatically to fit the new layout, and the labels on the connecting lines are no longer shown.
View as an outline or as a Gantt chart
Section titled “View as an outline or as a Gantt chart”Instead of changing the layout, you can open the same concept map in another view. The map itself doesn’t change, so you can come back to it at any time.
- Click the More button (1) next to the map’s name, at the top left.
- Choose View as Outline or View as Gantt (2).
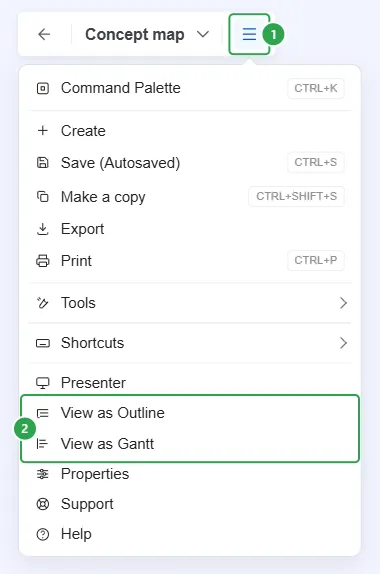
- View as Outline shows the topics as an indented list under the central topic. Labels and relationships aren’t shown in this view.
- View as Gantt shows the topics as tasks on a Gantt chart, where you can give them start and end dates.
To return to the concept map, click the same More button (1) and choose View as Mind Map (2). The concept map opens as you left it, with its labels and topic positions.